How to Organize Under the Kitchen Sink in 30 Minutes
The cabinet under the kitchen sink is the most ignored storage in the house. It is dark, deep, and built around a drainpipe and a garbage disposal, so it quietly fills with half-empty cleaners, stiff old sponges, and a tangle of plastic bags.
The good news: it is small and contained, so you can sort it out in about thirty minutes. The trick isn’t buying organizers first. It’s emptying the cabinet, tossing what’s dead, then using the vertical space around the pipe.
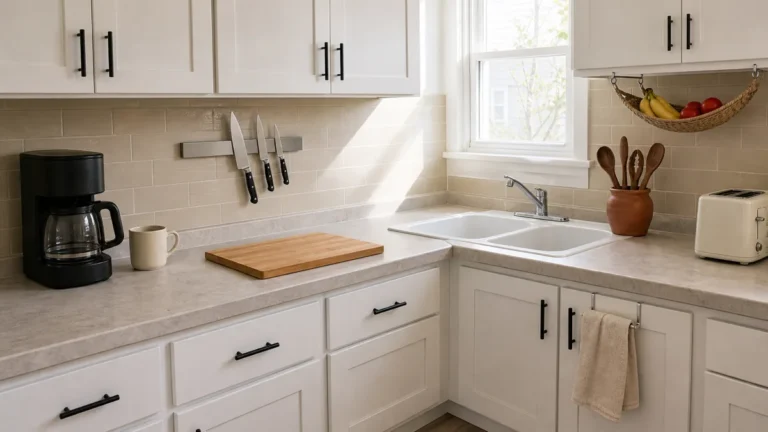
Here is the thirty-minute plan: three free steps, then a riser, a tension rod, and a pull-out bin where you need them. This is the cabinet under your kitchen counter, so do it after the surface above. Set a timer.
The fix for the cabinet under the kitchen sink is not more organizers — it is emptying it, tossing what is dead, and using the vertical space around the drainpipe. Work the steps in order, or jump to the one you need.
Empty the Cabinet, Wipe It Down, and Start the Clock

You cannot plan around a pipe you can’t see. Pull everything out so you can read the real shape of the space, including how much room the P-trap and garbage disposal actually steal. The floor of this cabinet is almost always sticky with old detergent drips, so a wipe-down now is the one cleaning step that pays off all month.
- Take every bottle, sponge, and bag out and line it up on the counter.
- Wipe the cabinet floor and walls with a damp cloth; let it dry while you sort.
- Note the clearance around the P-trap and the disposal so you buy the right-size riser later.
- Toss any old shelf liner or cardboard that’s gone soft with moisture.
- Set a thirty-minute timer so this stays a quick reset, not an all-day project.
Pull Out and Toss the Dried-Up, Expired, and Duplicate Supplies
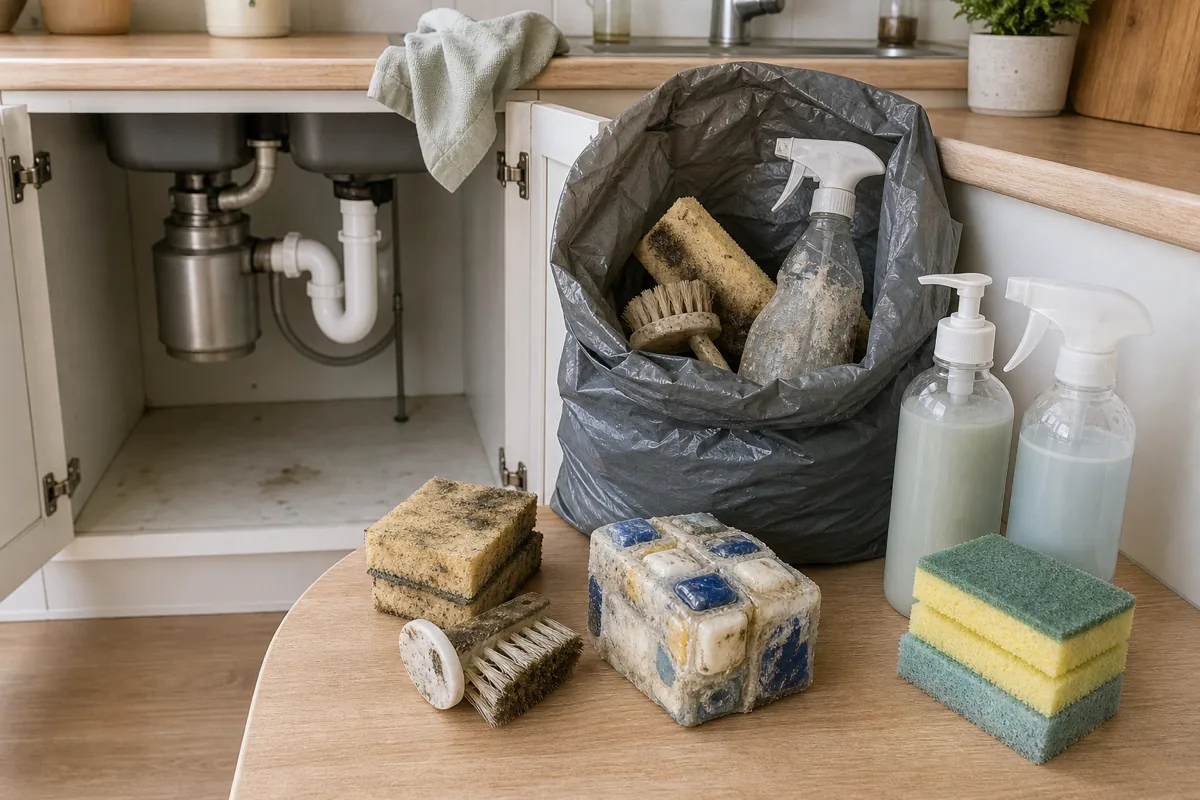
The under-sink cabinet is where cleaning supplies go to die. Most of the volume is usually three half-empty all-purpose sprays, a brick of fused dishwasher pods, and sponges that have gone hard. Throwing things out first means you size the storage for what you keep, not for the graveyard.
- Combine half-empty bottles of the same cleaner into one.
- Throw out stiff, smelly sponges and any scrub brush that’s worn flat.
- Check the dates on dishwasher pods and specialty cleaners and toss what’s expired.
- Drop broken spray triggers and crusted caps in the trash.
- Set aside freebies and single-use gadgets you’ll never reach for.
You do not have to do all eight steps at once. The first three are free and just take elbow grease; the rest add organizers only where you need them. The four situations below cover the most common under-sink messes.
Sort What’s Left Into Four Kitchen Zones
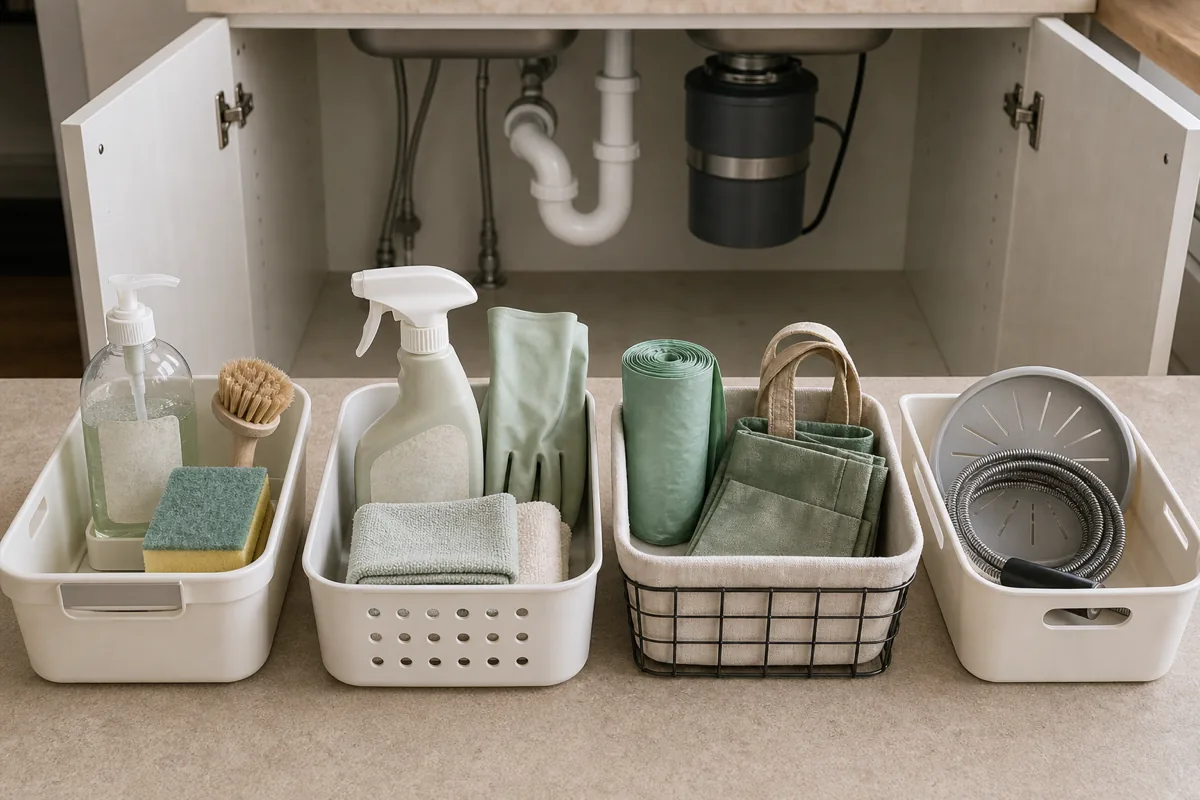
A kitchen under-sink has four jobs, and naming them tells you how many containers you actually need. Group what survived the purge into dishwashing, surface-cleaning, trash and recycling supplies, and occasional extras. Once it’s in four piles, the right bins and risers become obvious instead of guesswork.
- Dishwashing: dish soap, sponges, dish brush, drain strainer.
- Surface-cleaning: all-purpose spray, glass cleaner, microfiber cloths, gloves.
- Trash and recycling: trash bag roll, recycling and reusable shopping bags.
- Occasional: drain snake, extra disposal splash guard, spare scrubbers.
- Give each zone one container so it stays grouped when you put it back.
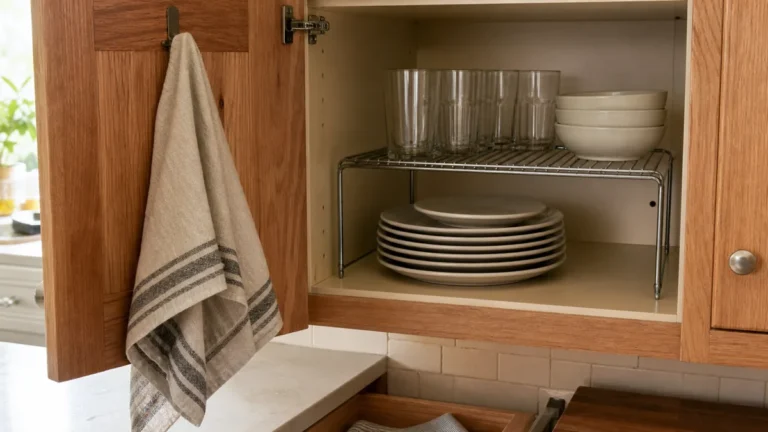
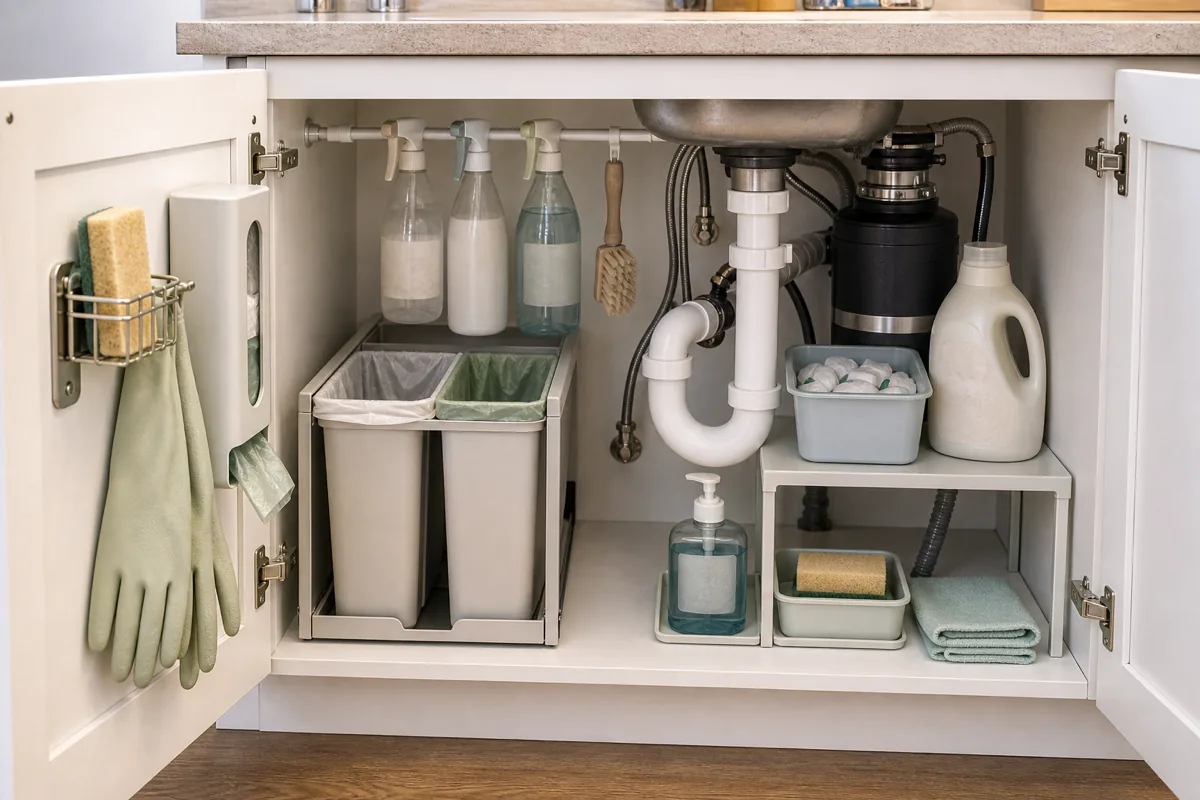
Set a U-Shaped Riser Over the Pipe for a Second Level
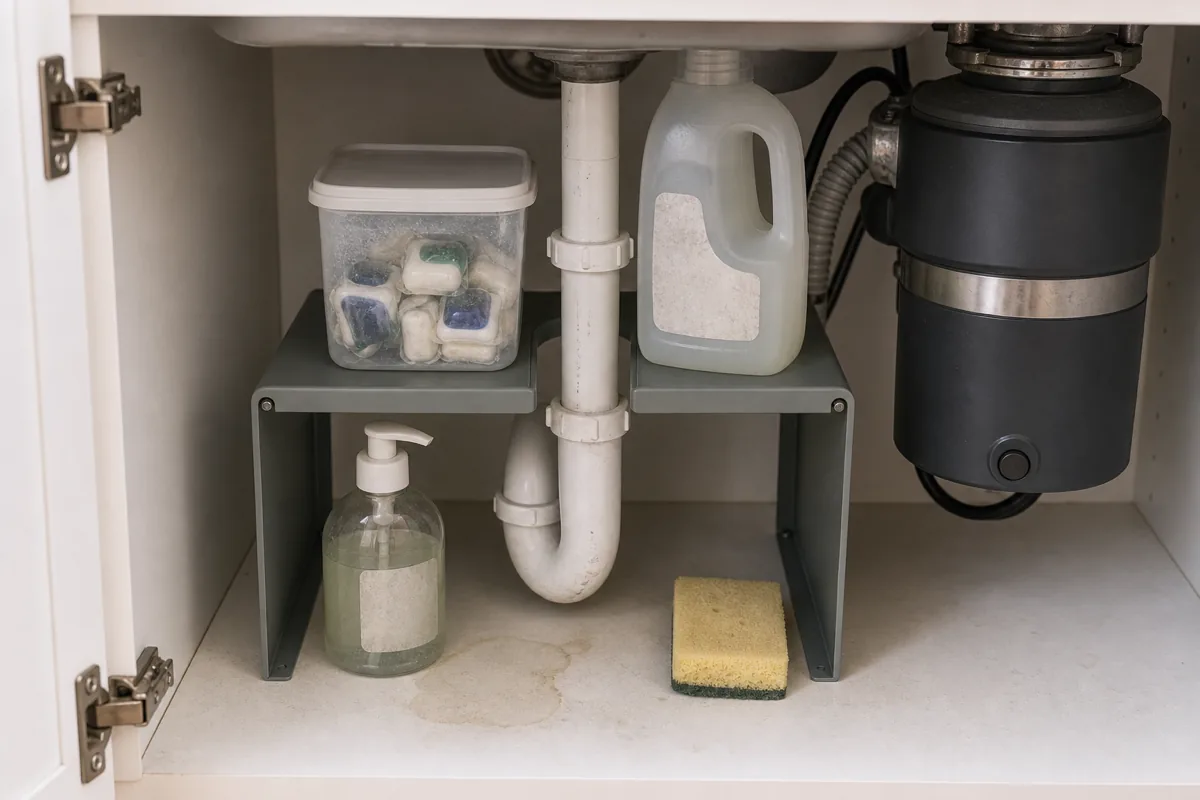
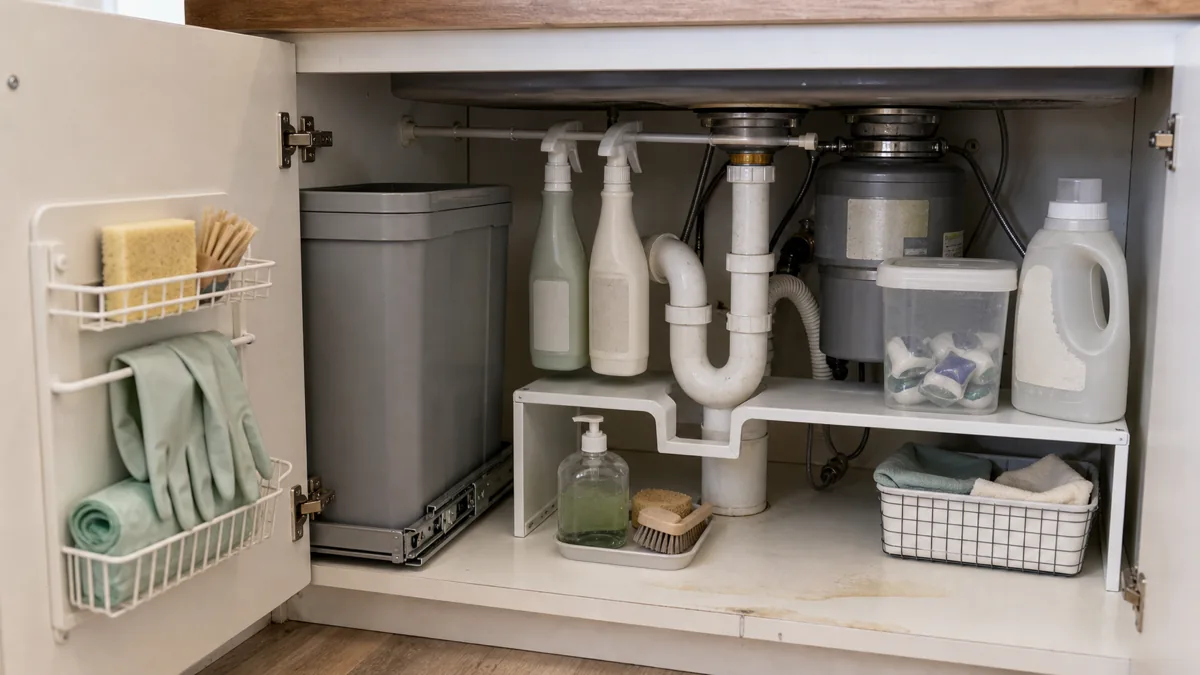
The drainpipe sits dead center and wastes the air above it. A riser with a U-shaped cutout straddles the pipe and gives you a second shelf right where the cabinet was emptiest. The same riser trick works under a bathroom sink, but here you’re stacking dishwasher pods and dish soap, not toiletries.
- Measure the P-trap height before buying so the cutout clears the pipe.
- Put backstock — pods, refill detergent — on the upper tier.
- Keep daily dish soap and the brush on the lower level.
- Choose a coated metal or plastic riser that shrugs off moisture.
- Leave the disposal reset button reachable; don’t box it in.
Organizing under the kitchen sink is mostly about editing and using vertical space, not buying bins. These four rules keep the work fast and keep the cabinet from filling back up.
Hang a Tension Rod for Spray Bottles and a Wet Dish Brush
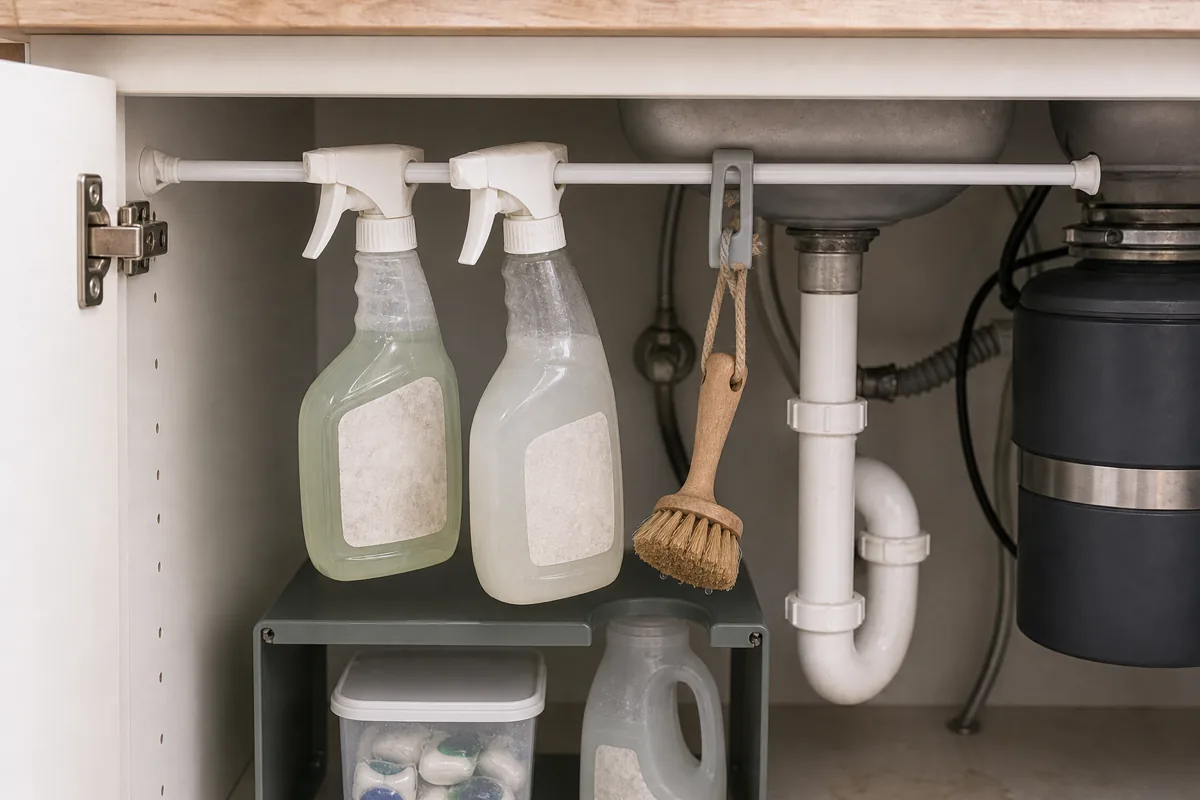
Spray bottles laid on their side leak and eat floor space. A spring tension rod mounted across the cabinet lets them hang head-down by the trigger, and it doubles as a drip bar for a wet dish brush so it dries instead of souring in a drawer.
- Wedge a spring-loaded tension rod across the upper cabinet.
- Hang spray bottles head-down by their triggers.
- Clip or hook a damp dish brush to drip-dry over the cabinet floor.
- Keep the rod clear of the disposal and the pipe.
- Tug-test the rod with a full bottle before you trust it.
Slide In a Pull-Out Bin for Trash and Recycling
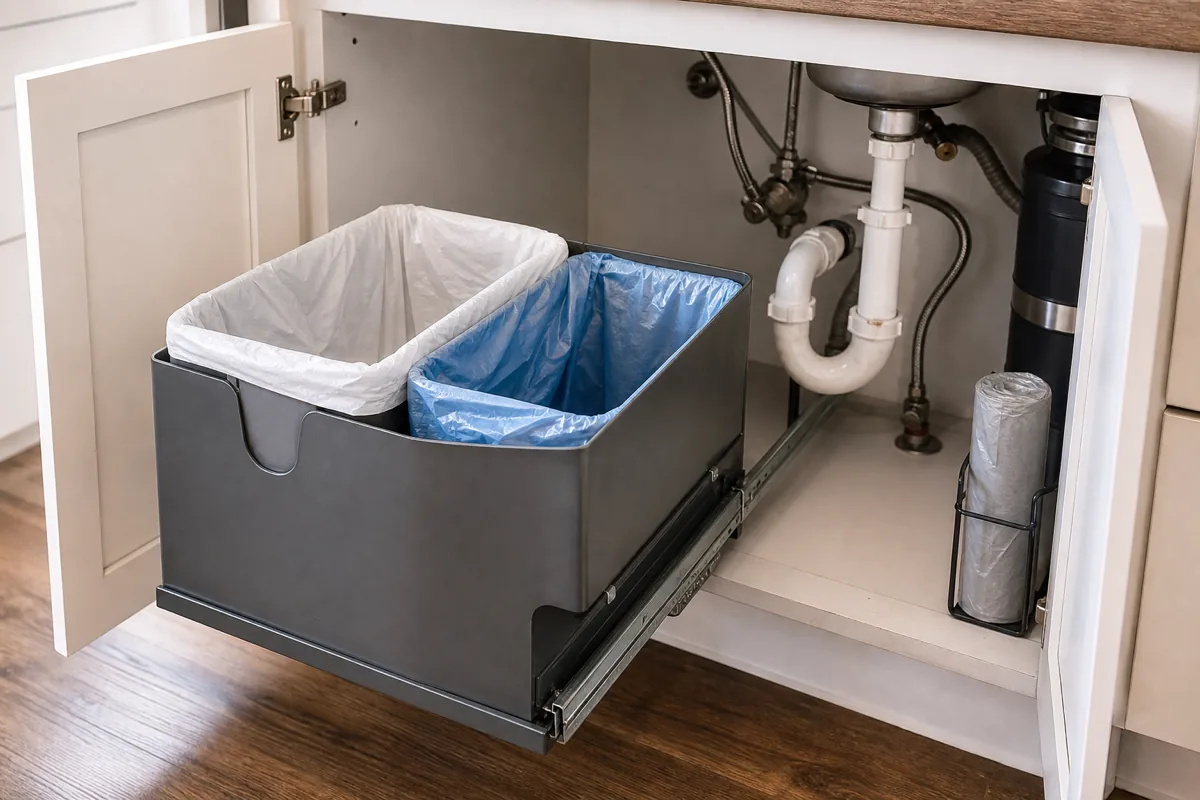
This is the move a bathroom cabinet never needs: under the kitchen sink is the best hidden home for the trash and recycling. A slide-out bin pulls the can off the floor, hides it from the room, and a two-compartment version splits recycling without a second bin cluttering the kitchen.
- Measure the interior width and the pipe clearance before buying.
- Pick a single bin for trash, or a two-compartment unit to split recycling.
- Mount the slide so the bin clears the P-trap as it pulls forward.
- Add a door-mounted version that swings open with the cabinet if floor space is tight.
- Drop a washable liner underneath to catch drips.
The 30-Minute Under-the-Kitchen-Sink Plan
- 1Empty it and start the clockPull everything out, wipe the sticky cabinet floor, and note the clearance around the pipe and disposal. Set a 30-minute timer. Do this right after you clear the kitchen counter above.
- 2Toss the dead and expired suppliesCombine duplicate sprays, throw out stiff sponges and worn brushes, check the dates on pods and cleaners, and bin broken triggers. Editing first frees up about half the space.
- 3Sort what’s left into four zonesGroup it into dishwashing, surface-cleaning, trash and recycling, and occasional. One container per zone tells you exactly what storage you need.
- 4A riser over the pipeA U-cutout riser straddles the drainpipe for a second shelf: backstock up top, daily dish soap below. The same trick works under a bathroom sink with toiletries instead.
- 5A tension rod for spray bottlesWedge a spring rod across the cabinet and hang spray bottles head-down by the trigger; clip a wet dish brush to drip-dry. It uses the empty air and stops bottles leaking on their sides.
- 6A pull-out bin for trash and recyclingA slide-out two-compartment bin hides the trash and splits recycling, clearing the floor. This is the move a bathroom cabinet never needs.
- 7Work the cabinet doorMount a caddy inside the door for a drip-drying sponge, rubber gloves on a hook, and a dispenser for the plastic-bag pile.
- 8Keep it reset and leak-freeFive minutes a week: dry the damp sponge, feel the pipe joints for moisture, top up soap, empty the recycling. It’s the same habit that keeps your kitchen cabinets in order.
styledhomenotes.com
Work the Cabinet Door for Sponges, Gloves, and Bags
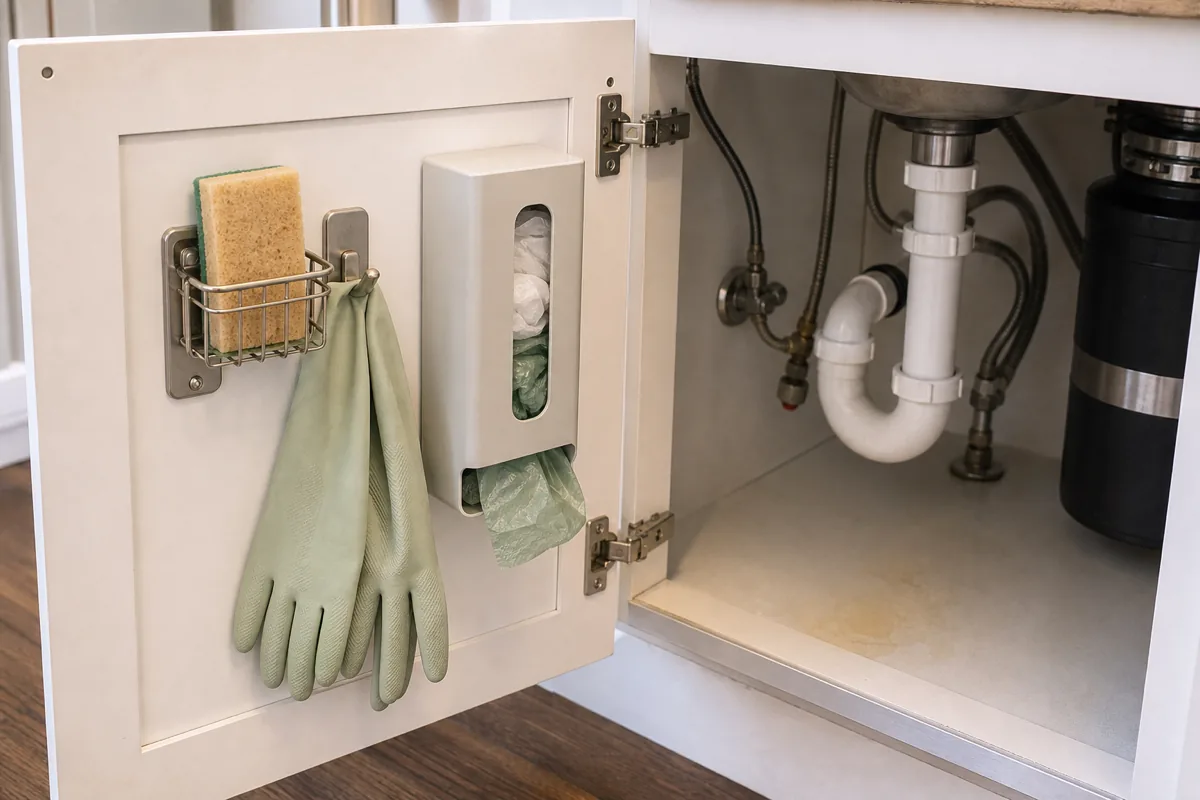
The inside of the door is free vertical real estate most people ignore. In a kitchen it earns its keep holding the wet, the bulky, and the loose: a sponge that needs to drip, rubber gloves, and the plastic-bag avalanche that always builds up under here.
- Hang an over-the-door or adhesive caddy on the inside panel.
- Stand a sponge in a small drip basket so it dries between uses.
- Loop dish gloves over a hook to air out.
- Add a bag dispenser to tame loose plastic and reusable bags.
- Clip the trash-bag roll where you can tear one off one-handed.
Reset It in Five Minutes a Week to Stay Ahead of Leaks
The kitchen under-sink works harder than any other cabinet and sees the most water, so a slow drip can rot your new setup before you notice. A quick weekly pass keeps it tidy and turns you into an early-warning system for leaks. It’s the same five-minute habit that keeps the rest of your kitchen cabinets in order.
- Pull out any damp sponge or cloth and let it dry fully.
- Run a hand along the P-trap and supply lines to feel for moisture.
- Top up dish soap and empty the recycling before it overflows.
- Wipe any new drips so a leak can’t hide behind clutter.
- Deep-clean and re-line the cabinet floor once a quarter.
Eight steps, one cabinet, about thirty minutes. That is the whole method: empty it, toss what’s dead, zone what’s left, and use the air around the pipe with a riser, a rod, and a pull-out bin.
The reason this one sticks is that the under-sink cabinet stops being a black hole. When every bottle has a place and the pipe stays clear, you can catch a leak the day it starts instead of the day it ruins the shelf.