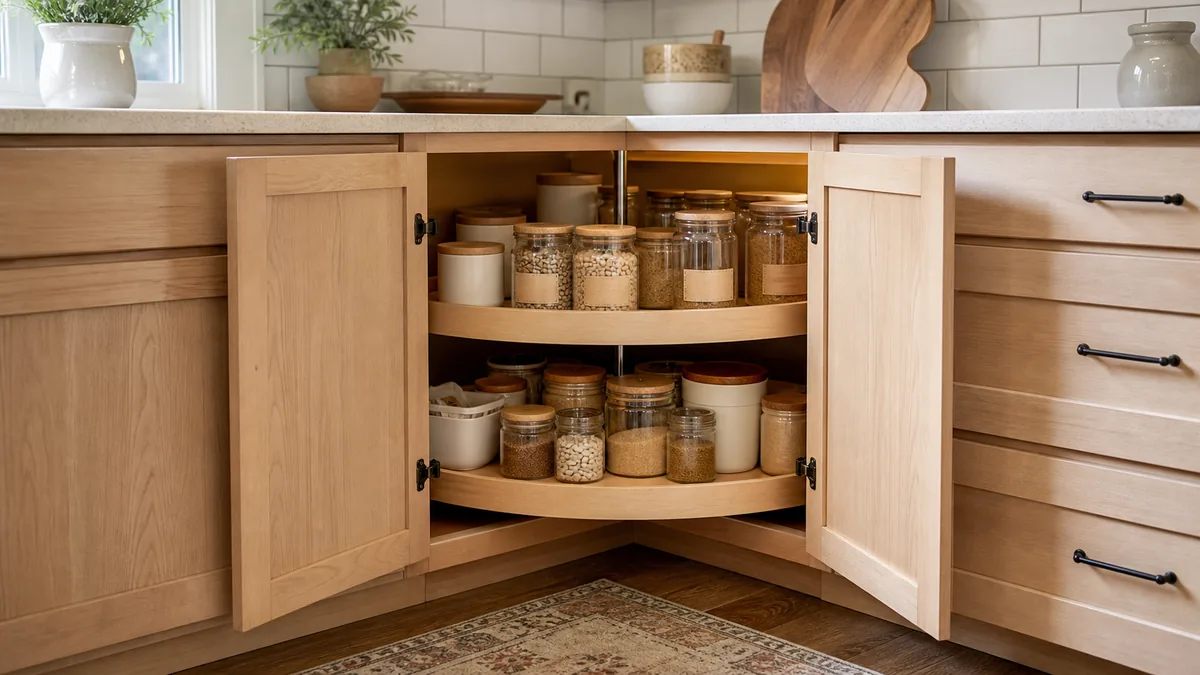
12 Corner Kitchen Cabinet Organization Ideas That Actually Use the Dead Space
The corner base cabinet is the deepest, darkest storage in most kitchens — the one shelf nobody actually reaches into. The fix isn’t a bin or a label.
It’s hardware that changes how the corner physically works: a turntable, a swing-out frame, a diagonal drawer, or a shelf that removes the door. These 12 ideas are all structural, not cosmetic.
Most retrofit into an existing cabinet box; a few assume a remodel. Need the broader system first? Start with this full kitchen cabinet organization guide — this picks up where general sorting stops working.
Each of these is a specific piece of hardware, not a bin or a label. Find the one that matches your corner’s actual shape and start there.
- 1A Full-Circle Lazy Susan for Deep Two-Door Corner Cabinets
- 2A Half-Moon Lazy Susan for Awkward Single-Door Corners
- 3A Blind Corner Pull-Out Swing System That Drags Everything Into the Light
- 4Diagonal Corner Drawers That Replace the Blind Cabinet Entirely
- 5A Two-Tier Pull-Out Caddy for Small Appliances You Rarely Reach
- 6A Vertical Divider Wedged Into the Deep Corner for Trays and Boards
- 7Stackable Wire Baskets That Use Every Inch of Corner Height
- 8Open Floating Shelves for Upper Corner Cabinets Instead of Doors
- 9Bi-Fold Doors That Open the Entire Corner at Once
- 10A Motion-Sensor Puck Light Inside the Cabinet So Nothing Hides in the Dark
- 11A Zone-and-Label System That Keeps the Corner From Becoming a Junk Drawer
- 12A Corner Swap-Out Kit for Kitchens Mid-Remodel That Aren’t Replacing Cabinets
A Full-Circle Lazy Susan for Deep Two-Door Corner Cabinets
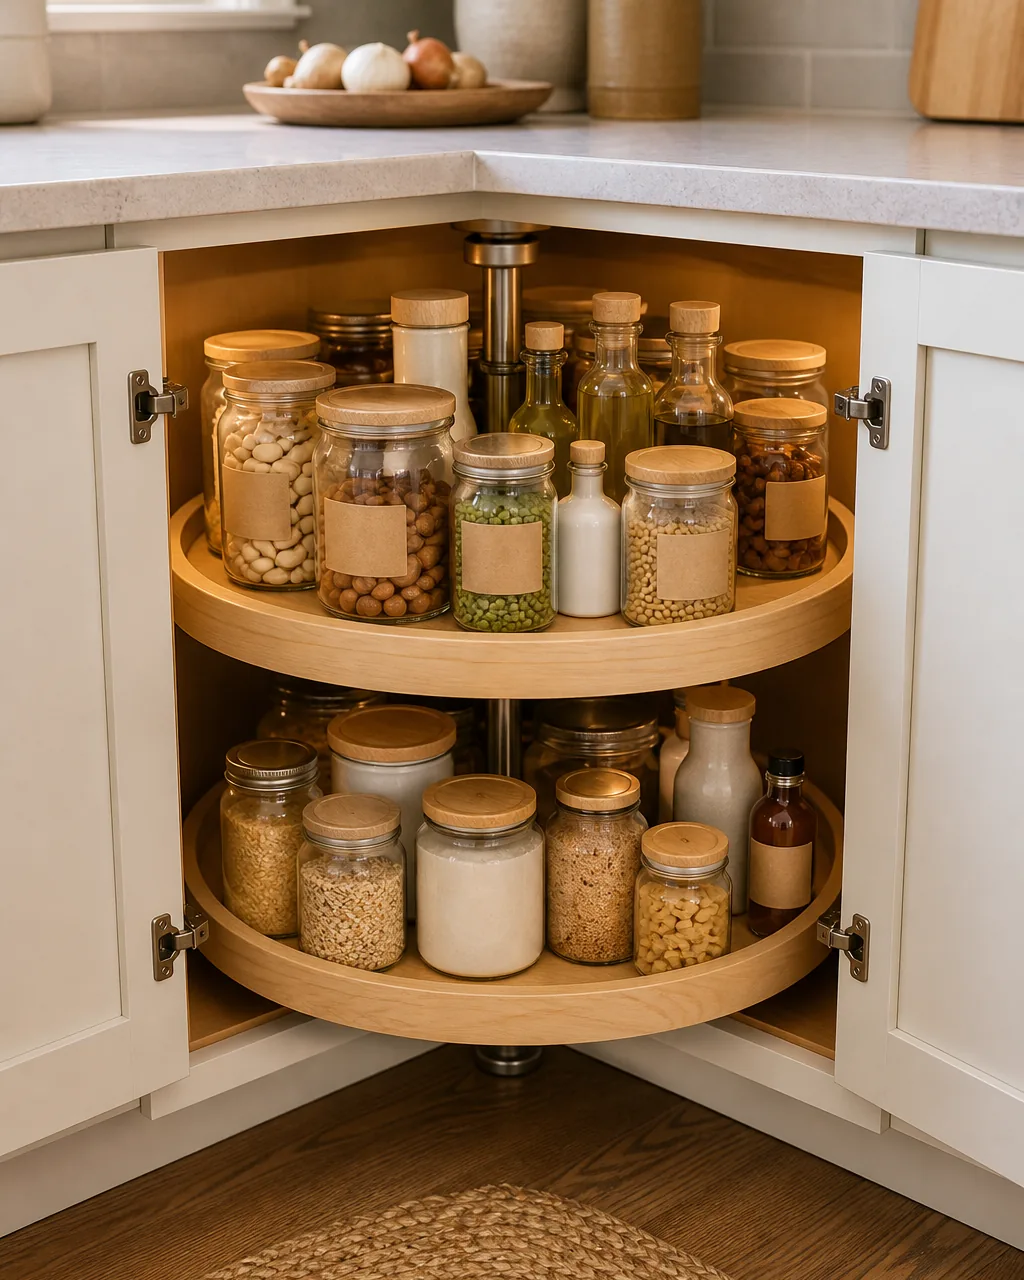
A full circle only makes sense in a corner deep enough to hold one — two-door cabinets with roughly equal depth on both sides. The turntable spins the entire load into view, so nothing at the back gets forgotten behind whatever’s near the door.
- Measure the full cabinet depth on both walls before ordering — a true full-circle needs close to equal depth on each side to spin freely without catching a corner
- Load heavier jars and bottles near the outer edge so the turntable spins evenly instead of tipping
- Leave a finger’s width of gap between items so nothing jams the rotation mid-spin
- Choose a two-tier turntable over a single deep one — it doubles storage without doubling reach depth
- Wipe the turntable surface monthly; spills under jars are invisible until the whole thing sticks
A Half-Moon Lazy Susan for Awkward Single-Door Corners
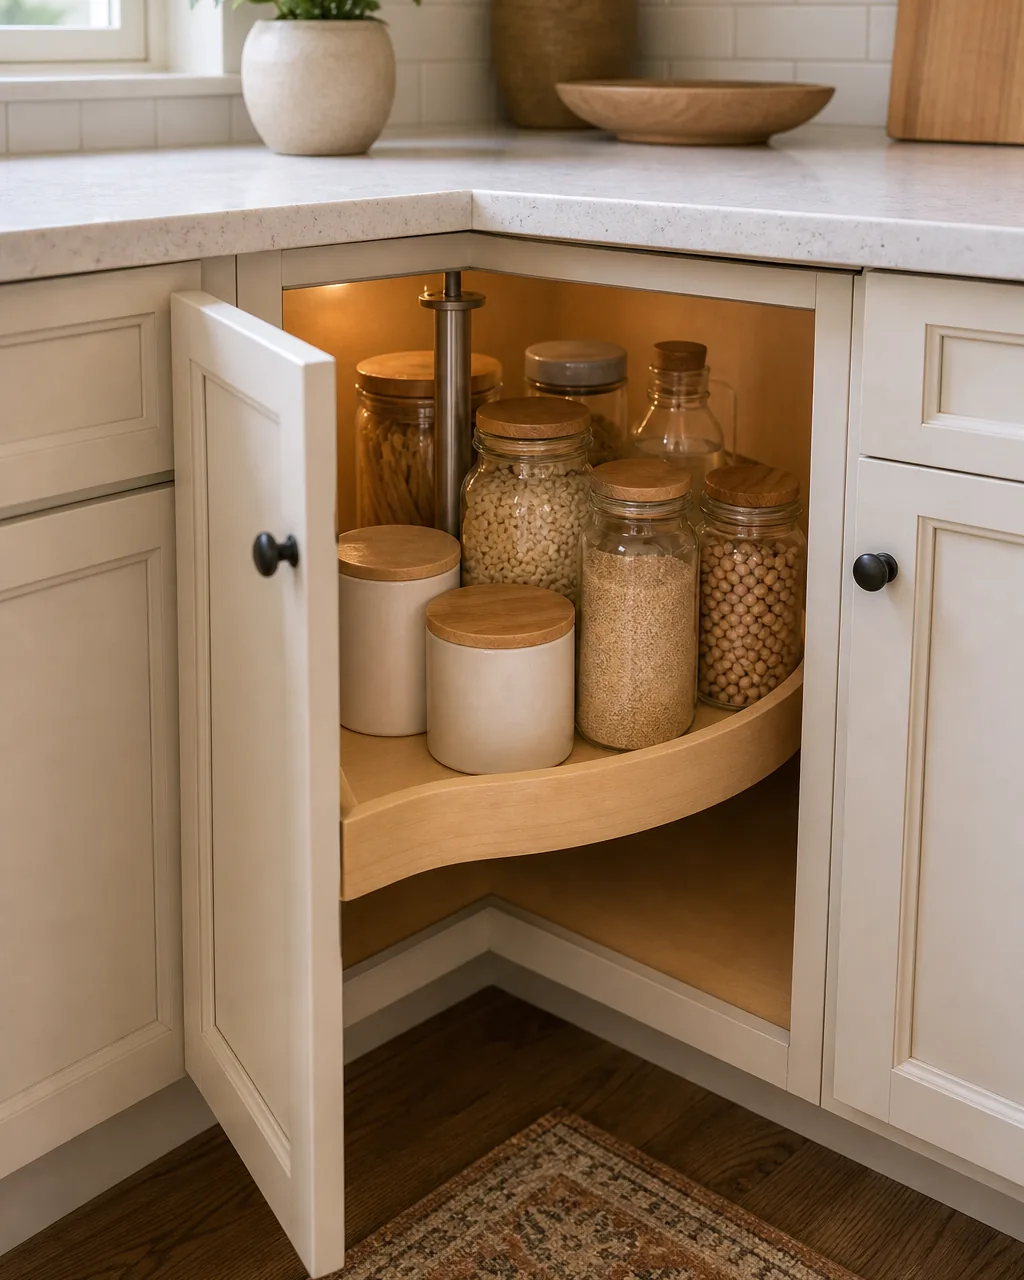
Single-door corners can’t fit a full circle — the door frame cuts off half the swing radius. A half-moon shelf is shaped to clear that frame, so the curved edge tucks past the door instead of jamming against it.
- Confirm door swing clearance first: a half-moon that’s cut too wide will still catch the frame on the return spin
- Keep the flat edge of the half-moon facing the door opening, not the back wall, so loading and unloading stays in reach
- Stick to lightweight items on a half-moon — it has less surface area than a full circle and less structural support
- Group by category on each half-turn (baking on one side, oils on the other) so a single spin gets you to the right zone
- Replace worn bearings before the shelf starts sagging, not after — a tilted half-moon spills
A Blind Corner Pull-Out Swing System That Drags Everything Into the Light
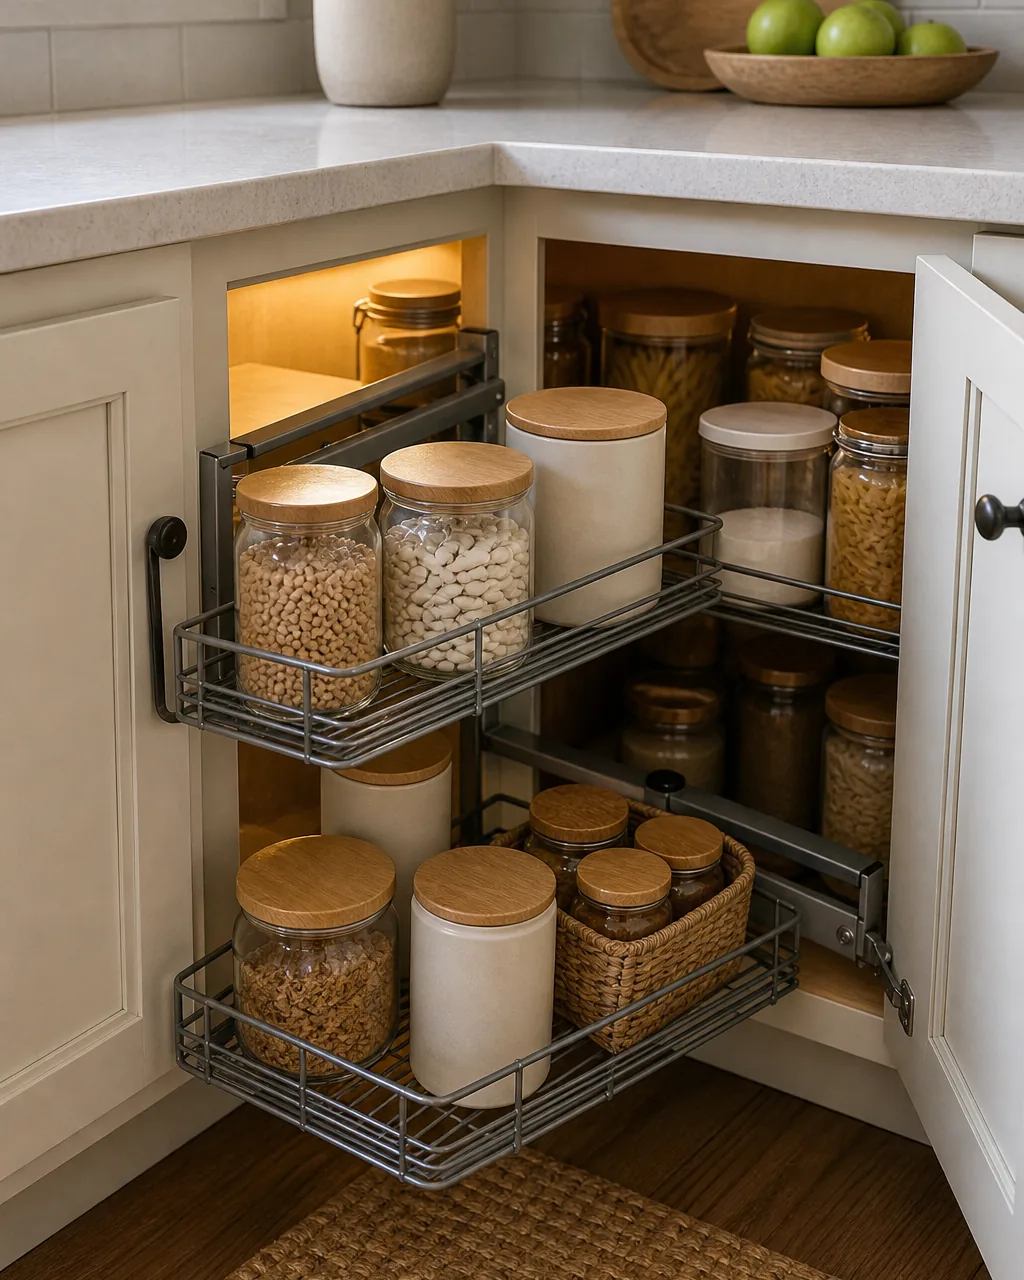
A blind corner cabinet has a section that’s physically hidden behind the front cabinet wall — no turntable reaches it. A swing-out frame solves this differently: it pulls the entire shelving unit out of the blind space and into the open kitchen before you ever reach for an item.
- Check the swing arm’s pivot point clears the front cabinet frame fully extended, not just at rest
- Load the back shelf first, since it becomes the front-facing shelf once the unit swings out
- Keep the loaded weight under the hardware’s rated limit — an overloaded swing arm sags and drags on the cabinet floor over time
- Test the full swing-out motion with the cabinet door open before loading, to catch any hinge interference early
- Lubricate the pivot hardware yearly; a sticking swing-out defeats the entire point of the mechanism
The right hardware depends on your cabinet’s door count and depth, not personal preference. Find the situation below that matches your corner today.
Diagonal Corner Drawers That Replace the Blind Cabinet Entirely
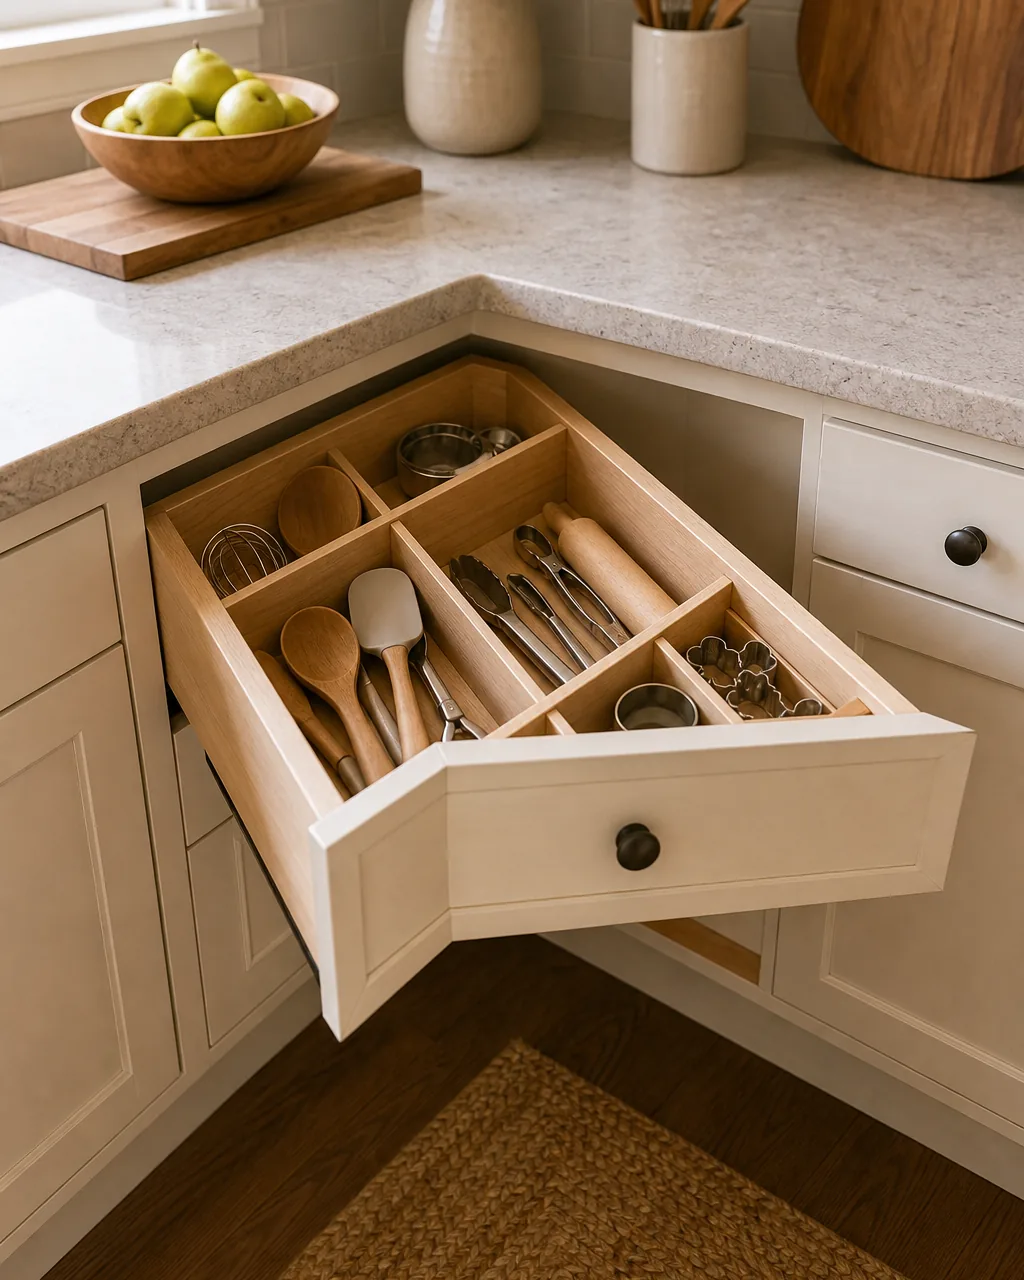
Diagonal drawers skip the blind-corner problem structurally — the drawer face itself is cut at an angle, so the whole box pulls straight toward you instead of requiring a reach into a hidden shelf behind a door.
- This is a remodel-level swap, not a retrofit — it replaces the whole blind cabinet box, not just the interior hardware
- Confirm your contractor cuts the drawer face at the matching diagonal angle before ordering — it’s a nonstandard shape, not a stock cabinet front
- Assign the drawer to tools used daily, since a full pull-out puts everything at arm’s length in one motion instead of a hidden reach
- Keep the heaviest cookware toward the wide back of the angled box, not the narrow front point, so the slides bear weight evenly
- Ask whether the diagonal box can span the full corner width — a too-narrow swap leaves a second dead strip behind it
A Two-Tier Pull-Out Caddy for Small Appliances You Rarely Reach
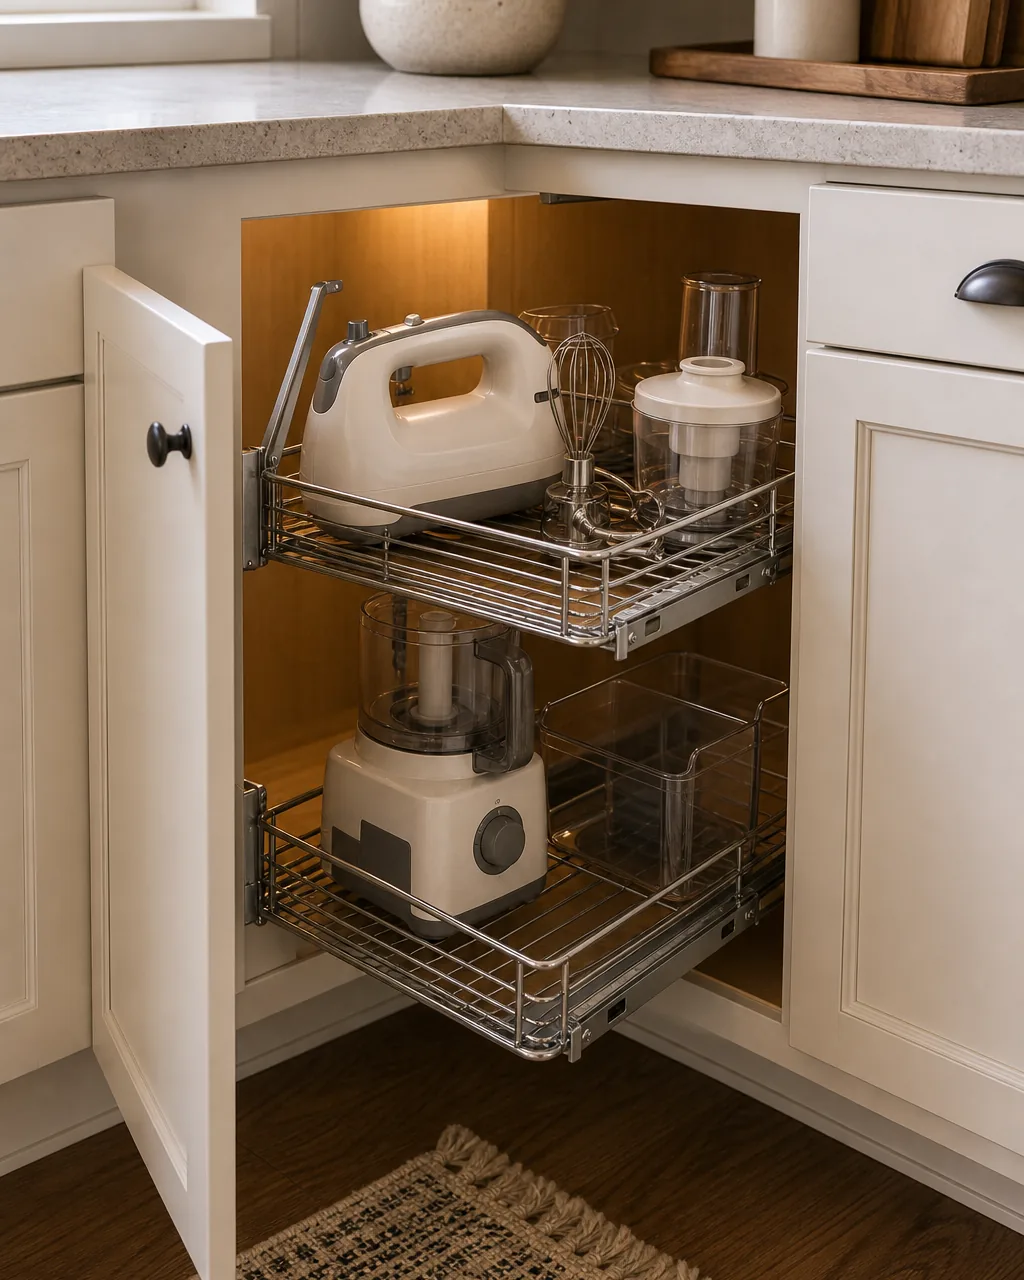
Small appliances used once a month are exactly what corner cabinets are good for — as long as you can actually pull them forward. A two-tier caddy slides the whole load out flush with the cabinet opening, so nothing at the back gets left behind and forgotten.
- Put the heavier appliance on the bottom tier; a top-heavy caddy is harder to pull smoothly on its slides
- Leave a visible gap between appliances on each tier so cords or attachments don’t tangle when the caddy extends
- Match the caddy’s tier height to your tallest appliance base before buying — some units are too shallow for stand mixer bases
- Test full extension with the heaviest load in place; slides rated too low will bow under real weight
- Reassign this caddy seasonally if needed — ice cream makers in summer, slow cookers in winter, same slot
A Vertical Divider Wedged Into the Deep Corner for Trays and Boards
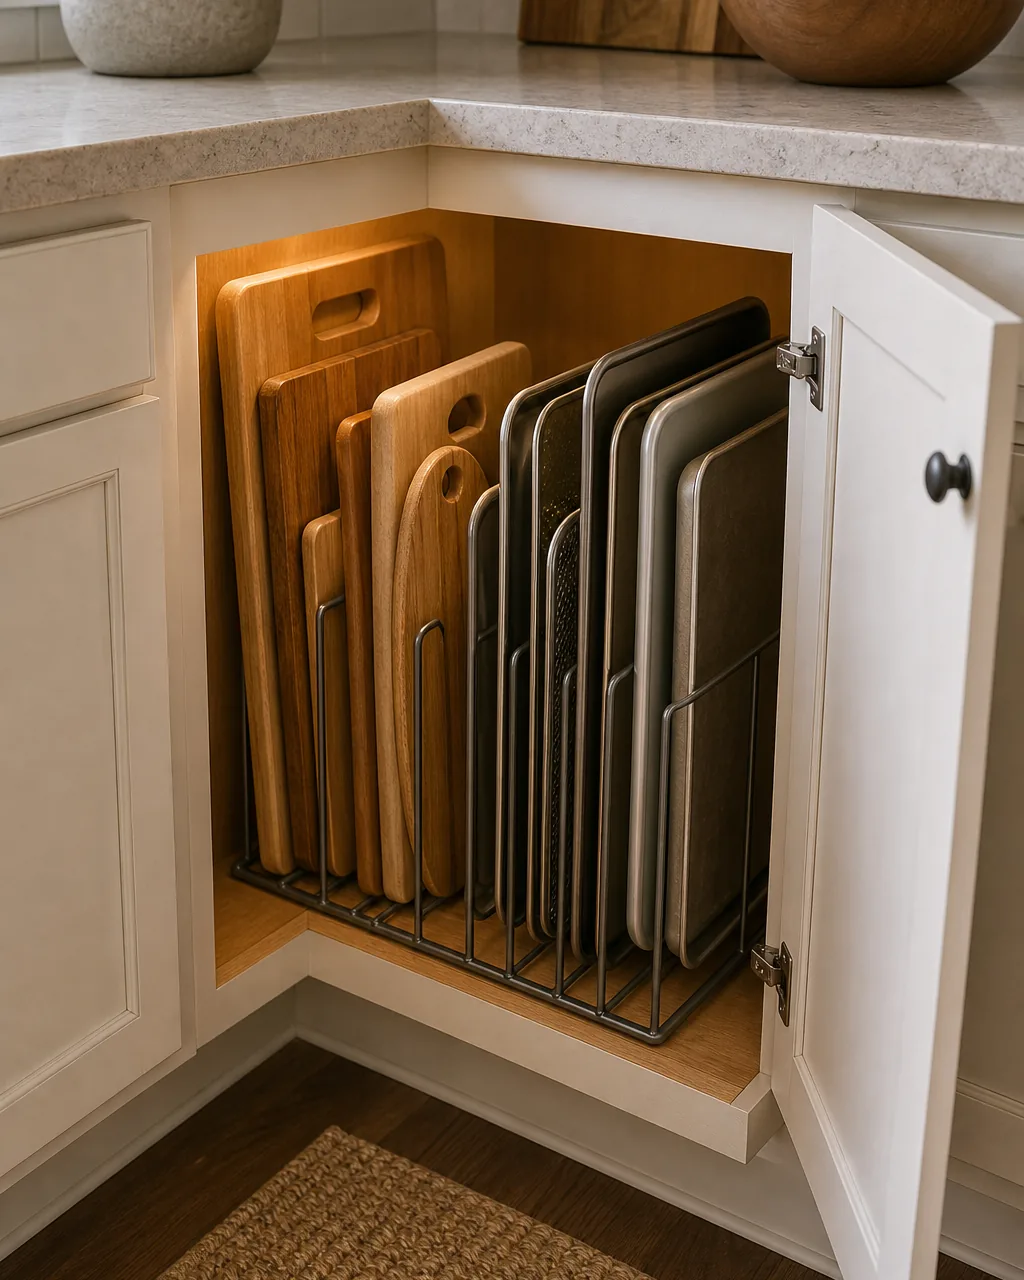
Flat items stacked horizontally in a deep corner turn into a single unliftable block — you can’t get the bottom board out without unstacking everything above it. A vertical divider slots each piece on its edge instead, so any single board or tray lifts straight out.
- Measure your tallest tray or board before installing dividers — a divider set too short lets items tip sideways
- Leave one empty slot between groups so a hand actually fits in to grip and lift, not just slide fingers along an edge
- Group by use, not by size — everyday cutting boards up front, occasional baking sheets toward the back
- Use rubber-tipped dividers if your boards have finished wood edges, to avoid scuff marks from bare wire
- Reassess the divider spacing after adding a new board — an ill-fitting gap defeats the standing-storage benefit
These four rules separate a corner cabinet that’s genuinely solved from one that just has fancier hardware sitting unused.
Stackable Wire Baskets That Use Every Inch of Corner Height
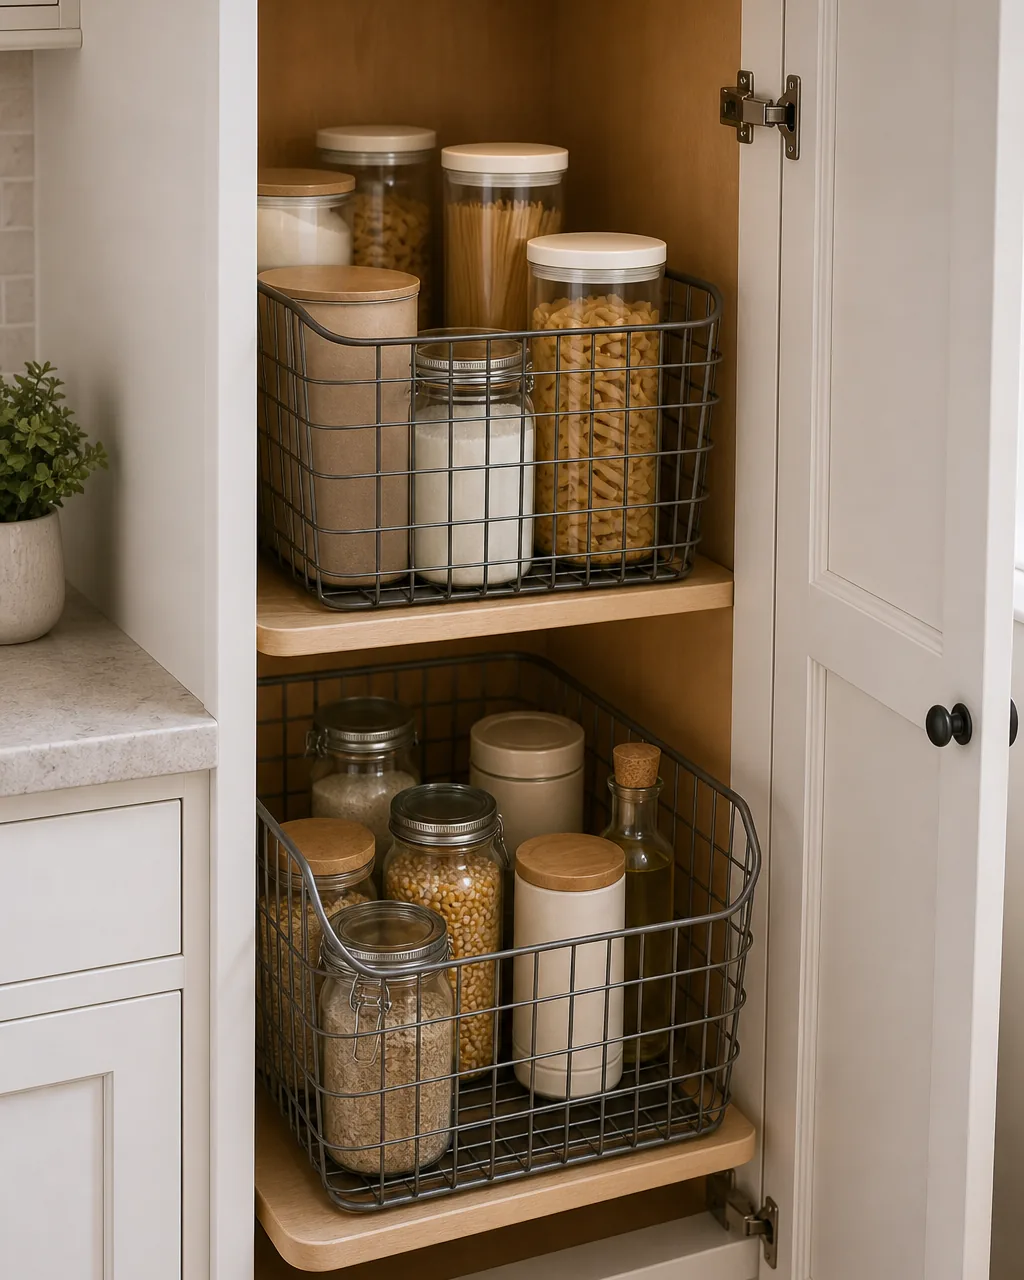
A tall corner cabinet without shelving wastes most of its height as one deep well — only the top layer of items is ever visible. Stackable baskets split that height into independent levels that each lift straight out, without needing a permanent shelf installed.
- Confirm each basket has feet or a lip that keeps it from crushing the basket stacked below it
- Load the bottom basket with items you reach for less often, since it’s blocked while the top basket is in place
- Leave the top basket’s handle accessible from the front, not buried against the back cabinet wall
- Choose baskets sized to lift out one-handed — an oversized loaded basket is awkward to remove without tipping
- Rotate which basket sits on top seasonally, so neither position becomes a permanent “forgotten” zone
Open Floating Shelves for Upper Corner Cabinets Instead of Doors
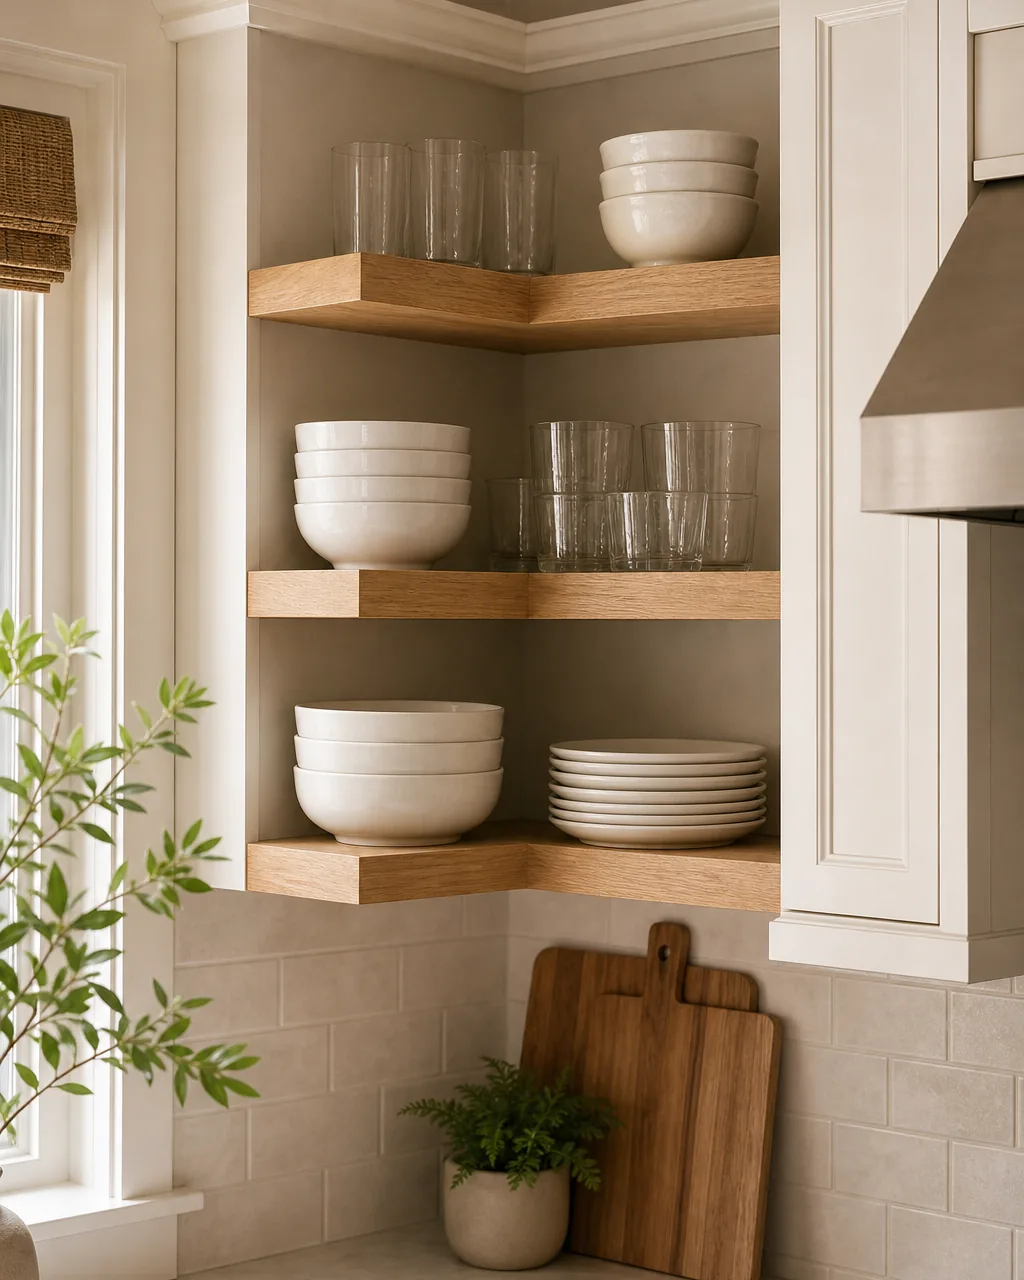
An upper corner cabinet with a door still has to be opened and searched. Removing the door and installing open shelves instead means the entire corner is scanned at a glance — nothing has to be pulled out just to see what’s there.
- Keep only frequently used, presentable items on open corner shelves; anything you’d rather not see stays behind a door elsewhere
- Anchor floating shelves into studs, not just drywall anchors — corner shelves carry real weight from stacked dishware
- Stack no more than three or four bowls per group; taller stacks look precarious in an open corner and are harder to grab safely
- Leave visible breathing room between groupings so the shelf reads as curated, not crammed
- Wipe shelves more often than closed cabinets — open storage collects kitchen grease and dust faster
Bi-Fold Doors That Open the Entire Corner at Once
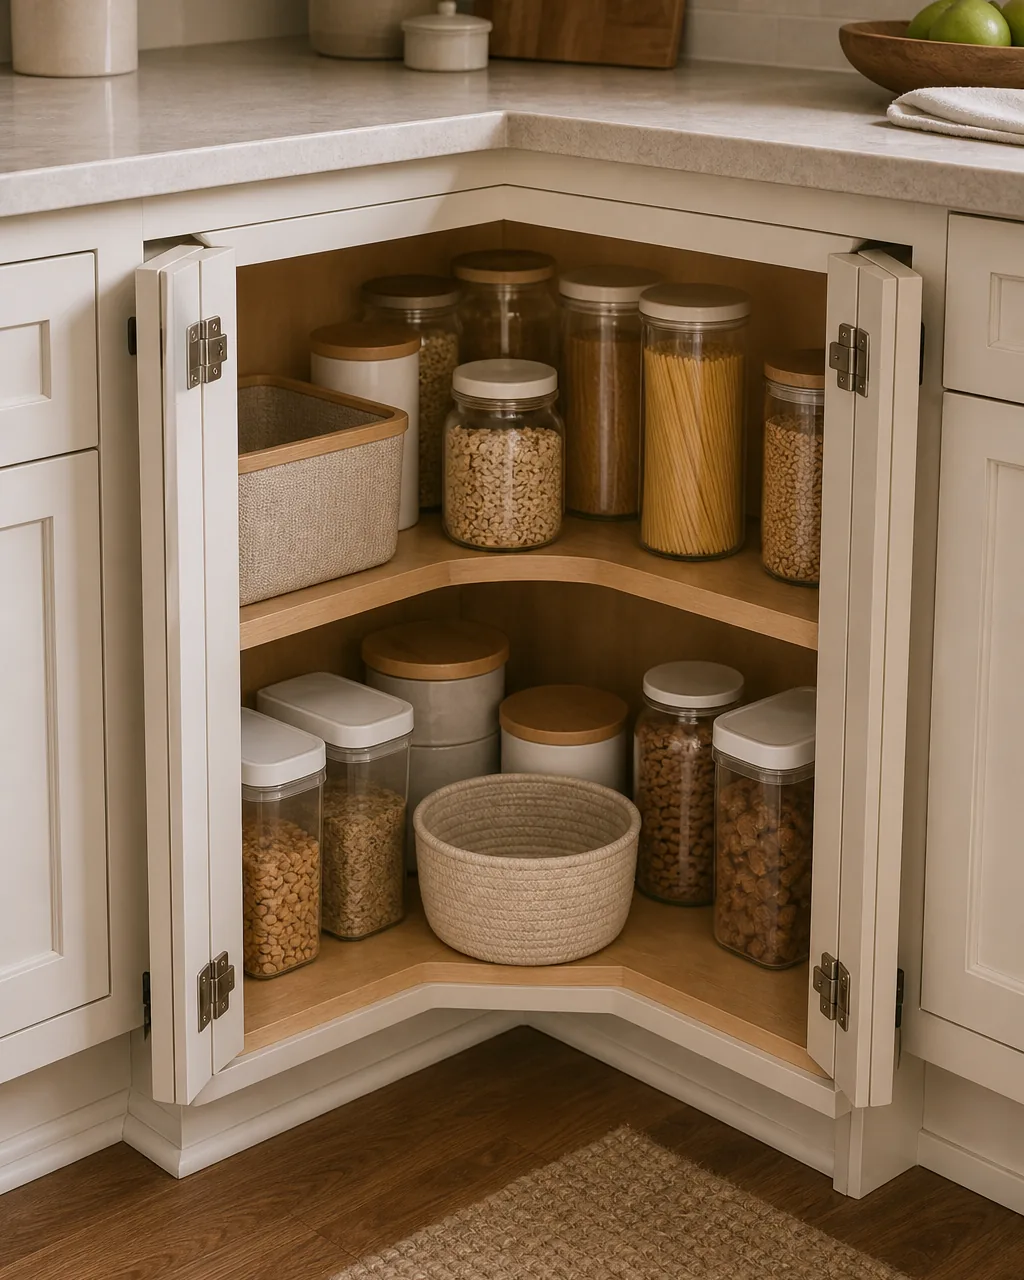
A single door only swings clear of a narrow slice of the corner opening. Bi-fold doors fold flat against the cabinet sides instead, so the entire width of the corner opens at once — no reaching around a half-open door to see what’s behind it.
- Check hinge hardware is rated for the door’s full weight in the folded-open position, not just closed
- Confirm nothing mounted nearby (a handle, a light switch) blocks the doors from folding completely flat
- Load the corner assuming full visual access — this hardware rewards items arranged for a wide view, not stacked deep
- Test the fold-open motion fully loaded before finalizing placement, since folded doors take up side space you’ll need to account for
- Keep hinges clean and lubricated; bi-fold mechanisms have more moving joints than a single door and show wear sooner
12 corner cabinet fixes, one dead space turned into storage you actually use
- 1A Full-Circle Lazy Susan for Deep Two-Door Corner CabinetsA full circle spins the entire load into view, so nothing at the back of a deep two-door corner gets forgotten.
- 2A Half-Moon Lazy Susan for Awkward Single-Door CornersShaped to clear a single door frame instead of jamming against it, where a full circle simply won’t fit.
- 3A Blind Corner Pull-Out Swing System That Drags Everything Into the LightThe swing arm pulls an entire hidden shelf out of the blind space and into the open kitchen before you reach for anything.
- 4Diagonal Corner Drawers That Replace the Blind Cabinet EntirelyAn angled drawer face pulls straight toward you, skipping the blind-corner problem structurally instead of working around it.
- 5A Two-Tier Pull-Out Caddy for Small Appliances You Rarely ReachSlides the whole load flush with the cabinet opening, so appliances used once a month don’t get lost at the back.
- 6A Vertical Divider Wedged Into the Deep Corner for Trays and BoardsSlots flat items on their edge instead of stacking them flat, so any single board lifts straight out.
- 7Stackable Wire Baskets That Use Every Inch of Corner HeightSplits one deep well into independent levels that each lift out on their own, without a permanent shelf installed.
- 8Open Floating Shelves for Upper Corner Cabinets Instead of DoorsRemoves the door entirely, so the whole corner is scanned at a glance instead of opened and searched.
- 9Bi-Fold Doors That Open the Entire Corner at OnceFolds flat against the cabinet sides, opening the full width of the corner instead of the narrow slice one door clears.
- 10A Motion-Sensor Puck Light Inside the Cabinet So Nothing Hides in the DarkSwitches on the instant the door opens, lighting the back corner that no ceiling fixture ever reaches.
- 11A Zone-and-Label System That Keeps the Corner From Becoming a Junk DrawerAssigns the corner one category only, so anything that drifts outside it gets noticed and moved.
- 12A Corner Swap-Out Kit for Kitchens Mid-Remodel That Aren’t Replacing CabinetsSlides new hardware into the existing cabinet box, keeping the doors and frame while fixing just the broken mechanism.
styledhomenotes.com
A Motion-Sensor Puck Light Inside the Cabinet So Nothing Hides in the Dark
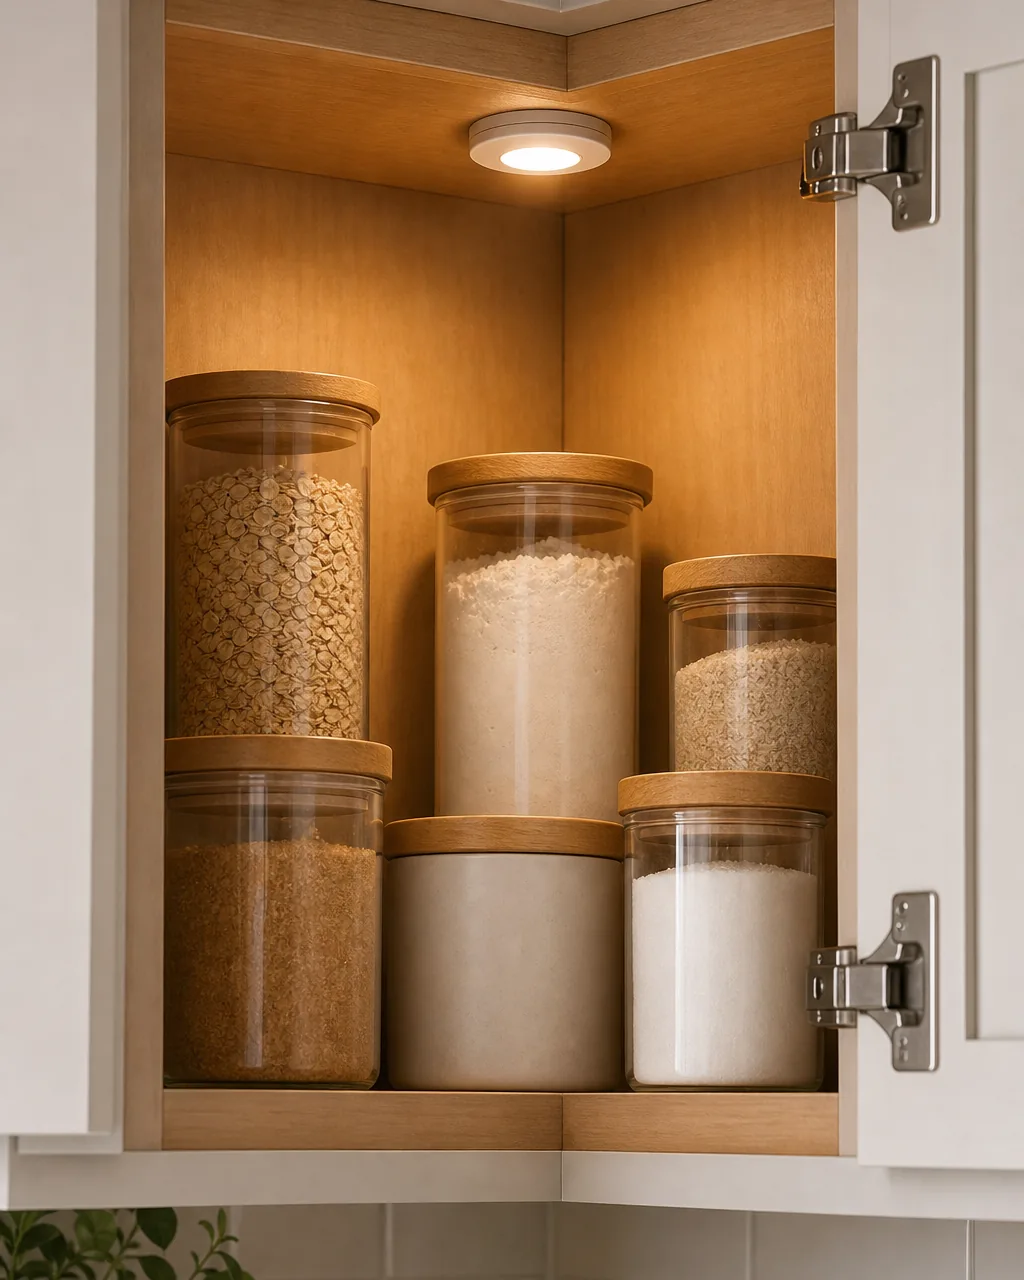
No ceiling fixture reaches the back of a corner cabinet — it’s the darkest spot in the kitchen even with the lights on. A battery-powered motion-sensor puck light switches on the instant the door opens, so the deepest corner is never a guessing game.
- Mount the puck toward the front of the cabinet ceiling, angled back, so light reaches the darkest rear corner instead of just the door opening
- Choose battery-powered over hardwired unless you’re already mid-remodel — battery units install in minutes with no electrician
- Test motion sensitivity with the door opened slowly, not just flung wide, since a slow swing can fail to trigger a poorly placed sensor
- Replace batteries on a fixed schedule (every 6 months) rather than waiting for the light to dim unpredictably
- Pick warm-white bulbs over cool blue-white — warm light reads as intentional kitchen lighting, not a flashlight left inside
A Zone-and-Label System That Keeps the Corner From Becoming a Junk Drawer
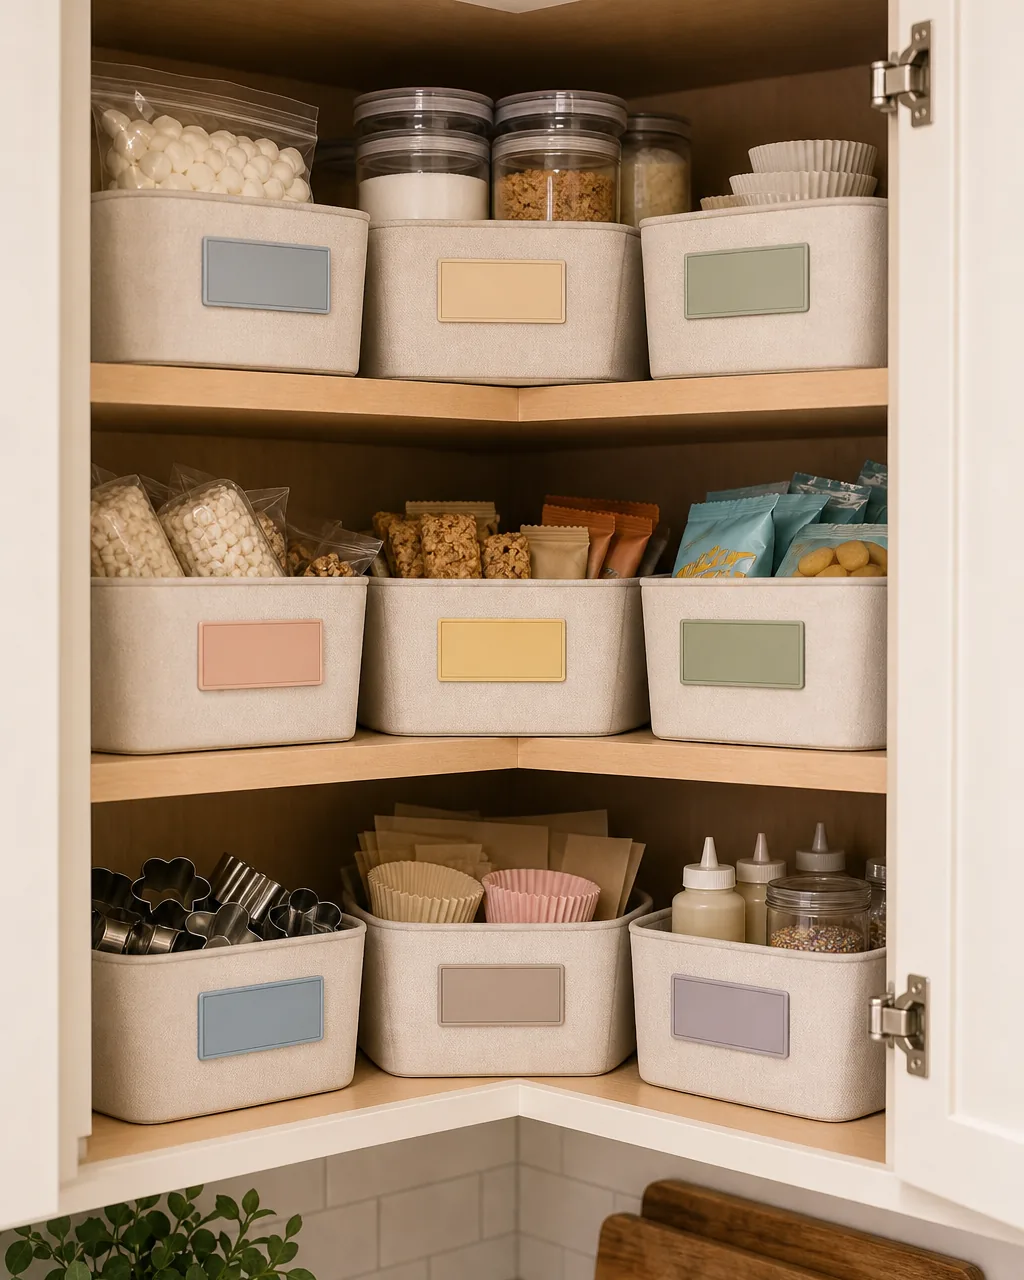
Corner cabinets drift into catch-alls faster than any other storage in the kitchen, precisely because they’re hard to see into. A fixed zone-and-label system assigns the corner one category only, so anything that doesn’t belong gets noticed and moved instead of shoved in.
- Pick one category per corner cabinet (baking, snacks, or bulk grains) and hold the line — mixed categories are what turn a corner into a junk drawer
- Use matching bins so the zone reads as one system at a glance, not a pile of mismatched containers
- Label the bin, not just the shelf — a shelf label gets ignored once the bin in front of it blocks the view
- Do a five-minute reset monthly: anything that’s drifted outside its assigned zone goes back or gets relocated
- Leave one bin intentionally empty as overflow space, so new items have a home instead of getting wedged in sideways
A Corner Swap-Out Kit for Kitchens Mid-Remodel That Aren’t Replacing Cabinets
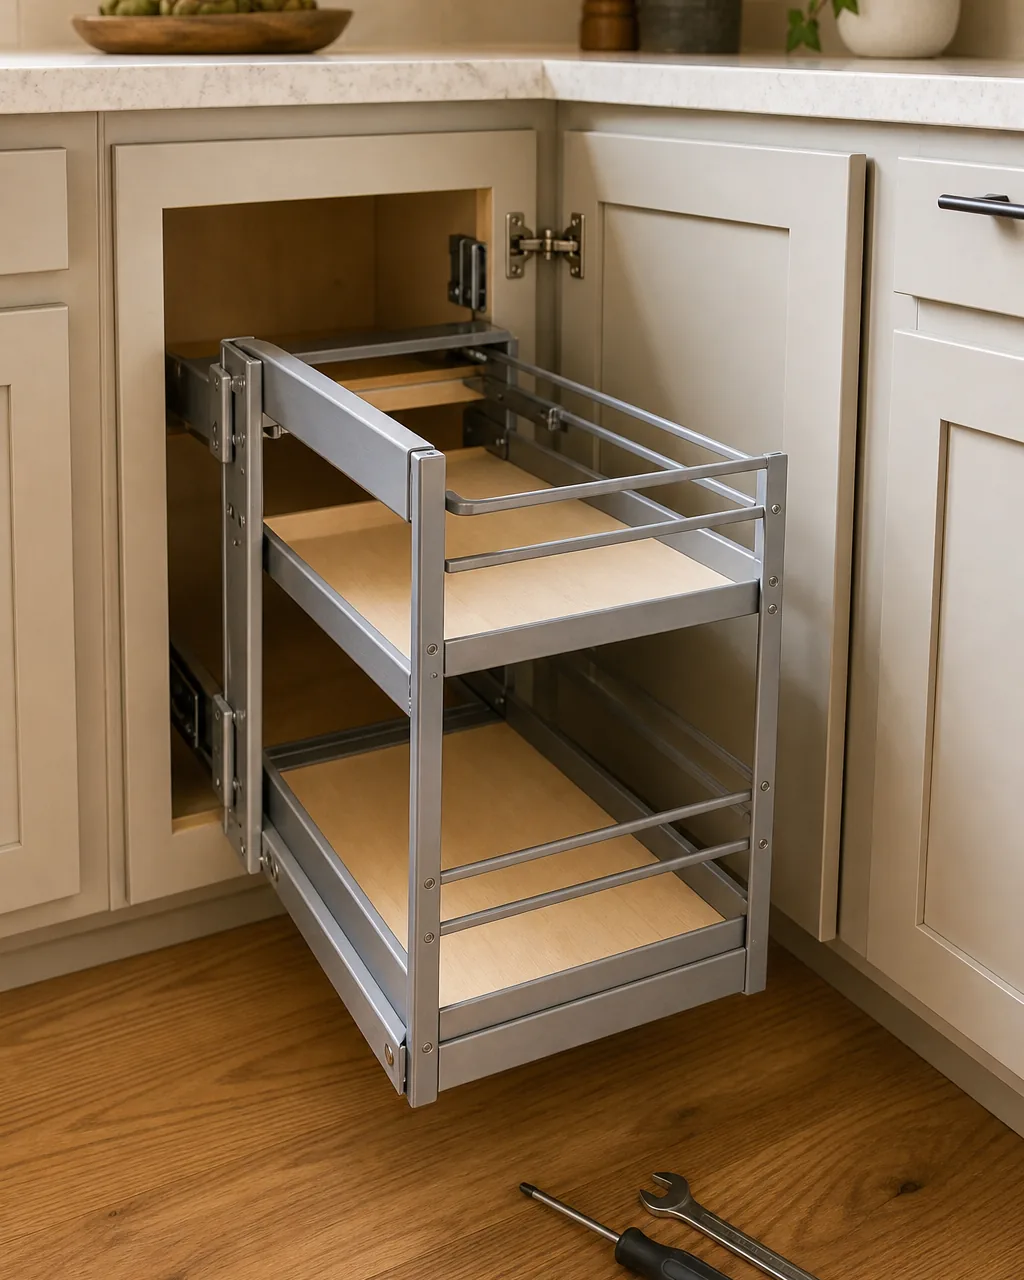
A full cabinet swap isn’t necessary just to fix a bad corner. Retrofit kits slide new pull-out hardware into the existing cabinet box, keeping the doors and frame you already have while replacing only the broken part — the interior mechanism.
- Measure the existing cabinet opening precisely before ordering; retrofit kits are sized to specific box dimensions, not universal
- Remove the old fixed shelf completely before installing new hardware — most kits assume an empty box, not a partial fit-in
- Confirm the kit’s mounting hardware matches your cabinet material (particleboard vs. solid wood needs different screws)
- Budget an afternoon, not a weekend — a swap-out kit is a same-day project compared to a full cabinet replacement
- Test the new hardware’s full range of motion before reloading, since retrofit kits vary more in fit than built-in originals

Nora writes about small, livable rooms for real apartments. Her own kitchen has a blind corner cabinet she avoided opening for two years before installing a swing-out pull-out — the exact fix in this guide. Every idea here gets tested against real cabinet dimensions, not a showroom mockup.
Nora Ellis edits Styled Home Notes. Visit the Nora Ellis author page. More from Nora: kitchen zones, small pantry organization ideas.