16 Kitchen Cabinet Storage Ideas That Double Your Usable Space
Most kitchen cabinets ship with two fixed shelves per section and nothing else — a layout that wastes the top third of every opening and turns deep lower cabinets into black holes where pans go to disappear.
The real problem is not cabinet size. It is that flat shelves treat the space as two-dimensional when the interior is a full three-dimensional box. Each of these sixteen ideas reclaims a different slice of that lost volume.
Already working through your kitchen countertop organization? Cabinet storage is the other half — what you clear off the counter needs somewhere organized to land.
- 1 Pull-out drawer inserts
- 2 Cabinet door spice rack
- 3 Stackable shelf risers
- 4 Lazy Susan turntable
- 5 Under-shelf hanging baskets
- 6 Vertical tray dividers
- 7 Tiered can organizer
- 8 Pull-down shelf system
- 9 Lid organizer rack
- 10 Cabinet drawer peg system
- 11 Roll-out recycling bin insert
- 12 Under-sink tension rod
- 13 Magnetic knife strip inside door
- 14 Clear bin grouping
- 15 Corner cabinet swing-out trays
- 16 Adjustable shelf pin reset
1. Pull-Out Drawer Inserts
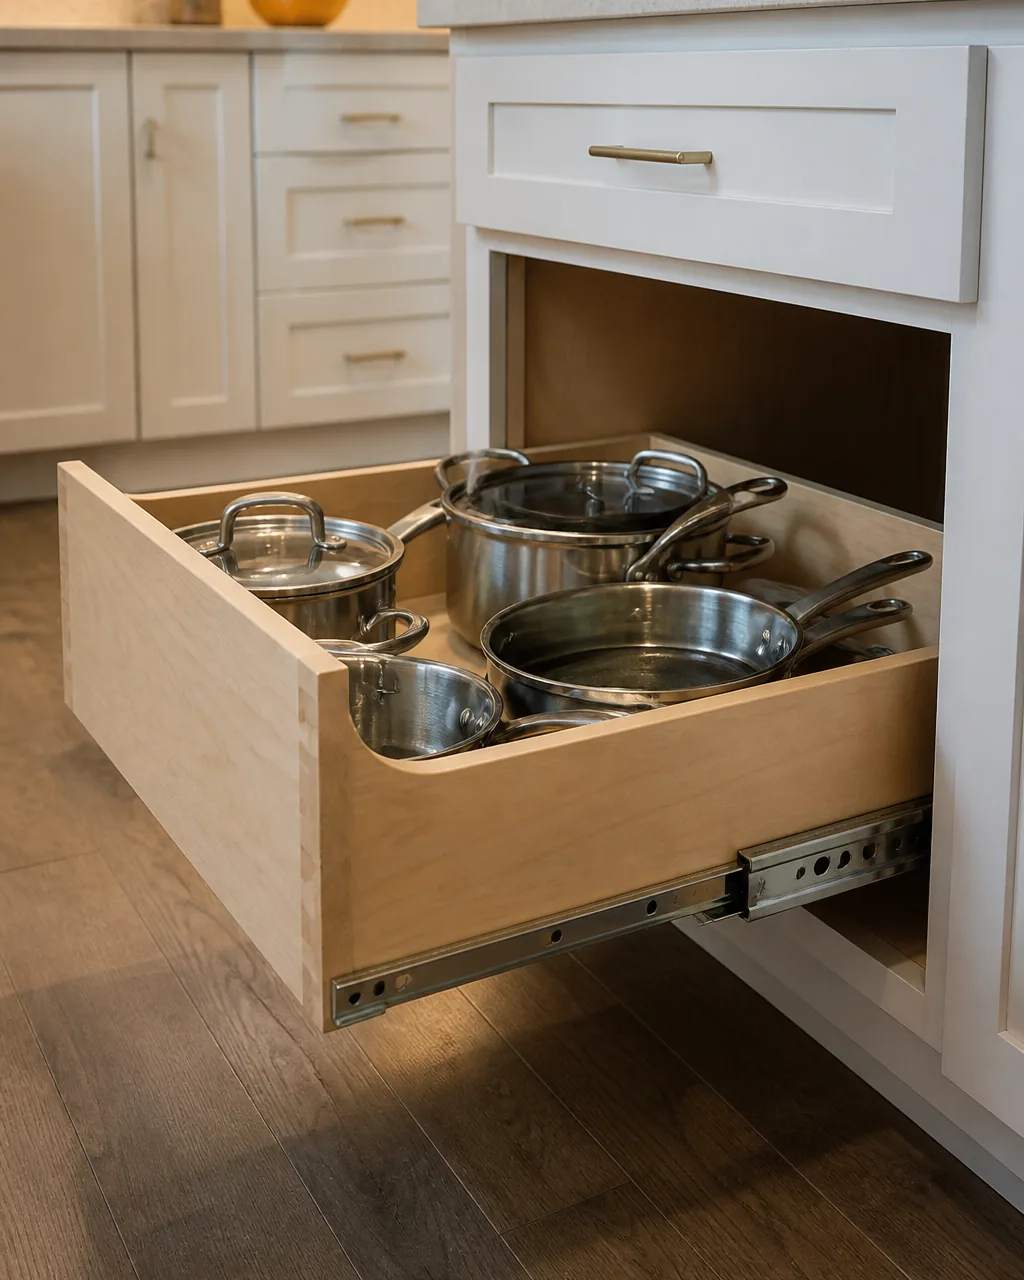
A lower cabinet with a fixed shelf forces you to crouch, reach past the front row, and hope you grab the right pot by its handle. Pull-out drawer inserts mount on ball-bearing glides inside the existing box and turn that dark cave into a tray you can see in one glance. The best part is the retrofit fit — most inserts sit on the existing shelf or cabinet floor without drilling into the sidewalls.
- Measure the interior width, depth, and door opening clearance before ordering — the insert must clear the door frame when extended.
- Choose soft-close glides rated for the load you plan to store (heavy cast iron needs 100-lb-rated hardware, not 50-lb).
- Place heavier pots toward the back of the drawer so the front does not tip when fully extended.
- Leave one slot empty at the side for a trivet or heat pad that lives with the cookware.
- Line the drawer bottom with a non-slip shelf liner to stop stainless steel from sliding forward on the pull.
2. Cabinet Door Spice Rack
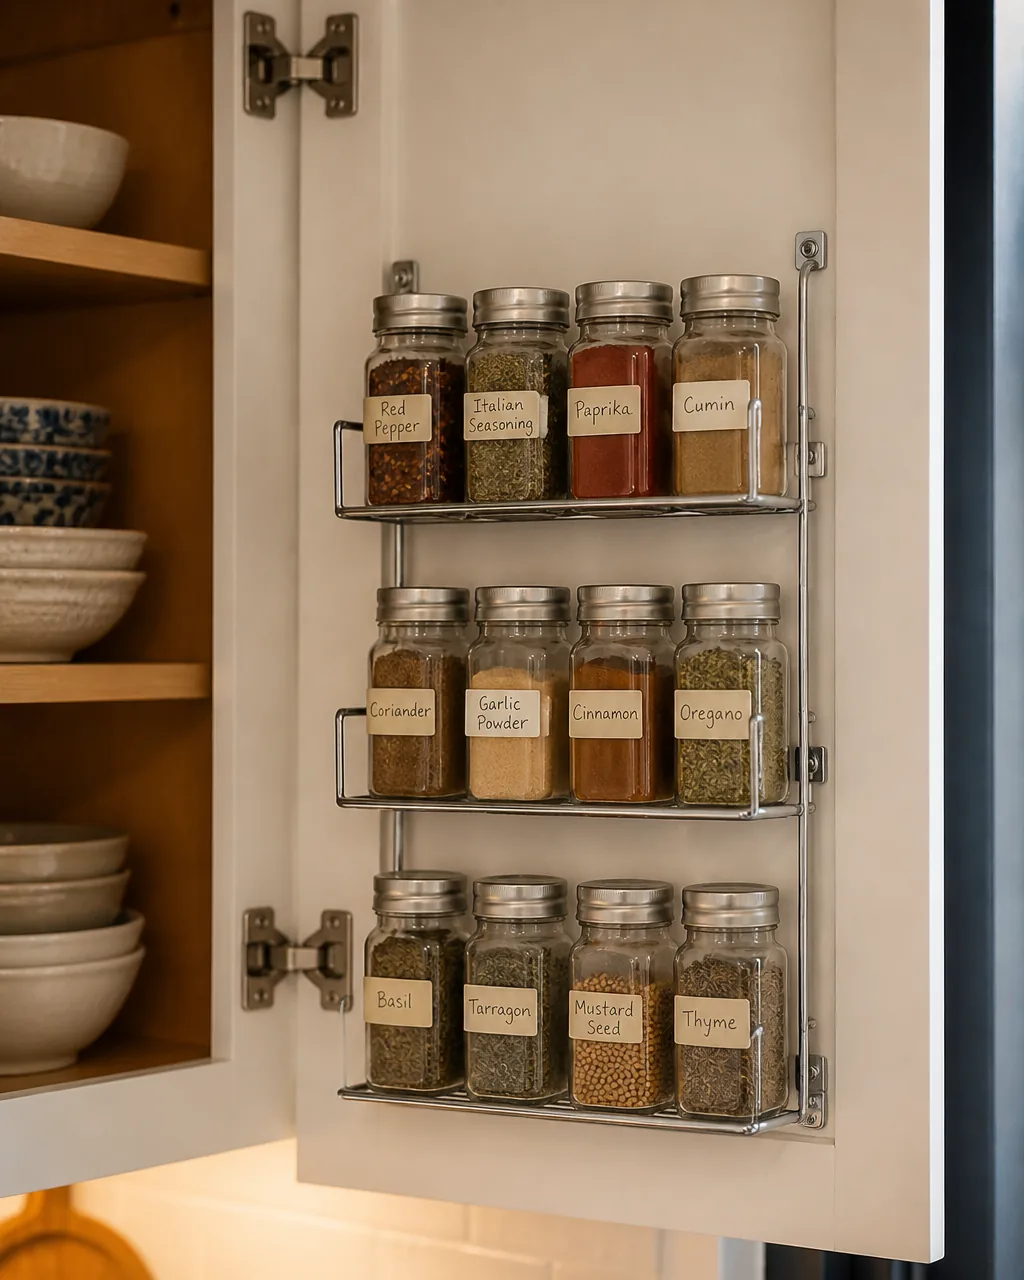
The inside of a cabinet door is dead real estate in almost every kitchen. A three-tier wire rack screws into the door panel and holds twenty or more small jars without consuming any shelf depth at all. It keeps seasonings at eye level when the door is open, so you stop rummaging through a dark shelf during every meal prep.
- Confirm the rack depth does not collide with shelf contents when the door closes — leave at least half an inch of clearance.
- Use uniform jars with flat lids so every row stacks neatly against the wire rail.
- Write labels on the lid tops, not just the sides — you look down at a spice shelf more often than you look at it head-on.
- Group by frequency: cooking oils and daily spices on the middle tier at natural reach, baking spices on the top tier.
- Anchor mounting screws into a solid rail or use toggle bolts if the door panel is thinner than three-quarter inch.
3. Stackable Shelf Risers
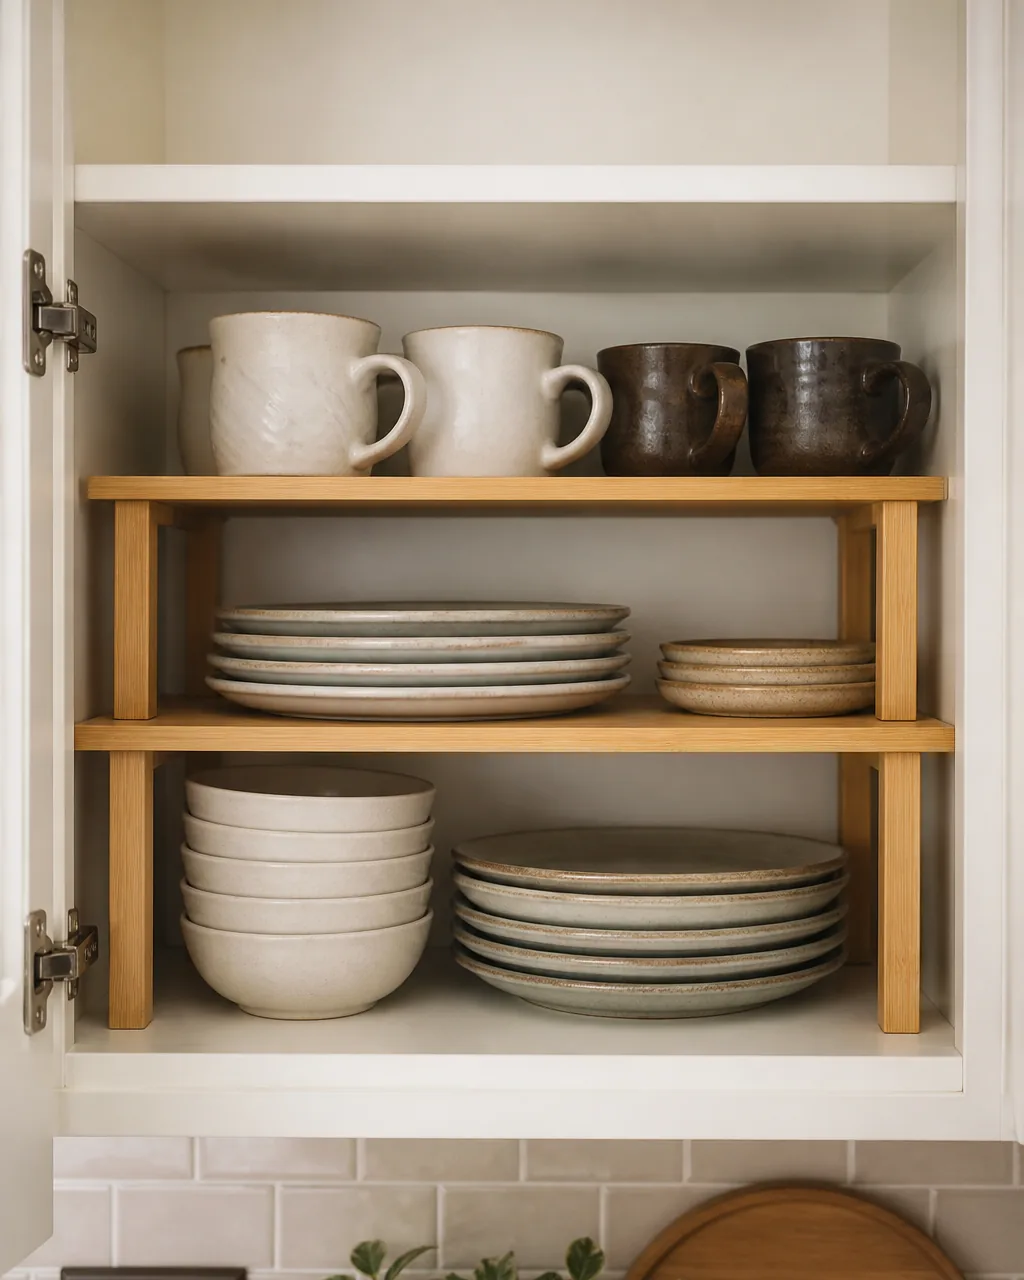
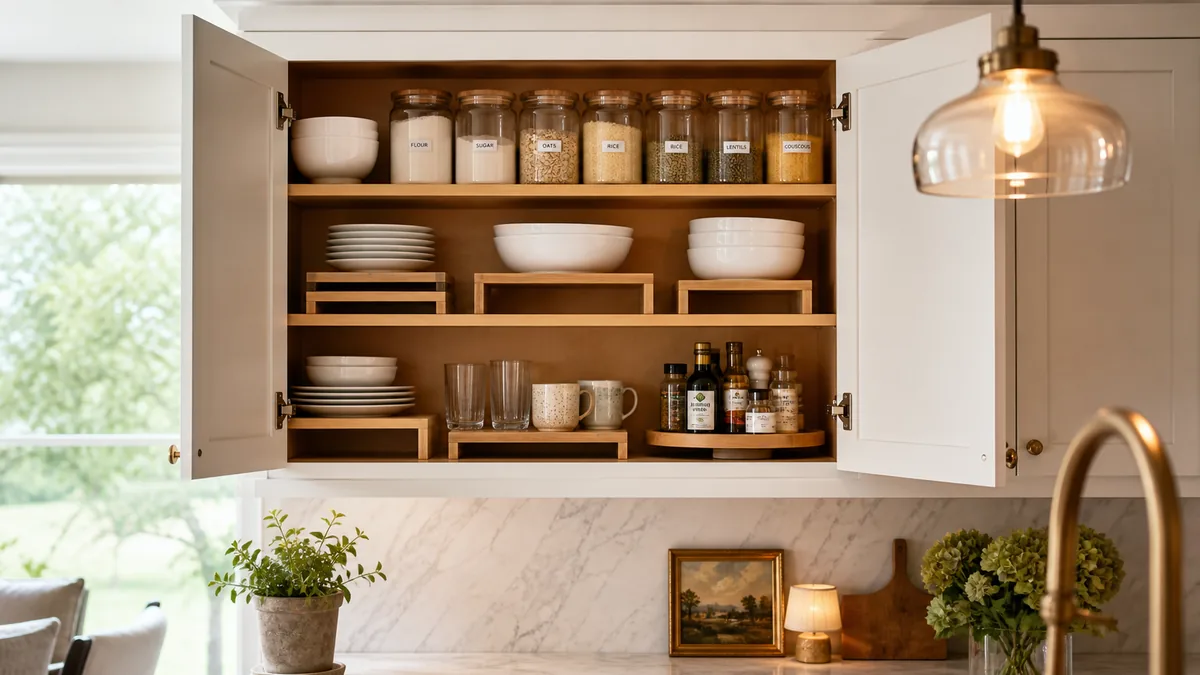
A twelve-inch shelf holding four-inch mugs wastes eight inches of vertical air above them. A shelf riser drops a second platform into that gap and instantly doubles the layers you can use. Bamboo risers look clean and absorb condensation better than wire, which matters in cabinets near the stove.
- Match riser width to the items stored below — too wide and you cannot slide plates out from underneath.
- Stack no more than two risers per cabinet section; three tiers become too tight to reach into.
- Place the heavier items (plates, bowls) on the fixed shelf and lighter items (mugs, small bowls) on the riser.
- Wipe riser feet with a damp cloth monthly to prevent grease film from making the shelf surface sticky.
- Consider expandable metal risers if your cabinet widths vary — one adjustable unit covers multiple cabinets.
4. Lazy Susan Turntable
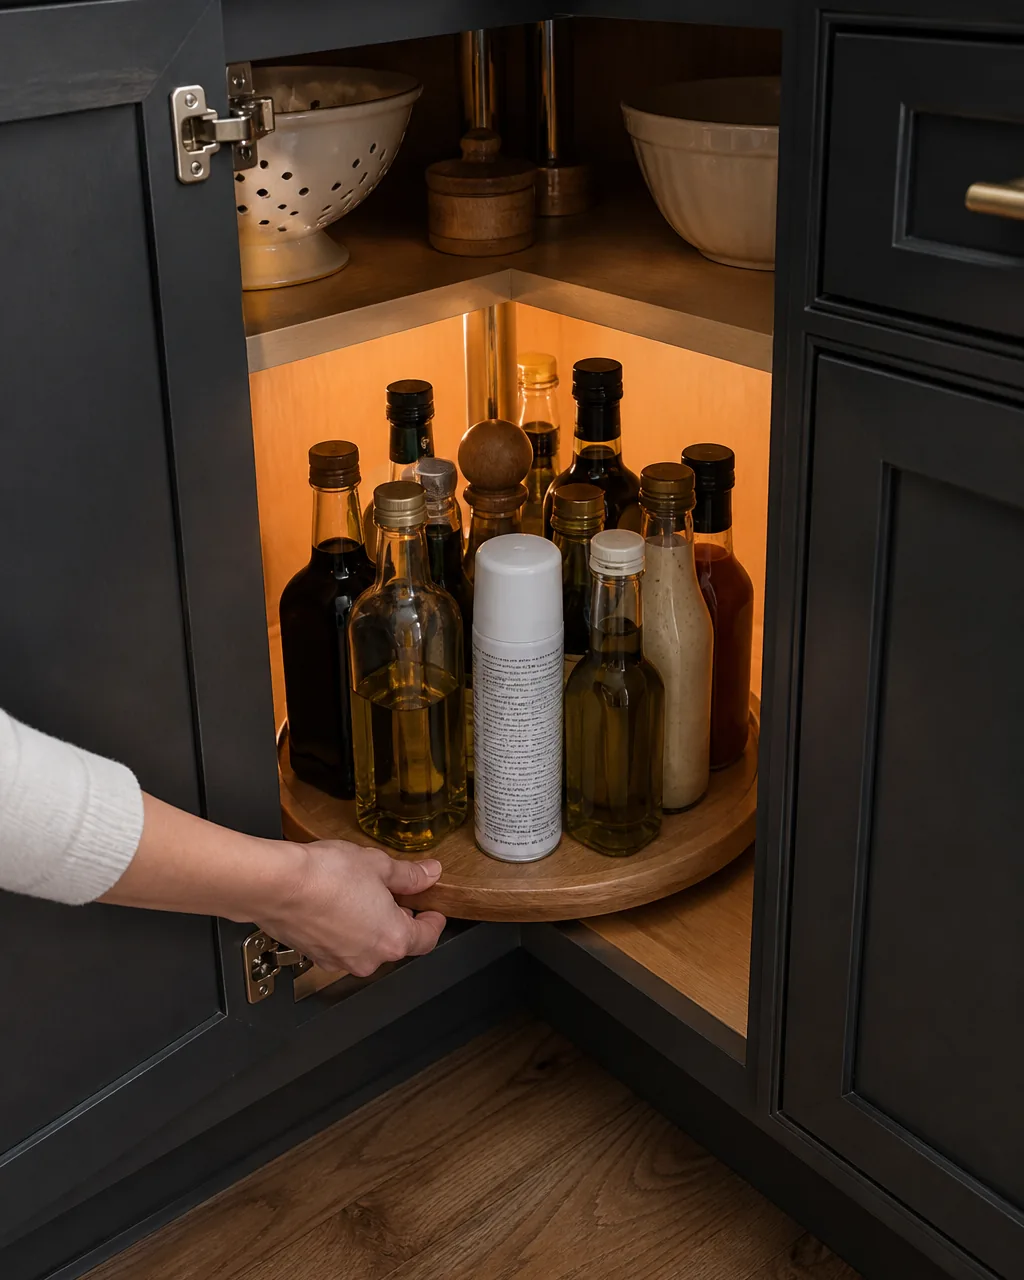
Deep corner cabinets punish anyone who stores things behind other things — the back row becomes permanent inventory that never rotates. A single turntable placed on the shelf turns a one-directional reach into a spin, so every bottle faces you within one rotation. No retrofit carpentry, no special hardware, and no loss of existing shelf space.
- Choose a turntable diameter two inches narrower than the shelf depth so it spins freely without jamming against the walls.
- Place tall bottles around the outside edge and short jars at the center where height clearance shrinks.
- Add a non-slip liner to the turntable surface — glass bottles on bare wood tend to drift outward during a spin.
- Reserve the upper corner shelf for a second turntable holding less-used items like specialty vinegars and sesame oil.
- Avoid overloading past the weight rating; a warped turntable grinds instead of spinning and scratches the shelf.
5. Under-Shelf Hanging Baskets
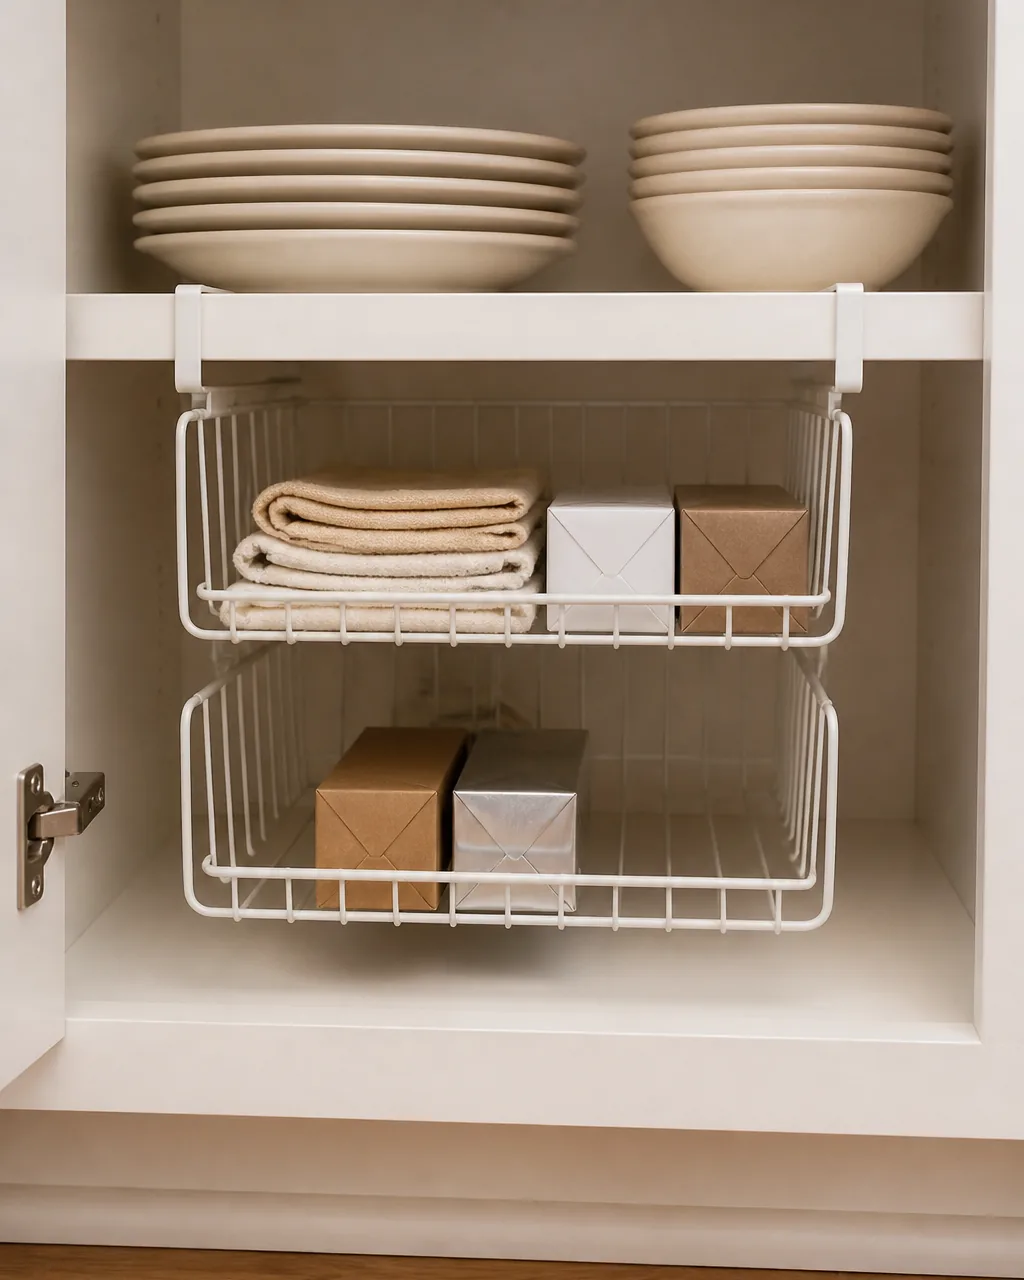
The gap between one shelf and the items below it is wasted real estate that a hanging basket fills without blocking the shelf above. Wire baskets clip onto the shelf lip and create a shallow second level — ideal for flat items like wrap boxes, foil rolls, and sandwich bags that do not stack well on their own.
- Choose baskets with a front lip low enough to slide items in and out without lifting them over a wall.
- Keep one basket exclusively for wrap boxes (plastic wrap, foil, parchment) so they stay horizontal and easy to tear.
- Leave at least three inches between the basket bottom and the items stored below it, or you lose access to both.
- Use a basket with a label slot on the front if the shelf is too high to see into from standing height.
- Remove the basket once a year to wipe down the shelf underneath — crumbs collect along the clip points.
6. Vertical Tray Dividers
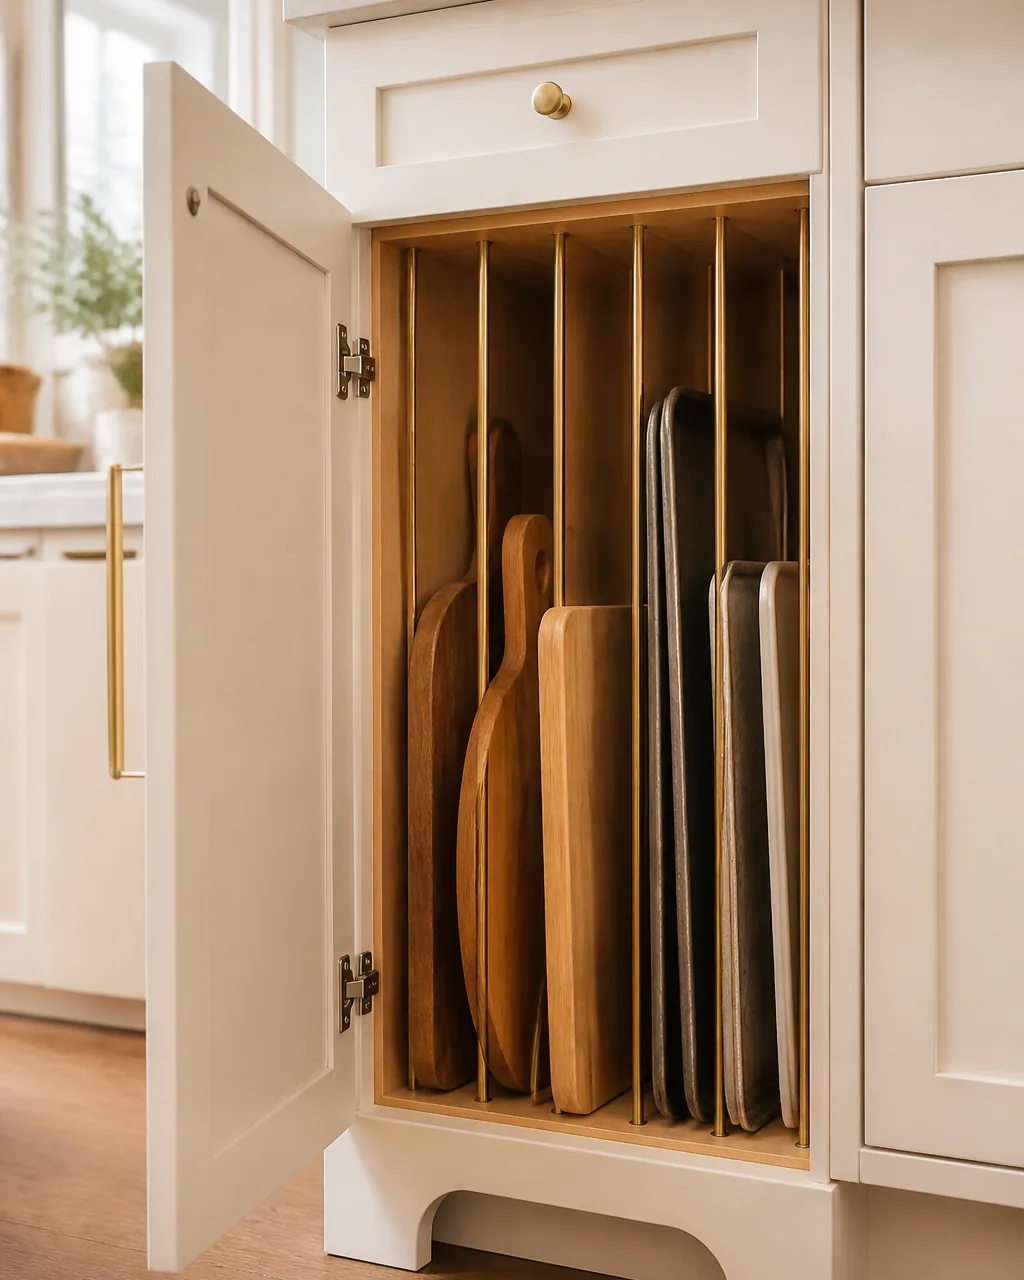
Stacking baking sheets flat means the one you need is always at the bottom, and pulling it out rattles every sheet above it. Vertical dividers turn the same cabinet into a filing system where each tray slides in and out independently. A single tall narrow cabinet can hold more trays vertically than two wide shelves can hold stacked flat.
- Space dividers at least one and a half inches apart — any tighter and insulated cookie sheets will not fit.
- Put the heaviest items (cast iron griddle, stone pizza tray) in the slots closest to the side walls for stability.
- Store cutting boards in the front slots where you grab them most often during meal prep.
- Secure dividers to the cabinet floor with adhesive bumpers if they are freestanding — they shift under weight without them.
- Reserve the widest slot for oversize items like a roasting pan with handles that do not fit standard spacing.
7. Tiered Can Organizer
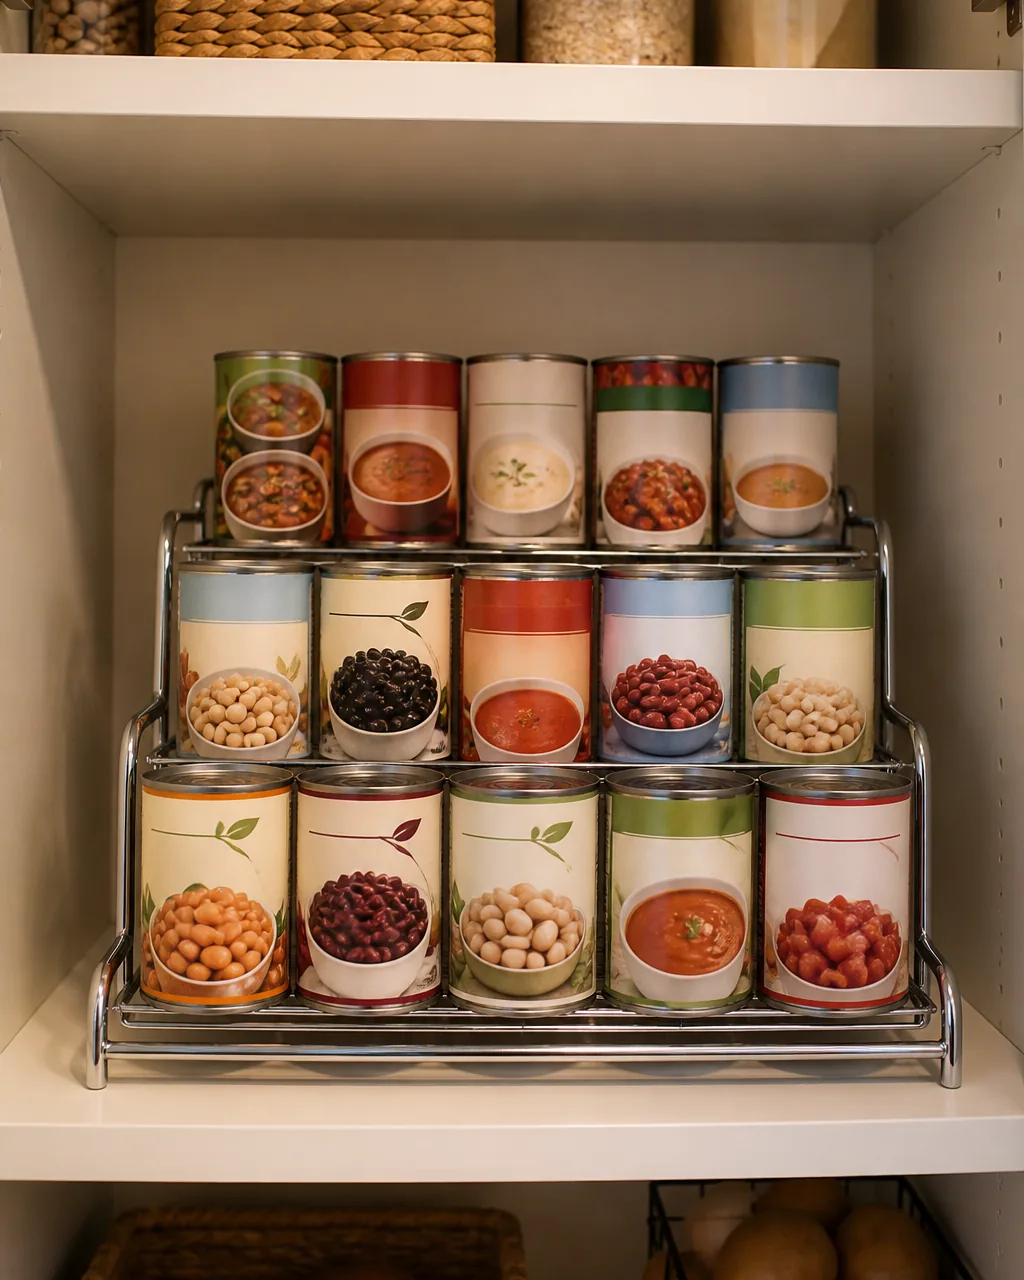
A single row of cans on a flat shelf hides everything behind the front can. A three-tier step rack lifts each row higher than the one in front of it, so every label is visible at a glance. You stop buying duplicates and start rotating stock — the two things that keep a pantry cabinet from quietly expiring.
- Face all labels forward after grocery runs so you can inventory at a glance without picking up each can.
- Place older cans at the front of each tier and newer purchases at the back — gravity and the step angle help with rotation.
- Measure the shelf height before choosing a rack — some three-tier models are too tall for standard twelve-inch cabinet openings.
- Use one organizer per food category (beans on one, soups on another) instead of mixing types on the same rack.
- Wipe the rack rails monthly; can bottoms leave rust rings if moisture gets trapped.
8. Pull-Down Shelf System
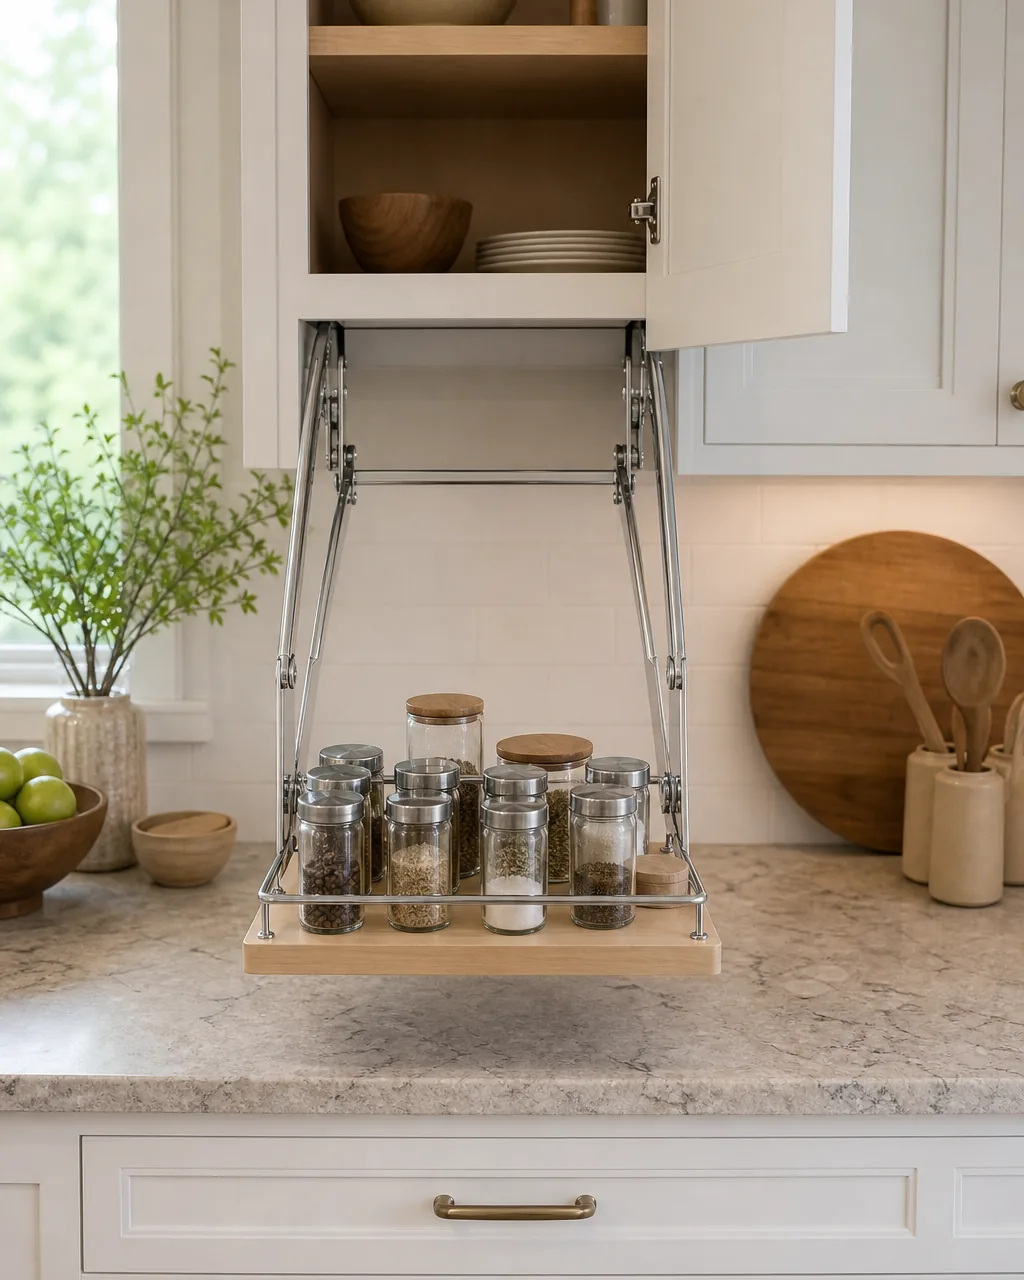
Upper cabinets above the counter are often too high to reach without a step stool, so the top shelf becomes permanent dead storage. A pull-down mechanism mounts inside the cabinet and swings the top shelf down to eye level on a chrome arm.
It gives short-reach access to items that would otherwise live out of sight — one of the few upgrades that changes how high you can effectively use a cabinet.
- Install on the upper shelf only — pull-down mechanisms on the lower shelf waste the height advantage.
- Confirm the arm swing does not collide with the cabinet door frame when the shelf is lowered.
- Store lightweight, frequently used items on the pull-down tray (spices, vitamins, tea boxes) and heavy items on the fixed shelf below.
- Tighten the tension adjustment screw so the shelf holds its lowered position without drifting upward.
- Keep a two-inch margin along the tray edges — items at the rim can fall off when the mechanism pivots.
9. Lid Organizer Rack
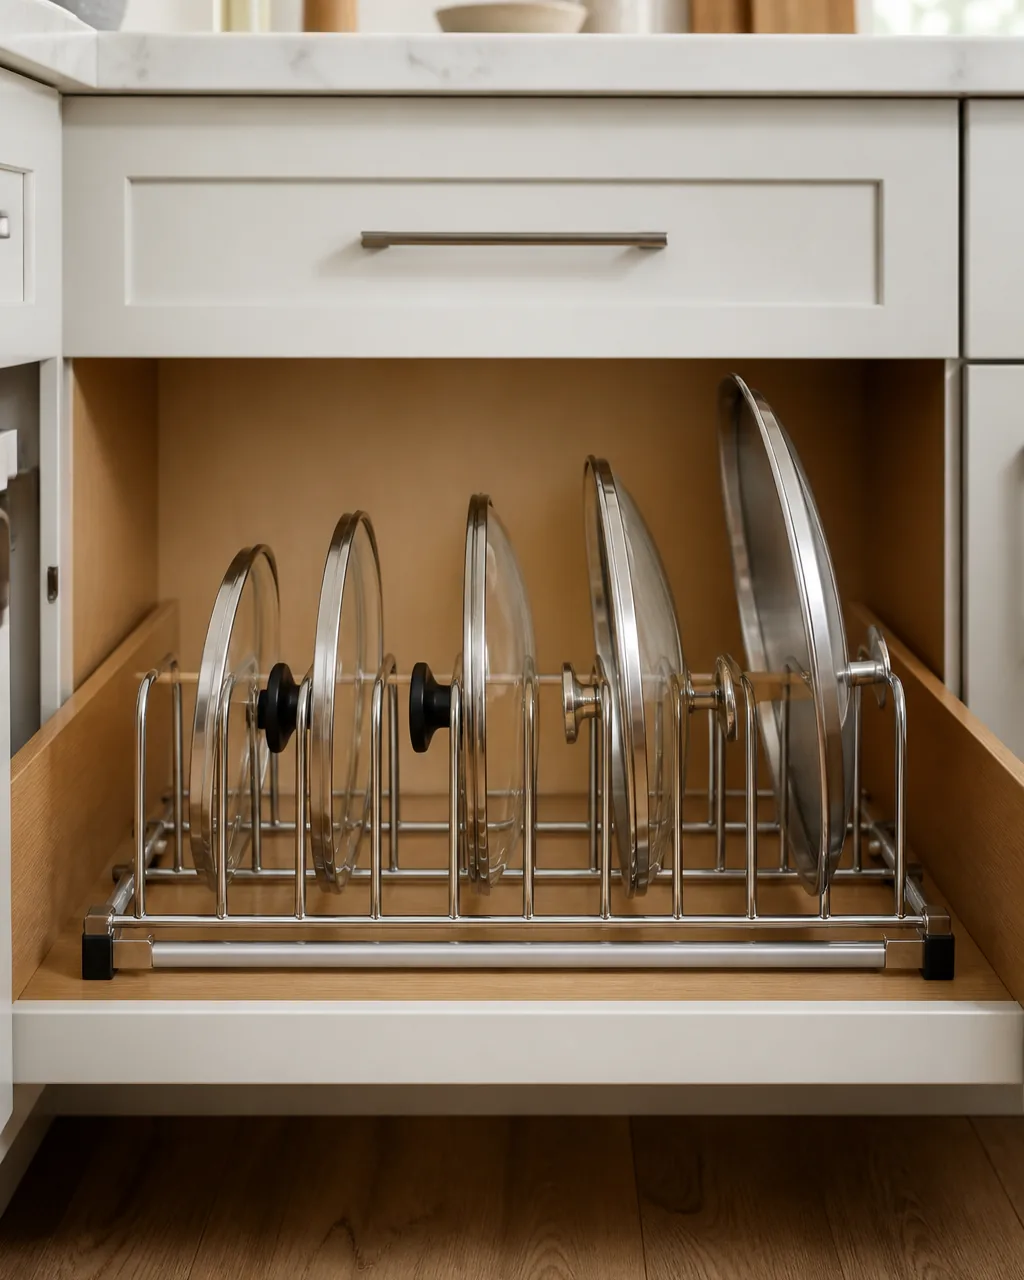
Stacking lids flat on top of pots turns every lid retrieval into a juggling act — lift one, the rest slide. A file-style rack with individual vertical slots holds each lid upright by its rim, and you pull exactly the size you need without disturbing the others. It is the single cheapest fix that prevents the most daily kitchen noise.
- Place the rack inside the cabinet door or in a deep drawer — wherever the pots live, their lids should be within arm's reach.
- Sort lids from smallest to largest so visual sizing is instant.
- Choose a rack with adjustable slot spacing if your lid sizes vary widely (a six-inch saucepan lid next to a twelve-inch stockpot lid).
- Attach rubber feet to the rack base to prevent it from sliding when you pull a lid out.
- Store lid knobs facing outward if the rack is door-mounted — you grab the knob, not the hot rim.
10. Cabinet Drawer Peg System
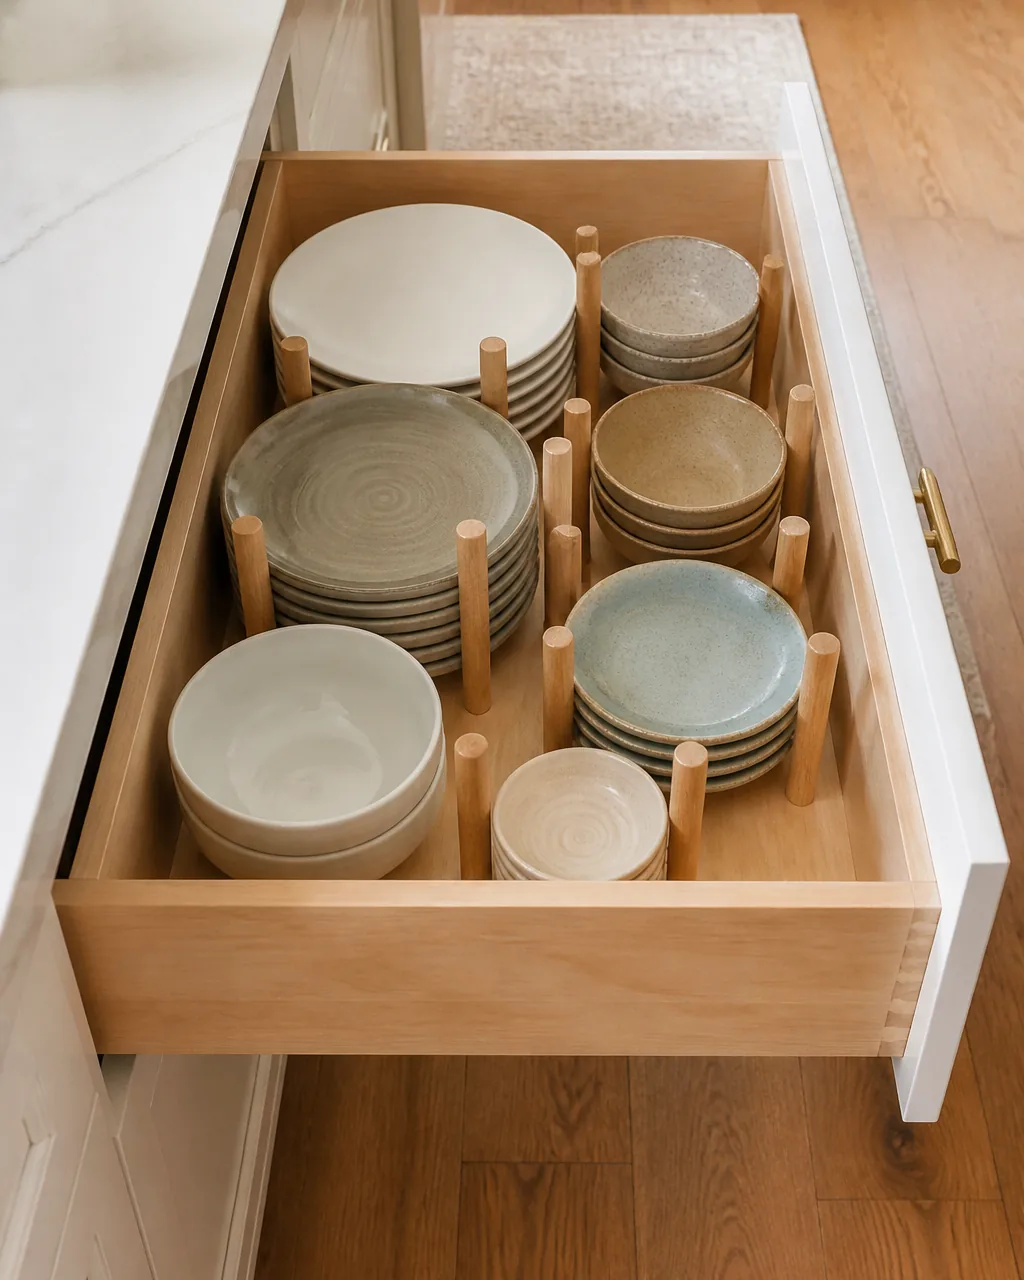
Standard plate stacks in upper cabinets demand two hands and careful lifting. A peg system in a lower drawer lets you slide plates in and out one at a time from a comfortable waist-height position. The pegs are adjustable, so when your dish collection changes, the layout changes with it — no new hardware needed.
- Space pegs half an inch wider than the plate diameter so dishes slide in without forcing.
- Place dinner plates in one section and salad plates in another — mixing sizes wastes the adjustable layout.
- Line the drawer bottom with a padded liner to absorb vibration and protect glazed finishes.
- Add a pair of pegs at the front edge to act as a stop — plates shift forward when you close the drawer hard.
- Drill new peg holes yourself with a quarter-inch bit if the factory grid does not match your dish sizes.
11. Roll-Out Recycling Bin Insert
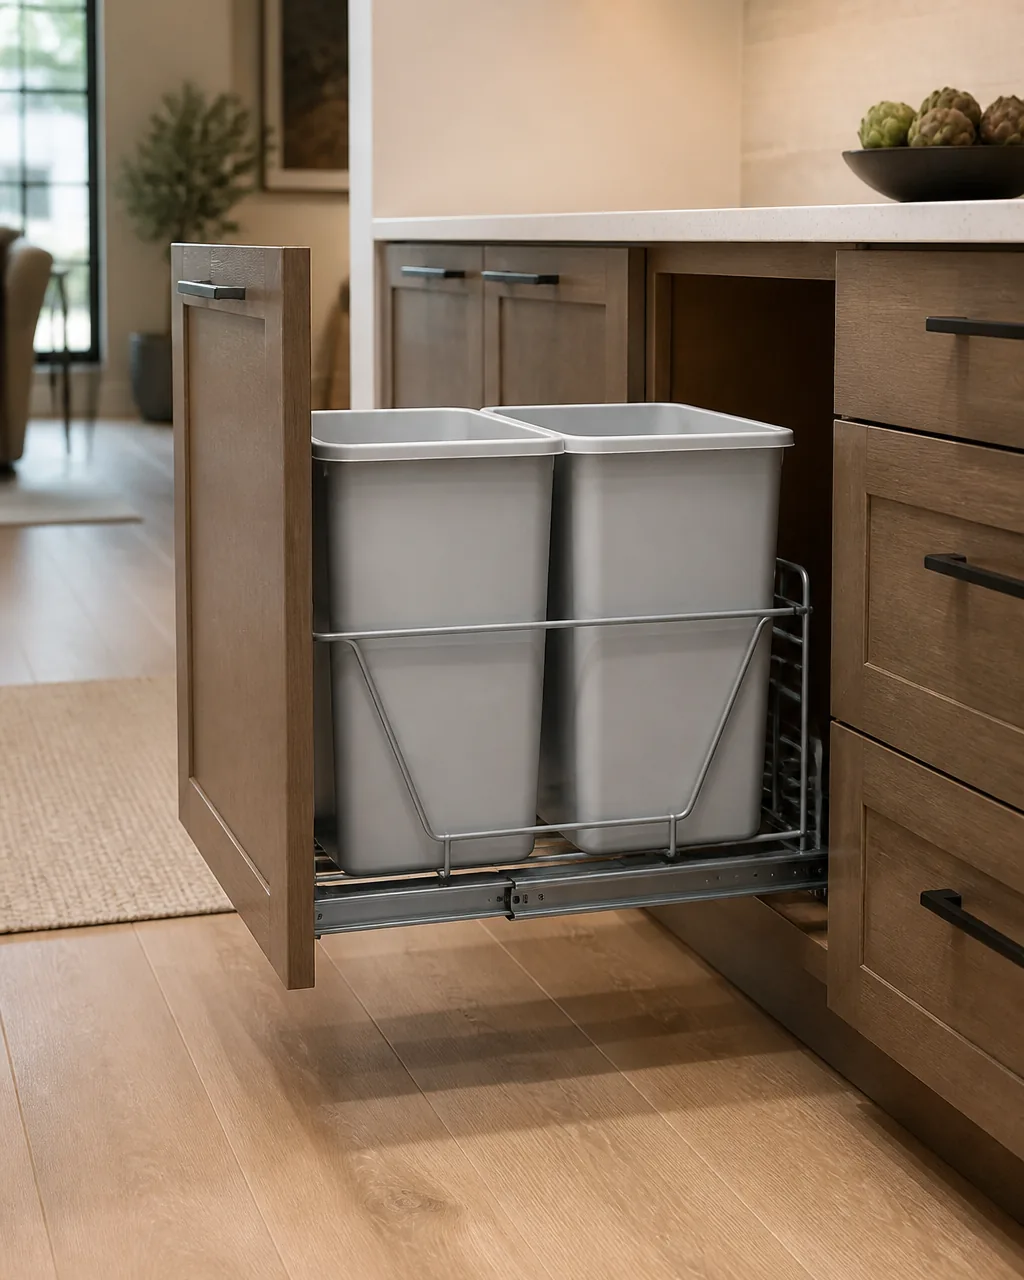
A freestanding trash can takes up floor space and breaks the visual line of a clean kitchen. A roll-out bin insert hides behind a cabinet door and separates recycling from trash in one motion — open the door, the bins slide forward on rails, and everything stays hidden when you close up. Most inserts hold two or three bins and fit a standard twenty-four-inch base cabinet.
- Pick a frame that holds standard bin sizes you can replace at any hardware store — proprietary shapes mean expensive refills.
- Mount the slide rails to the cabinet floor, not the shelf, so the frame sits as low as possible for maximum bin height.
- Line the cabinet floor under the bins with a waterproof tray to catch drips from recycling liquids.
- Label each bin slot on the inside of the cabinet door so every household member sorts consistently.
- Leave one bin for compost scraps if your municipality offers curbside composting — three-bin frames handle this cleanly.
12. Under-Sink Tension Rod
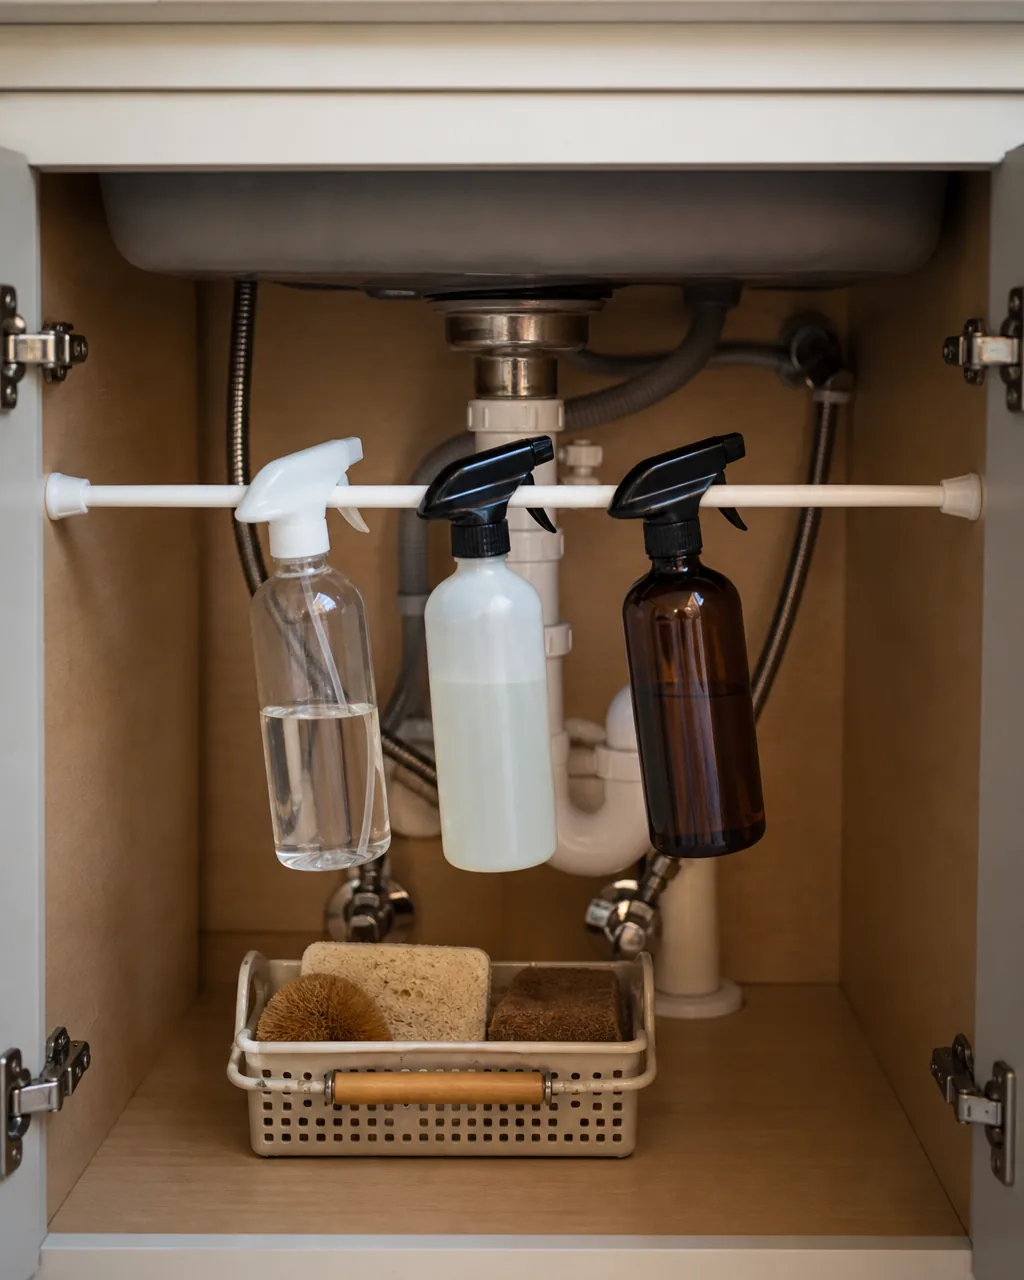
Under-sink cabinets are the most awkward shape in the kitchen — pipes eat the center, and everything slides to the back corners. A spring tension rod stretched between the side walls lifts spray bottles off the floor by their trigger necks, clearing the entire bottom for a caddy of sponges, a dish soap refill, and a roll of trash bags. It works around the pipes instead of fighting them.
- Set the rod high enough that bottles hang without touching the cabinet floor but low enough to clear the pipe behind them.
- Hang bottles by the trigger handle, not the body — the trigger hook is stronger and keeps the nozzle accessible.
- Limit the rod to three or four bottles; too many crowd each other and make removal awkward.
- Use a second, lower rod if you have the height — one for spray bottles, one for hanging hand towels or gloves to dry.
- Check rod tension monthly; humidity near the sink can cause rubber end caps to lose grip on laminate walls.
13. Magnetic Knife Strip Inside Door
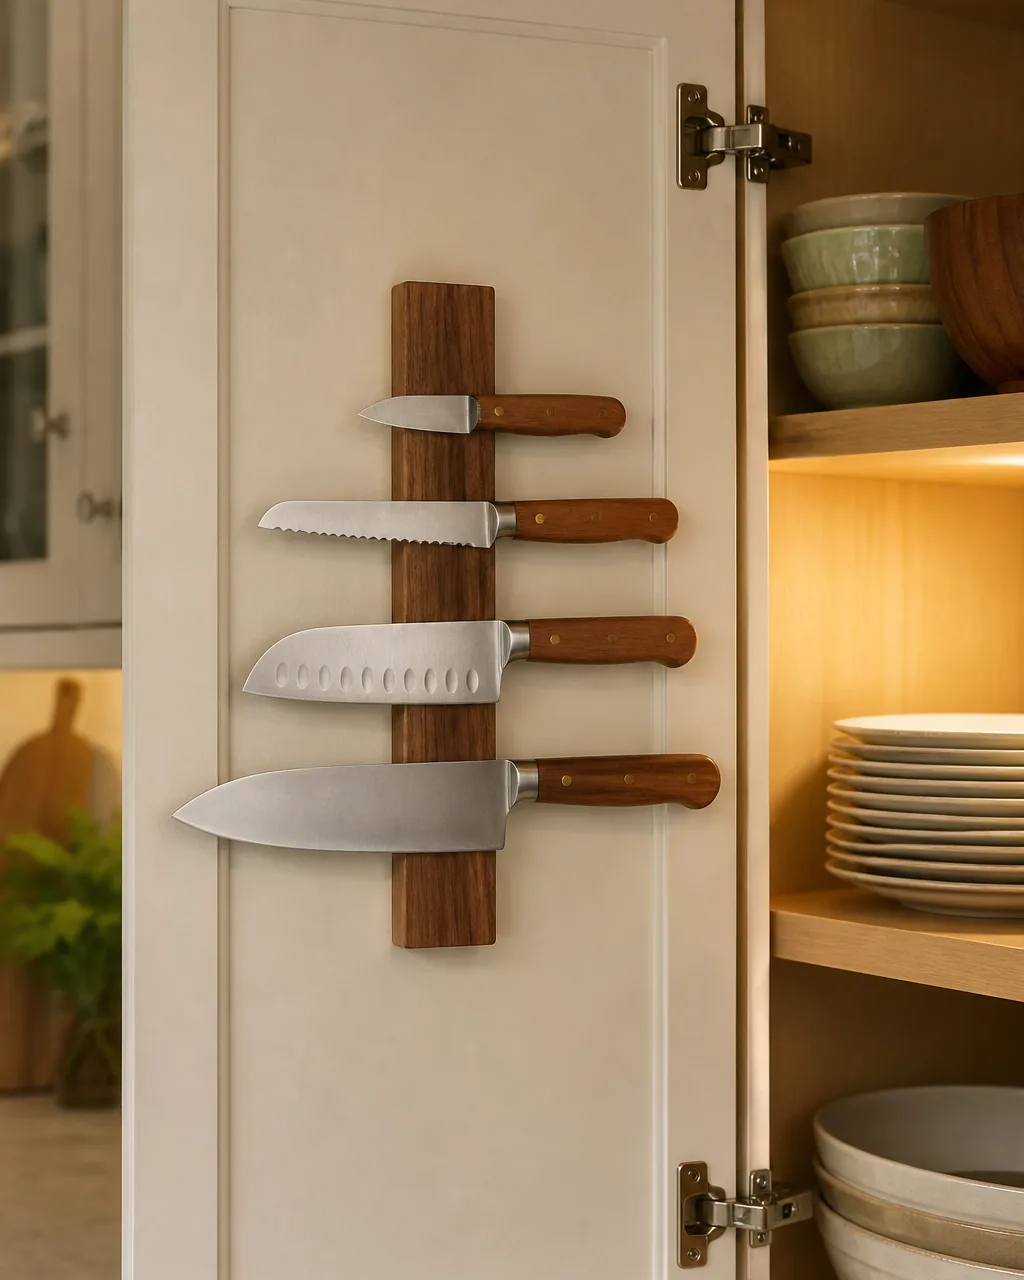
A countertop knife block occupies a full six inches of prep space and collects crumbs in every slot. Mounting a magnetic strip on the inside of a cabinet door hides the blades, frees the counter, and keeps edges from dulling against each other in a drawer. The strip holds its position with two screws, and every knife is visible the moment you open the door.
- Mount the strip vertically on the door so blades point downward and handles face outward for a safe grab.
- Choose a strip with a wood cover over the magnets — exposed metal scratches blade faces over time.
- Test magnet strength before loading all knives; a weak strip holding a heavy chef's knife above a countertop is a safety risk.
- Leave an inch between the strip and the door edge so the knives clear the cabinet frame when closing.
- Wipe the magnetic surface after each use — blade residue builds up and weakens the hold gradually.
14. Clear Bin Grouping
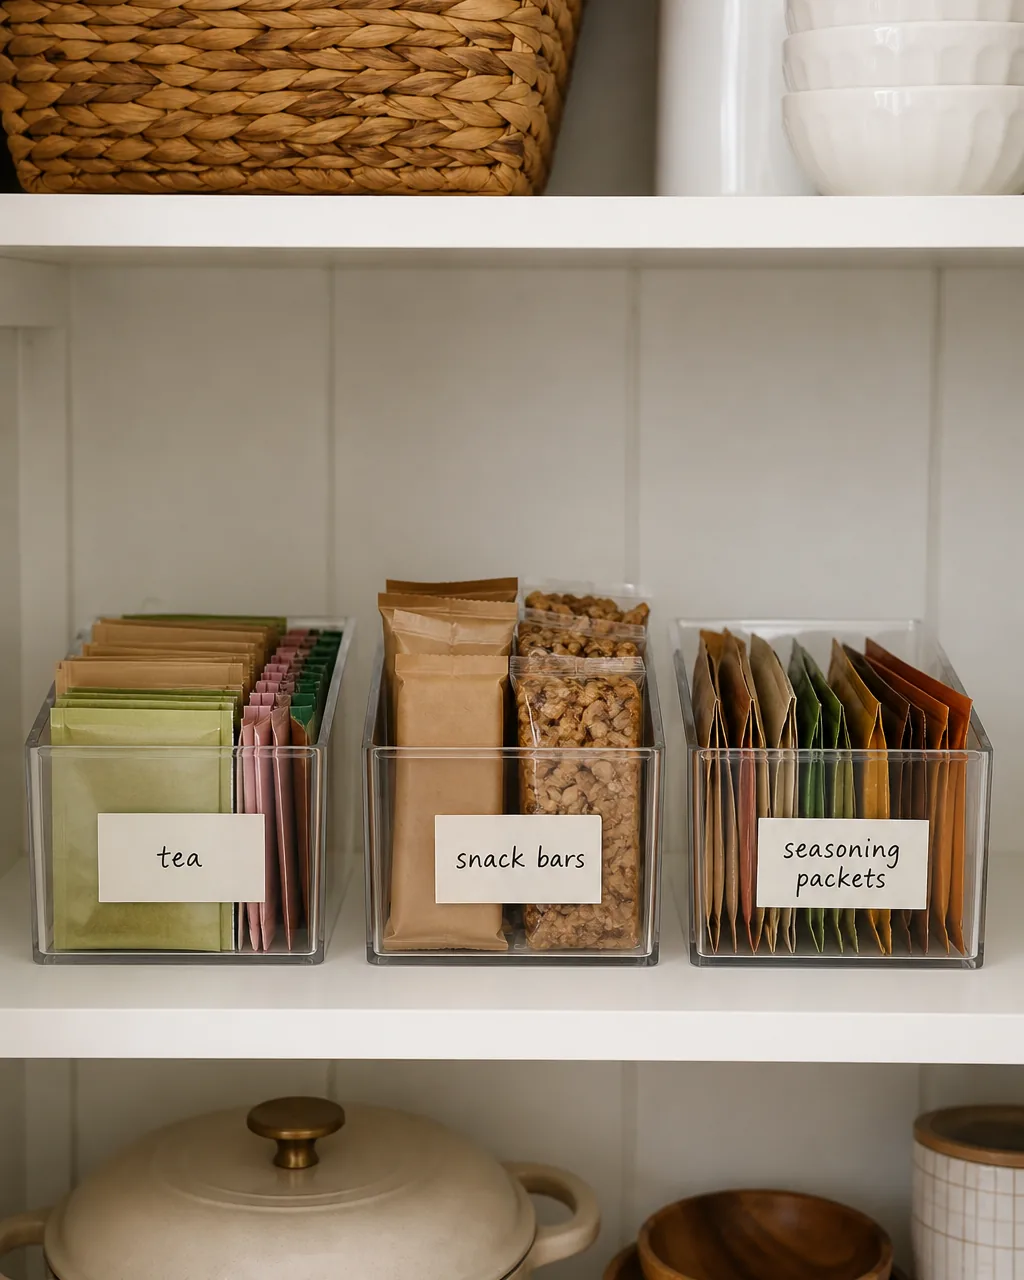
Loose packets — tea bags, seasoning envelopes, instant oatmeal, snack bars — scatter across a shelf the moment you reach for one. Clear acrylic bins corral each category into a single container you can pull out, scan, and push back. The transparency matters: opaque bins require memory, and memory fails on the third week.
- Use bins with a front handle or a lip you can grip — smooth-sided bins are hard to pull out of deep cabinets.
- Label the front face, not the top, if the shelf is at eye level or above.
- Size each bin to the category volume — a full bin looks intentional, a half-empty bin looks like you ran out.
- Stand packets upright like files instead of stacking flat so you can read each label without digging.
- Commit to one bin per loose category and if the category outgrows the bin, split it into two rather than overflowing into a pile.
- 1. Pull-out drawer inserts
- 2. Cabinet door spice rack
- 3. Stackable shelf risers
- 4. Lazy Susan turntable
- 5. Under-shelf hanging baskets
- 6. Vertical tray dividers
- 7. Tiered can organizer
- 8. Pull-down shelf system
- 9. Lid organizer rack
- 10. Cabinet drawer peg system
- 11. Roll-out recycling bin insert
- 12. Under-sink tension rod
- 13. Magnetic knife strip inside door
- 14. Clear bin grouping
- 15. Corner cabinet swing-out trays
- 16. Adjustable shelf pin reset
15. Corner Cabinet Swing-Out Trays
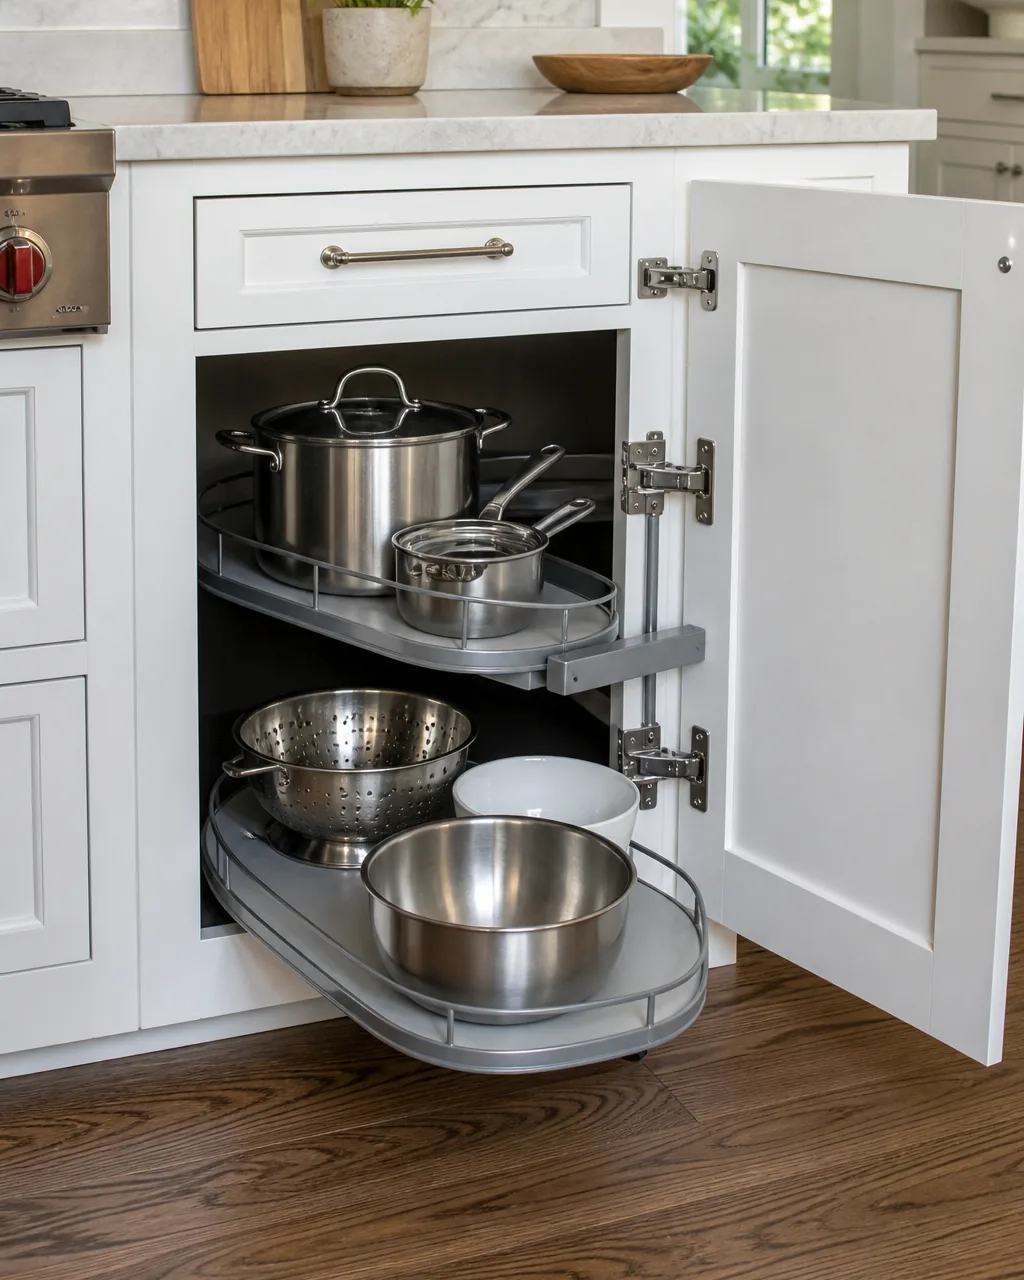
Blind corner cabinets are where kitchen items go to be forgotten — the back half is unreachable without lying on the floor. Swing-out trays mount on hinged arms attached to the door and pivot the shelf contents completely outside the cabinet when opened. Two tiers double the capacity, and the door-mounted linkage means everything swings out in one motion.
- Confirm the tray swing radius does not collide with adjacent cabinets or appliances when fully extended.
- Store daily-use items on the upper tray and heavier occasional items (stock pot, dutch oven) on the lower one.
- Avoid overloading the door-mounted arm — check the manufacturer's weight limit and stay under it by ten percent.
- Tighten the hinge screws every six months; repeated swing-out motion loosens them gradually.
- Place a rubber mat on each tray surface to prevent bowls from sliding forward during the pivot.
16. Adjustable Shelf Pin Reset
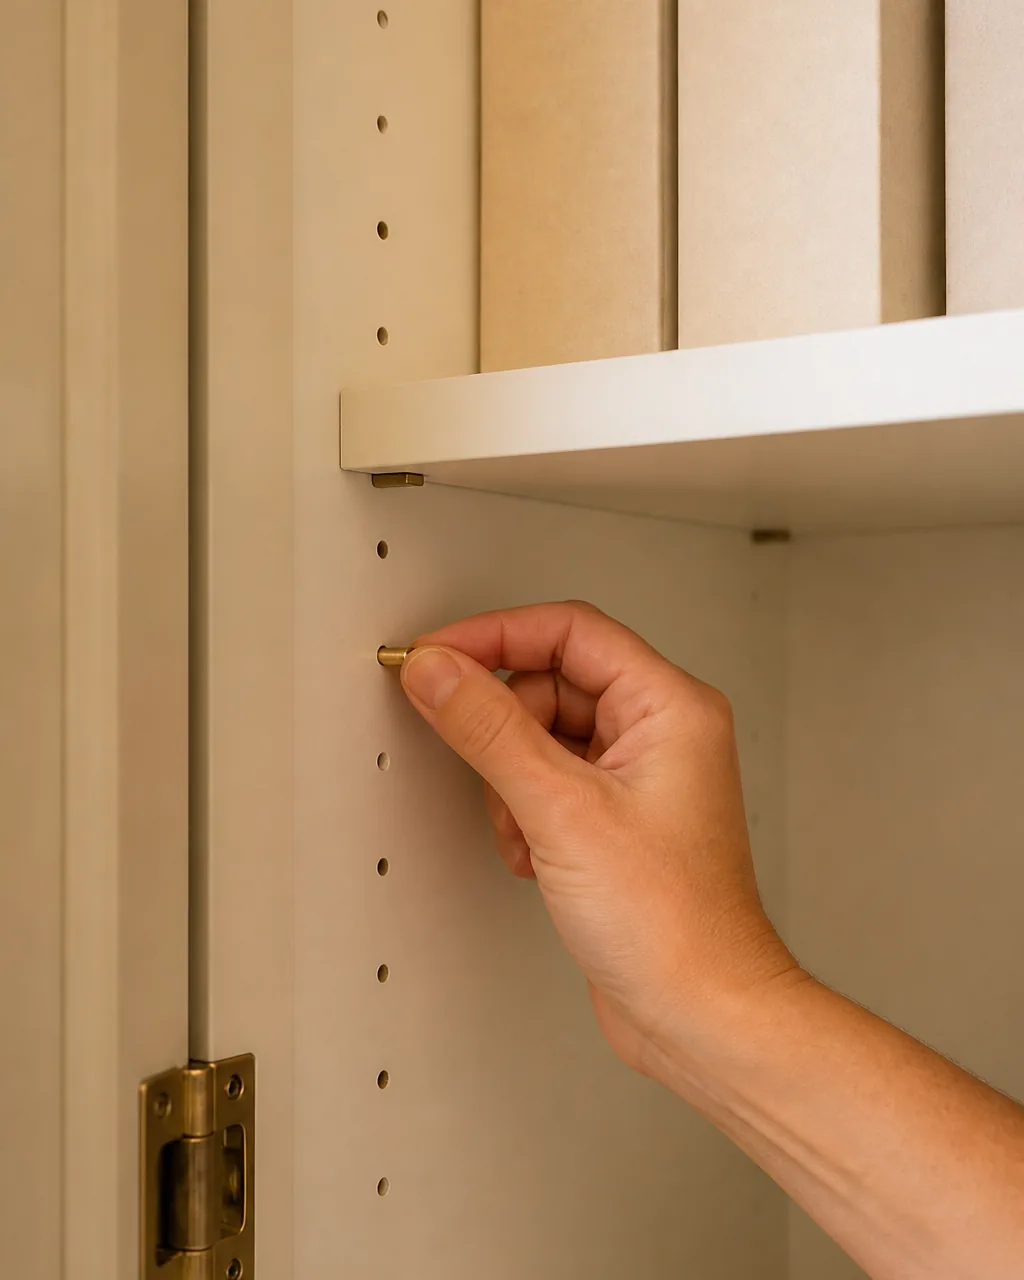
Factory shelf pins sit at heights chosen by the cabinet manufacturer, not by the person storing cereal boxes and wine glasses in the same column. Moving the pins to custom heights costs nothing, takes five minutes per cabinet, and eliminates the wasted air above short items and the clearance squeeze under tall ones. It is the only upgrade on this list that uses hardware you already own.
- Pull out all four pins, stack your tallest items on the shelf below, and move the shelf to one inch above their tops.
- Use the same hole column on each side wall — skipping a hole on one side tilts the shelf.
- Replace any missing or bent pins with the same diameter before resetting; most cabinets use 5mm brass pegs.
- If you cannot reach the back pins with your fingers, press them in with the eraser end of a pencil.
- Revisit pin placement once a year — what you store changes, and the spacing should follow.
Cabinet storage is not about buying more cabinets. It is about making the ones you already have work in three dimensions instead of two. Start with the idea that matches your most frustrating cabinet, test it for a week, and then move to the next.
For the space between your cabinets, kitchen countertop organization ideas covers the surface. If your cabinets are part of a tight layout, small kitchen organization ideas focuses on kitchens where every inch has to earn its keep.
When you have the cabinet interiors sorted and want to think about how everything looks together, kitchen aesthetic ideas bridges function and style.