11 Kitchen Utensil Organization Ideas That Keep Every Spatula Off the Counter
Kitchen utensil clutter lives right where you cook, and it is the first mess anyone notices. A counter crowded with spatulas, whisks, and wooden spoons signals a kitchen that has outgrown its storage, even when the cabinets still have room.
The fix is not buying more drawer organizers. It is deciding which tools belong at the flame, which belong in the drawer, and which go inside a cabinet door. Once each utensil has a home based on how often you reach for it, the counter clears itself.
These eleven ideas cover the full range: countertop crocks for daily tools, backsplash rails for arm's-reach access, drawer zoning for the utensils you grab less often, and top-shelf bins for seasonal gadgets.
1. Stand Daily Spatulas in a Weighted Stoneware Crock Next to the Stove
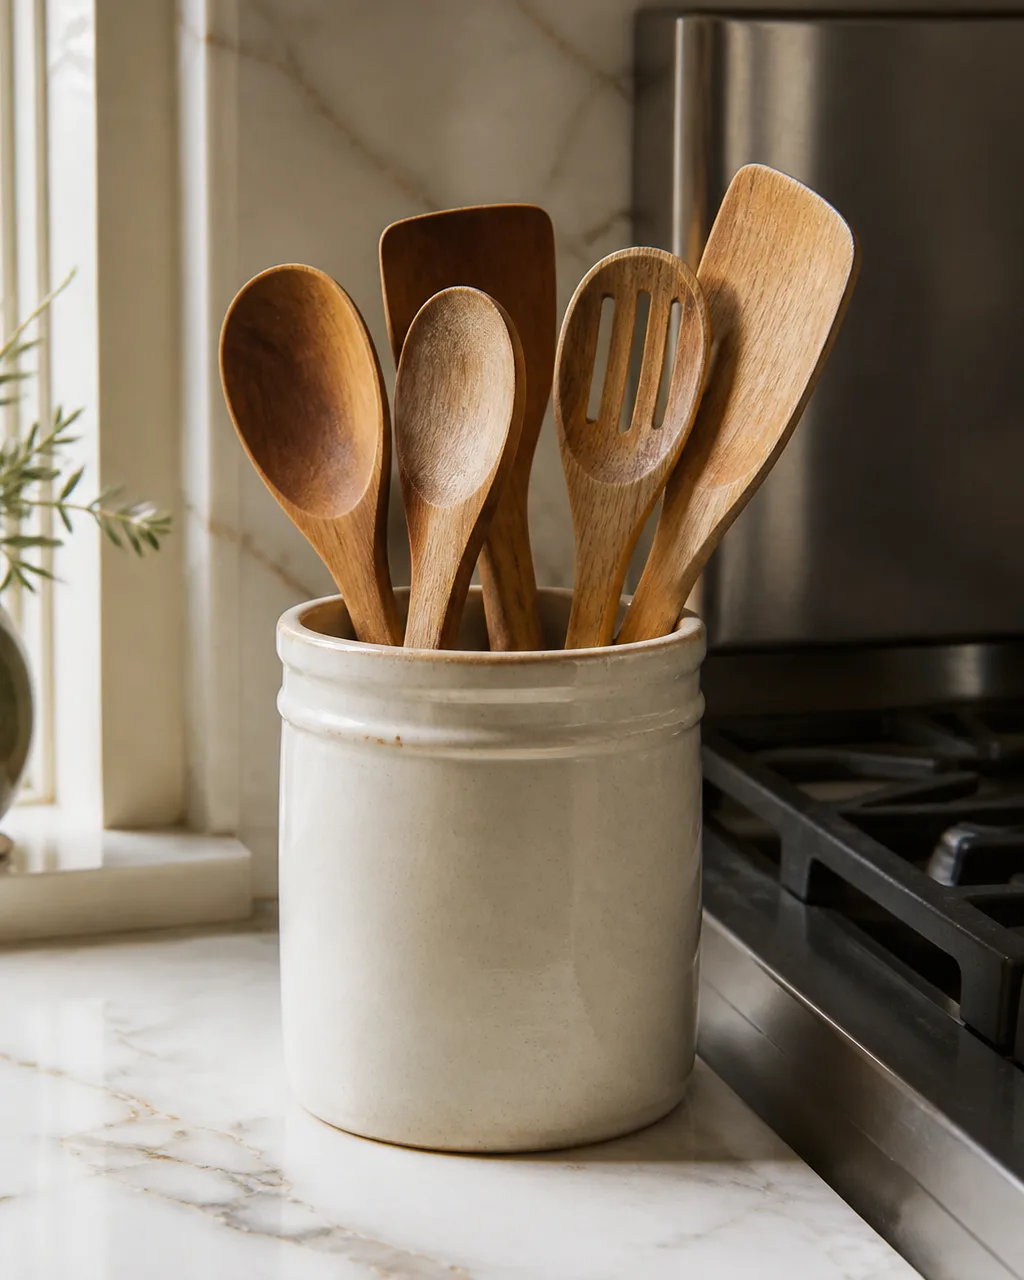
A heavy stoneware crock anchors itself on the counter without sliding when you yank out a spatula one-handed. The wide mouth lets you see every handle at a glance, and the unglazed base means a stray drip of oil wicks into the clay instead of pooling into a ring on the counter.
- Choose a crock that weighs at least two pounds empty so it does not tip when you pull the tallest spoon
- Keep only five or six daily-use tools in the crock; more than that and handles tangle
- A wide-mouth crock (four inches across or wider) prevents the cluster of handles that makes grabbing one tool a two-handed job
- Place the crock on the counter between your stove and prep area, not against the wall behind the faucet
- Wipe the inside rim monthly; cooking grease collects where handles rest against the lip
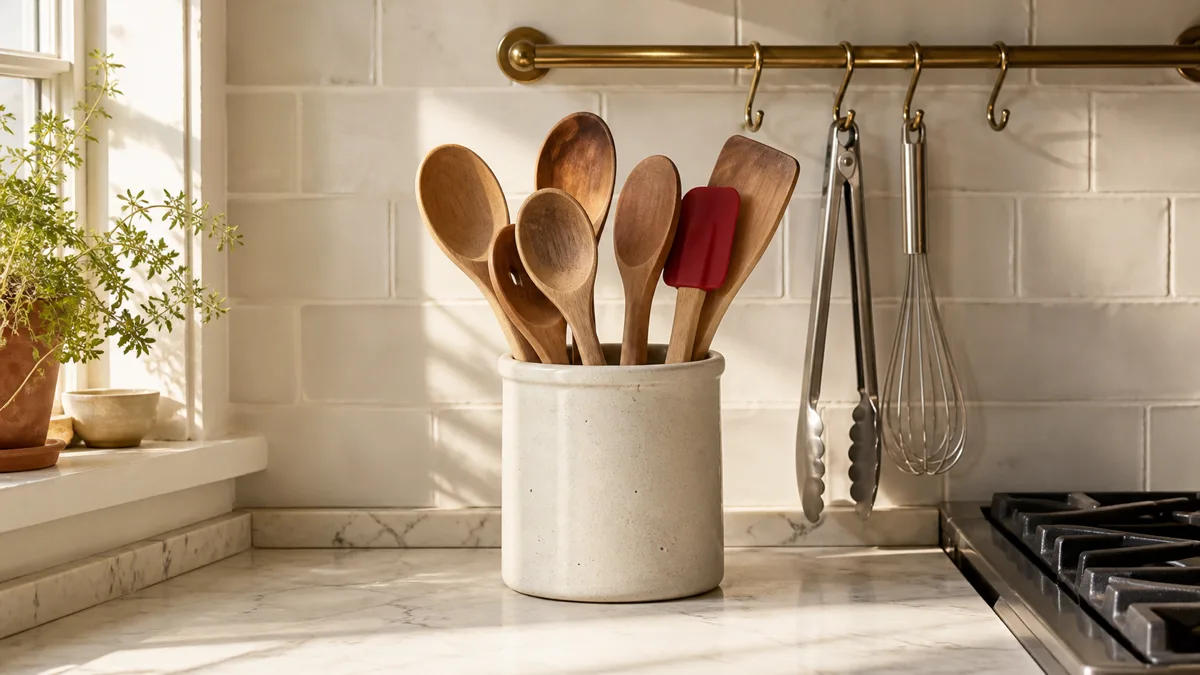
2. Hang a Short Utensil Rail on the Backsplash Between the Stove and Prep Area
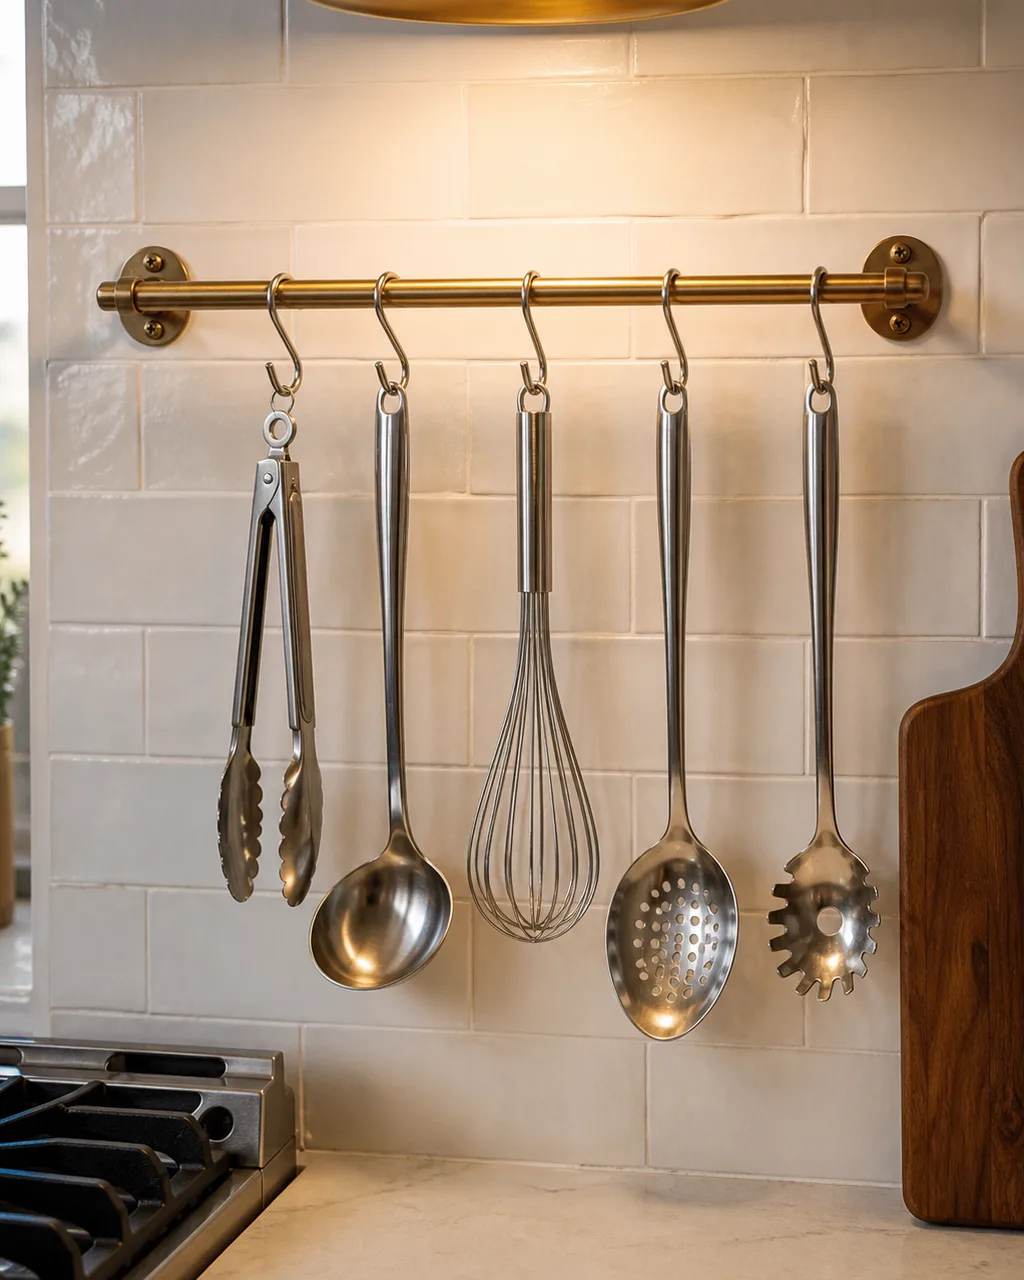
S-hooks on a twenty-inch rail keep tongs, ladles, and whisks in plain sight and within arm's reach while you cook. The rail's short length forces you to curate: five hooks, five tools, nothing extra. A longer rail invites hoarding and ends up looking like a garage pegboard.
- Mount the rail four to six inches above the countertop so handles hang clear of the surface
- Brushed brass or matte black rails blend into most tile and stay looking clean longer than chrome
- Use thick S-hooks (3mm wire or thicker) that grip the rail without swaying every time you bump the counter
- Arrange tools by reach frequency: tongs and spatula closest to the stove, whisk and ladle farther out
- Drill into a stud or use heavy-duty tile anchors; the combined weight of five metal tools pulls harder than you expect
3. Sort Drawer Utensils Into Three Zones: Flip, Stir, and Serve
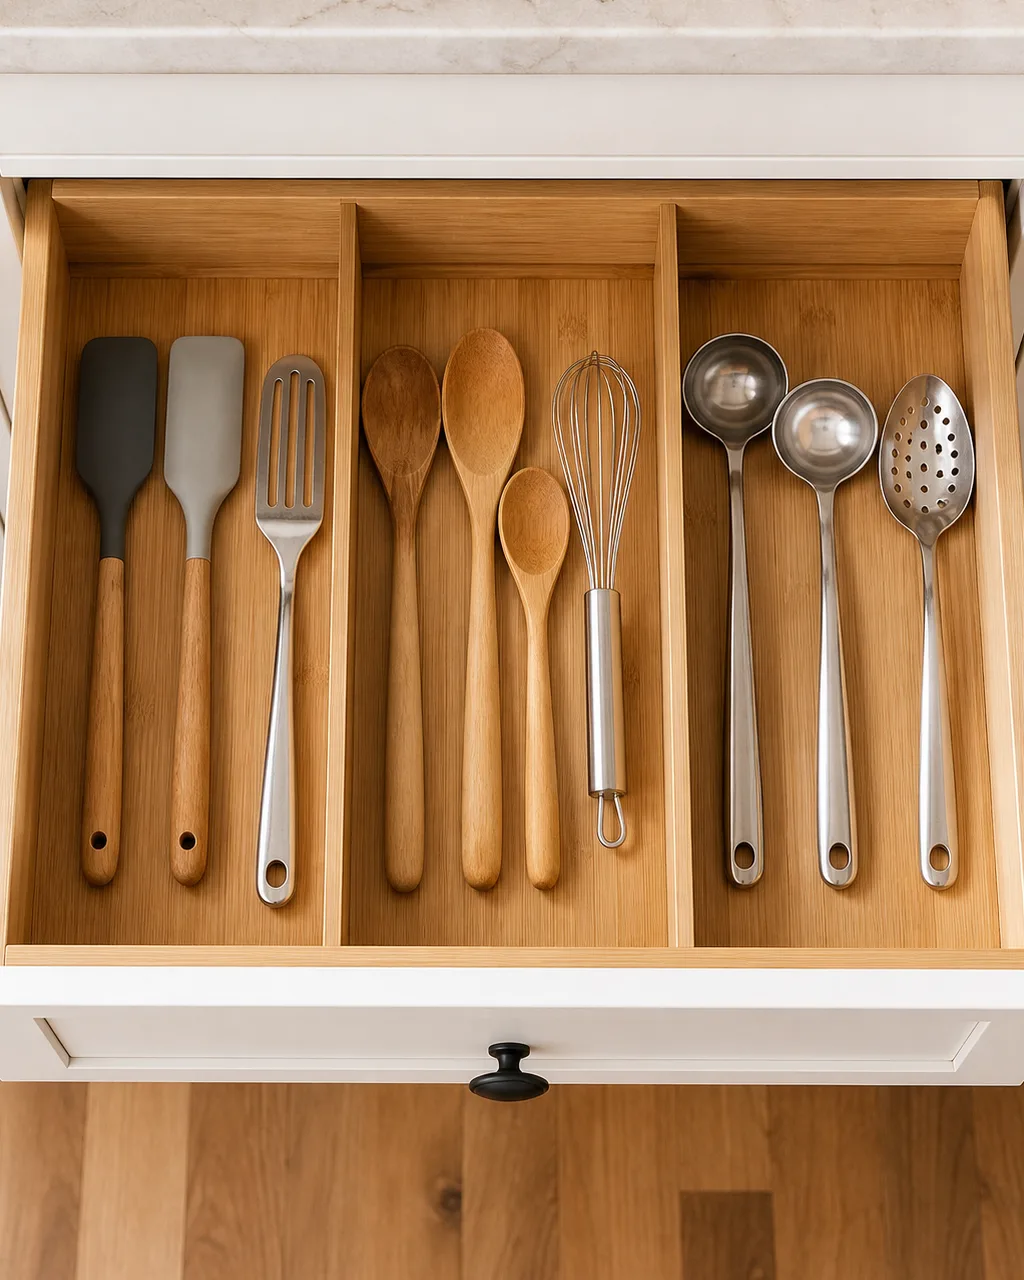
Task-based grouping means one grab per action instead of rummaging through a mixed pile. Flip tools — spatulas, turners, fish slicers — live on the left. Stir tools — wooden spoons, whisks, silicone scrapers — sit in the center. Serve tools — ladles, slotted spoons, pasta forks — go on the right. When a recipe says "stir," your hand goes to the center without thinking.
- Bamboo dividers let you adjust zone widths as your tool collection changes
- The flip zone is usually the narrowest because turners are flat and stack well
- The stir zone needs the most width since whisks and wooden spoons are bulky
- Put a non-slip liner under each divider so the zones do not shift when you open the drawer hard
- If you also need a full drawer organizing system, that guide covers every drawer in the kitchen
4. Store Long-Handled Tools Horizontally in a Shallow Wall-Mounted Tray
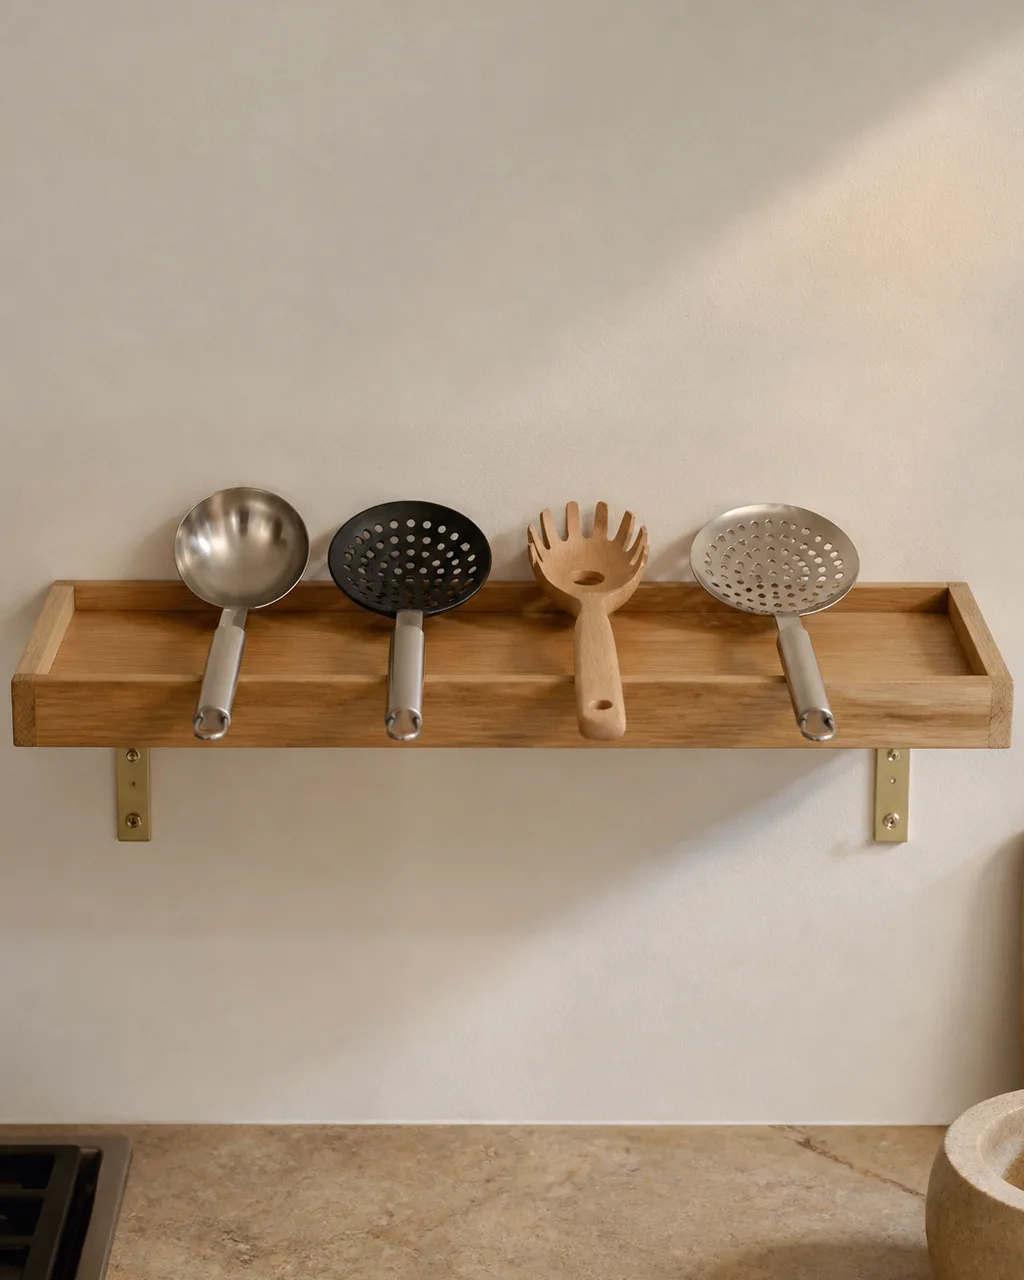
A narrow floating tray bolted to the wall keeps ladles and slotted spoons visible without eating counter space. Mount it between eye level and the bottom of the range hood so you can see and grab without bending or stretching.
- The tray should be two to three inches deep — enough to cradle a ladle handle but shallow enough that tools do not roll around
- Light oak or walnut matches most kitchen finishes and ages gracefully near cooking heat
- Use two L-brackets per tray for stability; the combined weight of four metal tools pulls harder than a single floating shelf anchor expects
- Arrange tools with handles facing the same direction so you grab consistently
- This spot works for the utensils too long for a standard kitchen drawer — pasta forks, slotted spoons, and skimmers
5. Put Heat-Safe Silicone Tools in a Canister Right on the Stovetop Apron
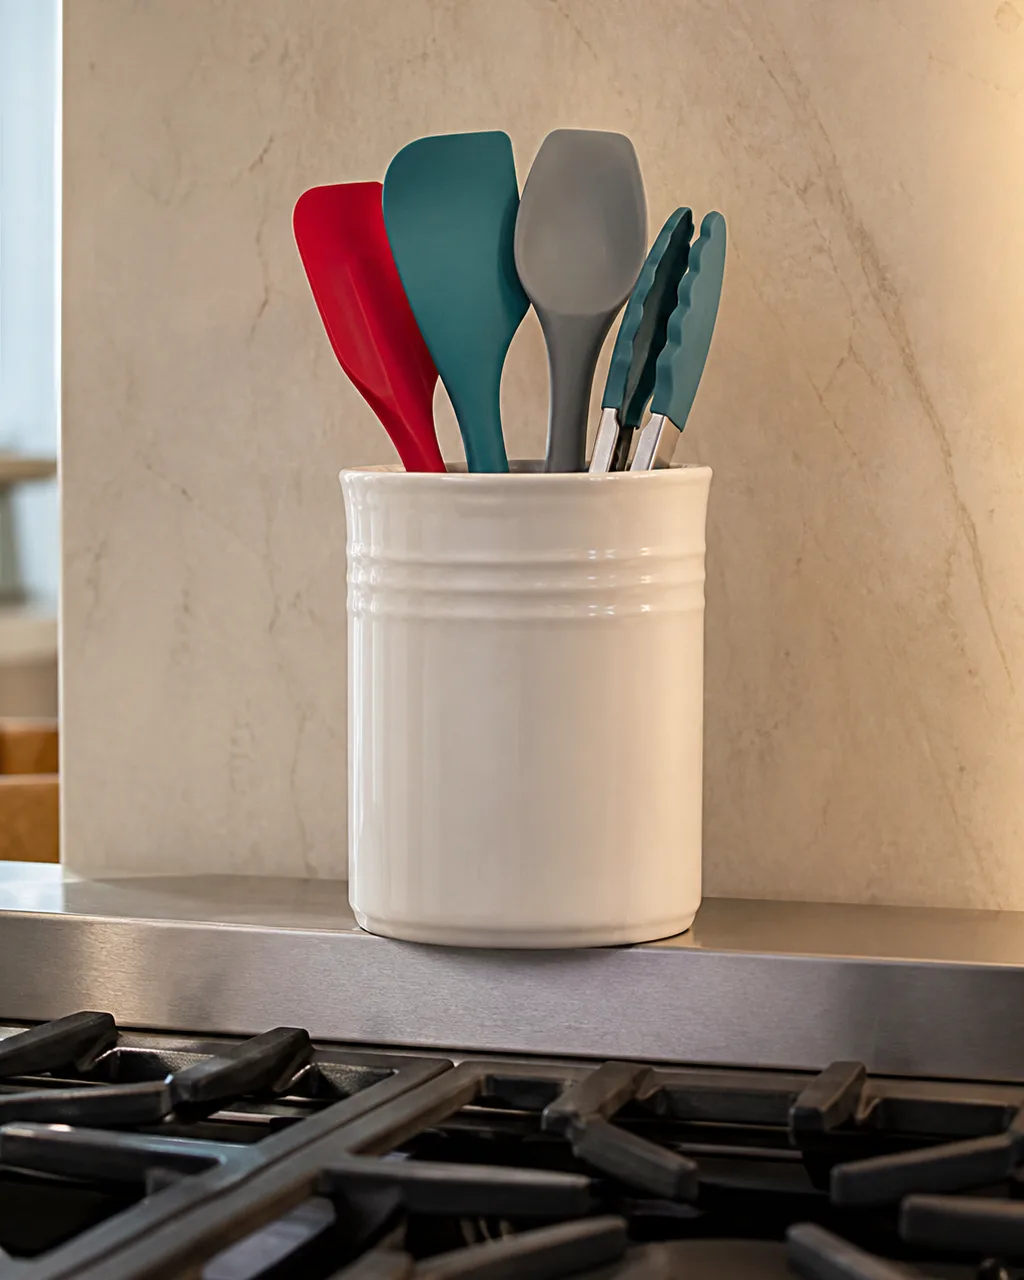
The tools you reach for mid-flame live at the flame. Silicone spatulas and nylon tongs withstand the ambient heat near burners, so they belong in a ceramic canister on the stainless apron behind the grates. Metal and wood tools go in the drawer where repeated heat cycling near the stove will not warp the wood or discolor the finish.
- Use a ceramic canister (not plastic) because radiant heat from a hot pan can soften plastic over time
- Limit the canister to three or four silicone tools so you can pull one without knocking the rest over
- Place the canister on the flat apron behind the burner grates, not on the grate itself
- Wipe the canister weekly; grease splatter from the stove coats the outside fast
- If your stove has no flat apron, a small magnetic shelf on the side panel serves the same role
6. Clip Rarely Used Gadgets to the Inside of a Cabinet Door
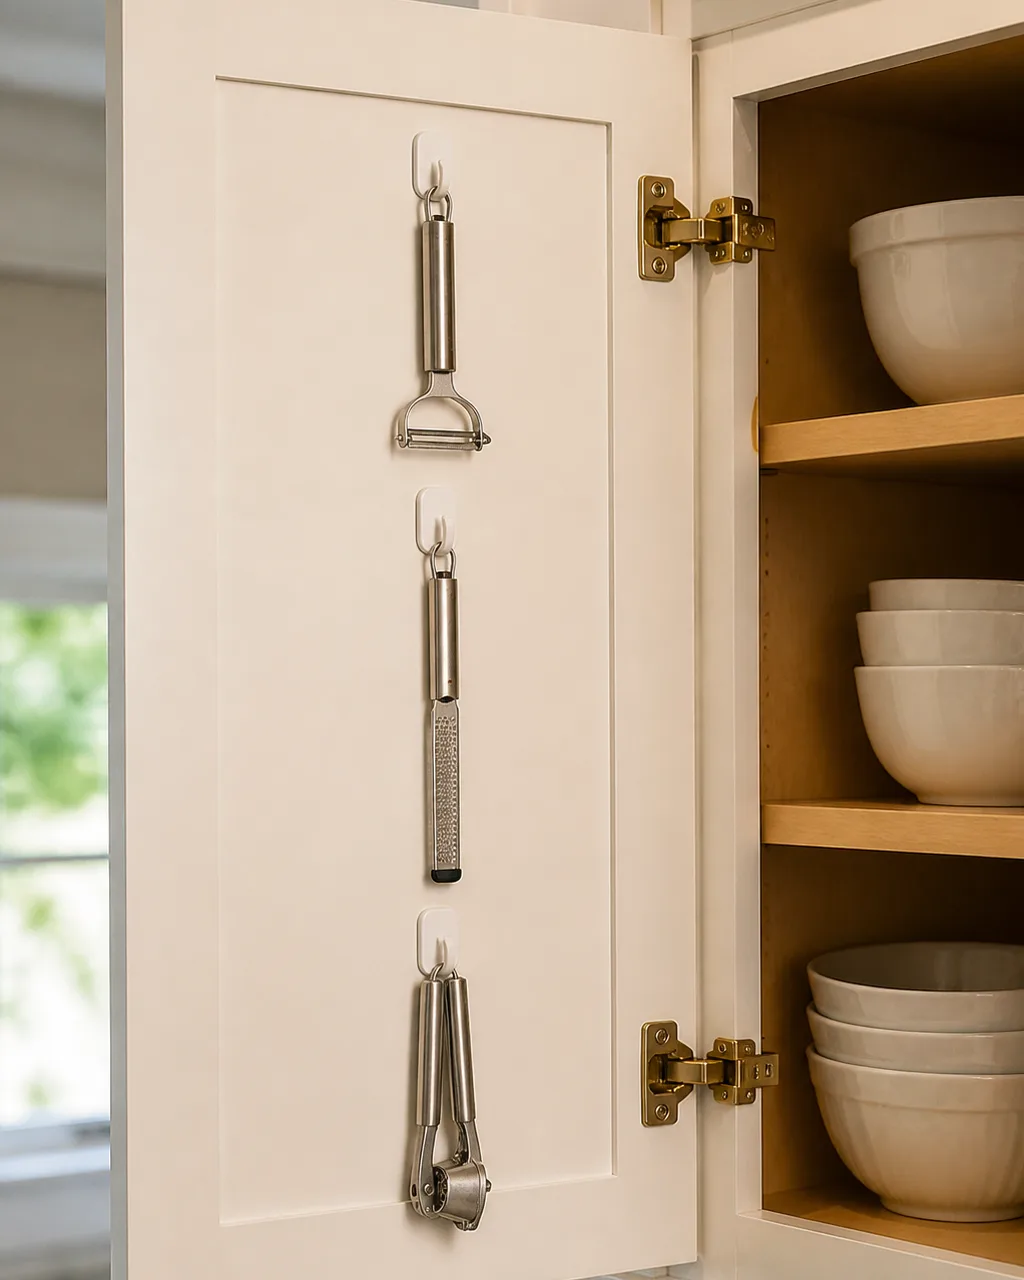
Adhesive command hooks or a clip strip on the door interior hold peelers, zesters, and garlic presses. These are weekly-use tools that do not deserve prime drawer real estate. Clipping them to the inside of a door keeps them visible the moment you open the cabinet, but completely hidden when the door is closed.
- Use removable adhesive hooks so you can reposition without damaging the door finish
- Space hooks vertically with three inches between each so tools do not overlap
- Only clip tools that weigh under half a pound; heavier gadgets pull hooks off the door over time
- Group by prep task: peeler, zester, and grater together on one door; can opener and bottle opener on another
- This frees drawer slots for the daily-use spatulas and spoons that need one-grab access while cooking
7. Nest Measuring Cups and Spoons on a Single Carabiner in the Baking Drawer
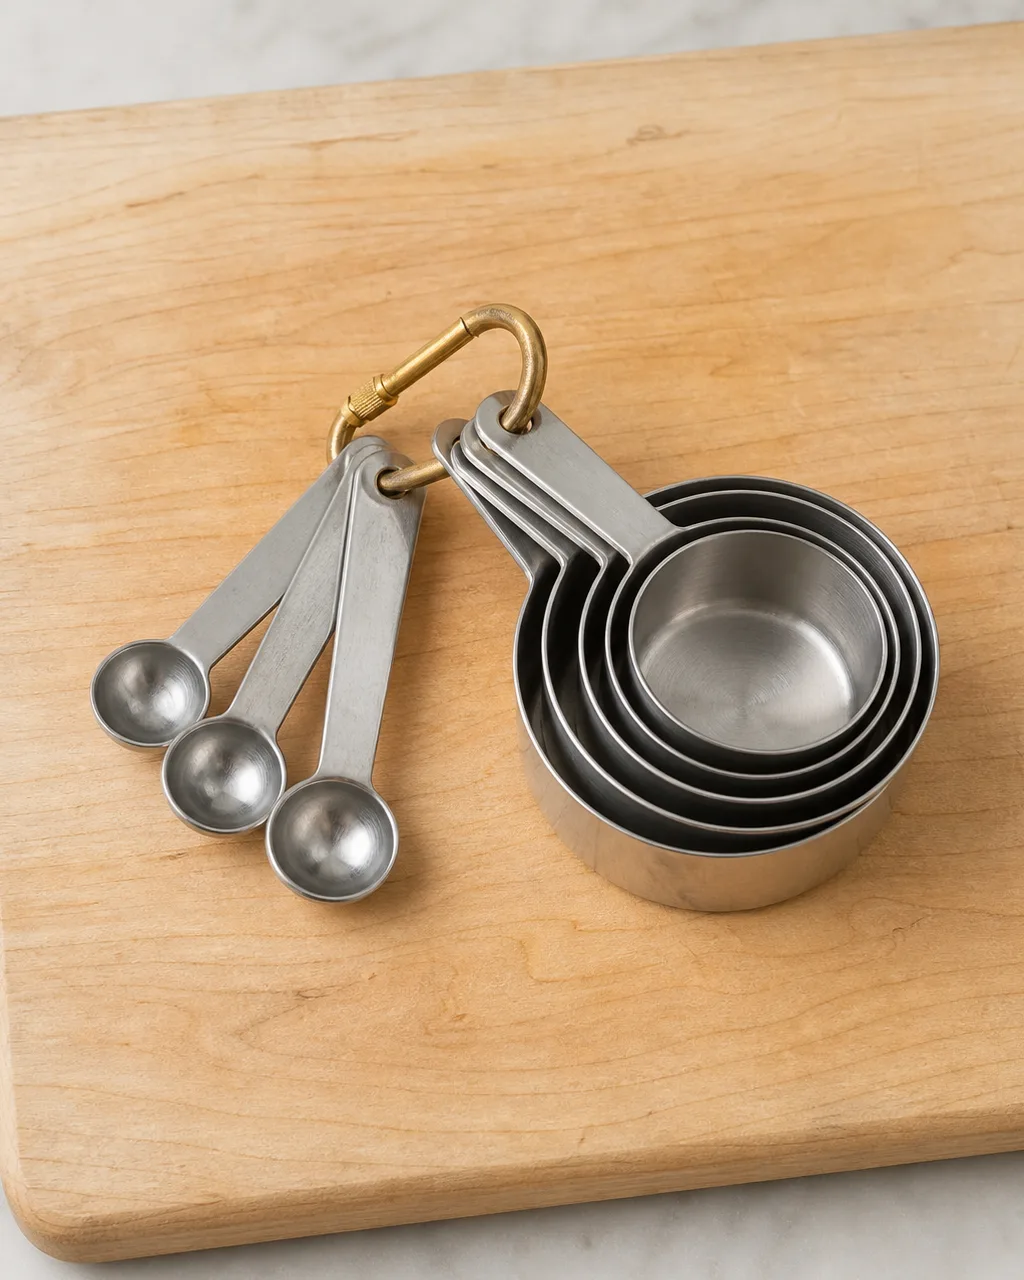
One carabiner clip keeps the full set together. Pull the whole ring out when a recipe calls for measuring, hang it back on its hook after washing. The missing quarter-teaspoon problem disappears because the set never separates.
- A small brass or stainless carabiner (two-inch gate) fits through most measuring cup handles
- Nest the cups largest to smallest so the set lays flat in the drawer without rocking
- Spoons clip onto the same ring or a second smaller ring attached to the first
- Hang the carabiner on a hook inside the baking supplies drawer so it does not slide to the back
- After washing, clip everything back on before it dries; loose pieces that sit on the counter never make it back to the ring
8. Roll Silicone Mats and Trivets Into a Vertical File Holder Under the Counter
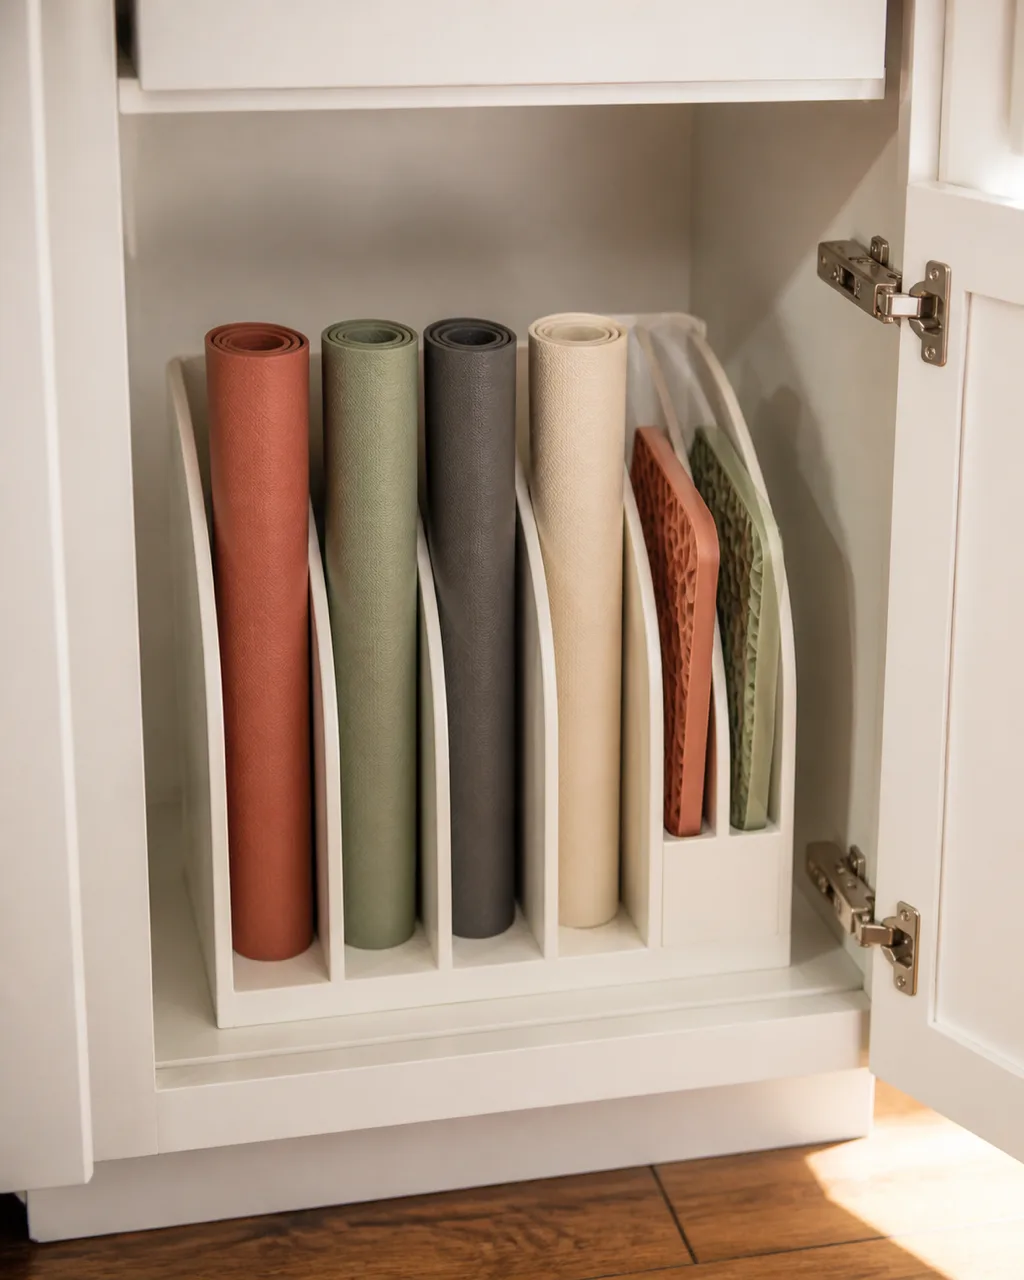
Silicone baking mats and trivets unroll flat for use and file back upright into a standard office file sorter. No more flat stack that slides around every time you open the cabinet door. The sorter slots keep each mat separated so you pull one without disturbing the rest.
- A standard letter-size desktop file sorter (twelve inches wide) fits inside most lower cabinets
- Roll each mat loosely; tight rolls spring open and pop out of the slot
- Place the file sorter near the oven since baking mats are always grabbed on the way to the sheet pan
- Trivets file next to the mats; they are the same flexible material and the same grab-and-go pattern
- If your cabinet is too shallow for a standing sorter, lay it on its side and slide mats in horizontally
11 kitchen utensil ideas at a glance
- 1Stoneware CrockHeavy crock by the stove holds daily spatulas upright and one-hand accessible.
- 2Backsplash RailA short brass rail with S-hooks keeps tongs and ladles visible without counter clutter.
- 3Three-Zone DrawerFlip, stir, serve: one grab per cooking action instead of rummaging.
- 4Wall-Mounted TrayLong-handled tools lay horizontal on a floating tray, visible but off the counter.
- 5Stovetop CanisterSilicone tools live at the flame in a heat-safe ceramic canister.
- 6Cabinet Door ClipsPeelers and zesters hang inside the door, freeing drawer slots for daily tools.
- 7Carabiner Measuring SetOne clip keeps cups and spoons together so the quarter-teaspoon never goes missing.
- 8Silicone Mat File HolderRolled mats stand upright in a file sorter inside the cabinet.
- 9Magnetic Drawer BarMetal tools lay flat on a hidden magnet strip so the drawer closes flush.
- 10Mason Jar Spoon DisplayOne jar per spoon type on a shelf reads as display, not clutter.
- 11Seasonal Tool BinCookie cutters and corn holders leave the prime drawer until their season.
9. Mount a Magnetic Bar Inside a Drawer for Metal Whisks and Tongs
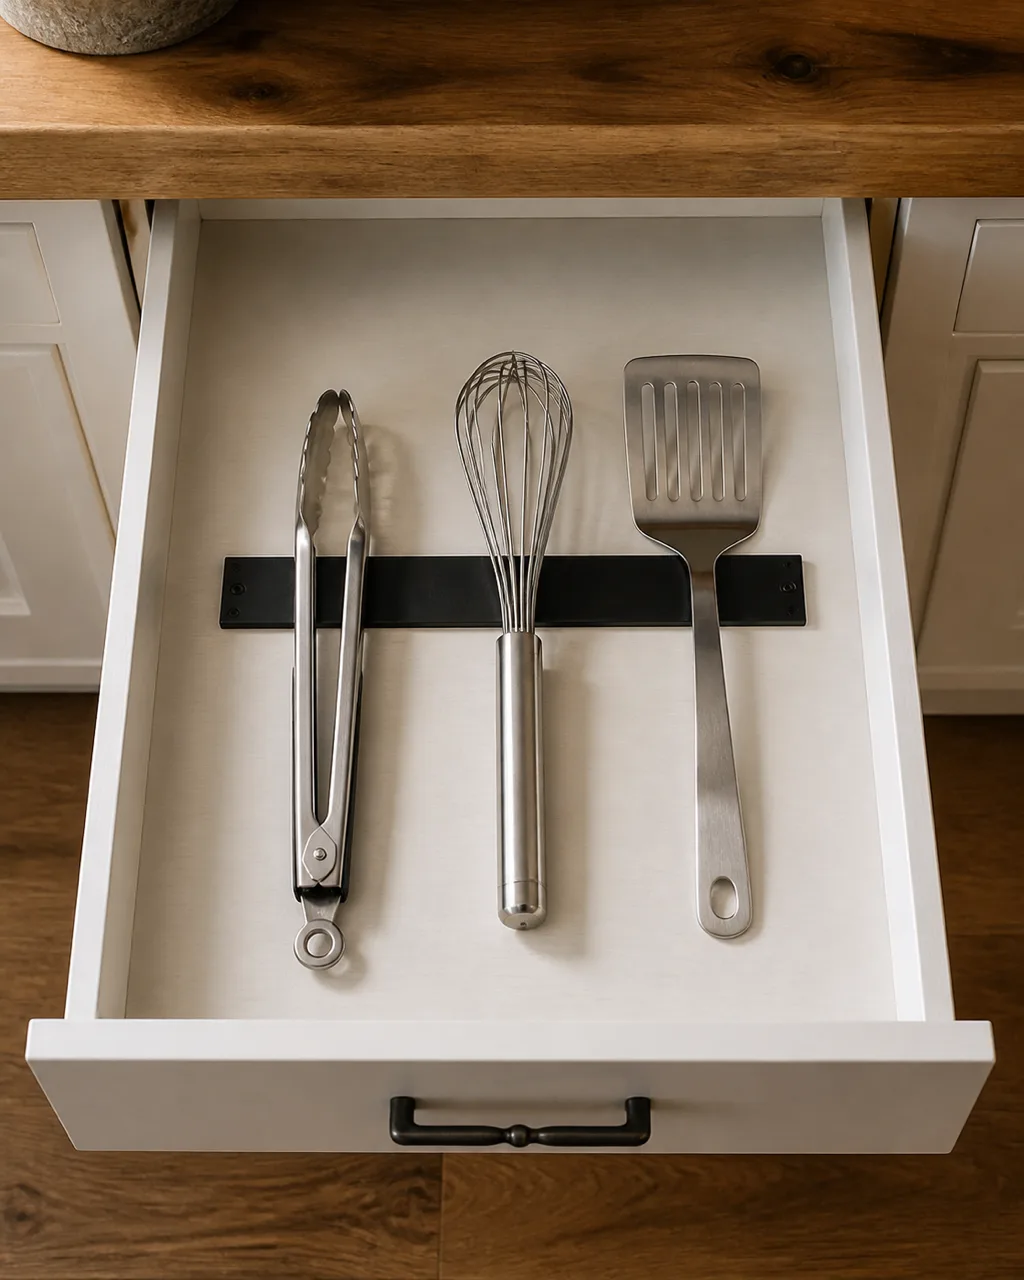
A hidden magnetic strip mounted flat on the drawer bottom holds metal tools in place so the drawer closes flush. Tongs do not tangle with spatulas, and whisks do not snag on dividers. The magnet is strong enough to keep tools from sliding when you open and close the drawer, but weak enough that you lift each tool out with one hand.
- Use a flat adhesive-backed magnetic strip rated for at least two pounds of pull per inch
- Mount the strip along the center of the drawer bottom, not against the side wall
- Only metal tools stick: tongs, whisks, metal spatulas, and steel ladles
- Test the magnet strength before committing — if it holds a whisk flat without a gap, it is strong enough
- If your kitchen cabinets lack deep drawers, a magnetic strip inside a shallow top drawer still works for flat spatulas and turners
10. Dedicate One Mason Jar per Wooden Spoon Type and Line Them on a Shelf
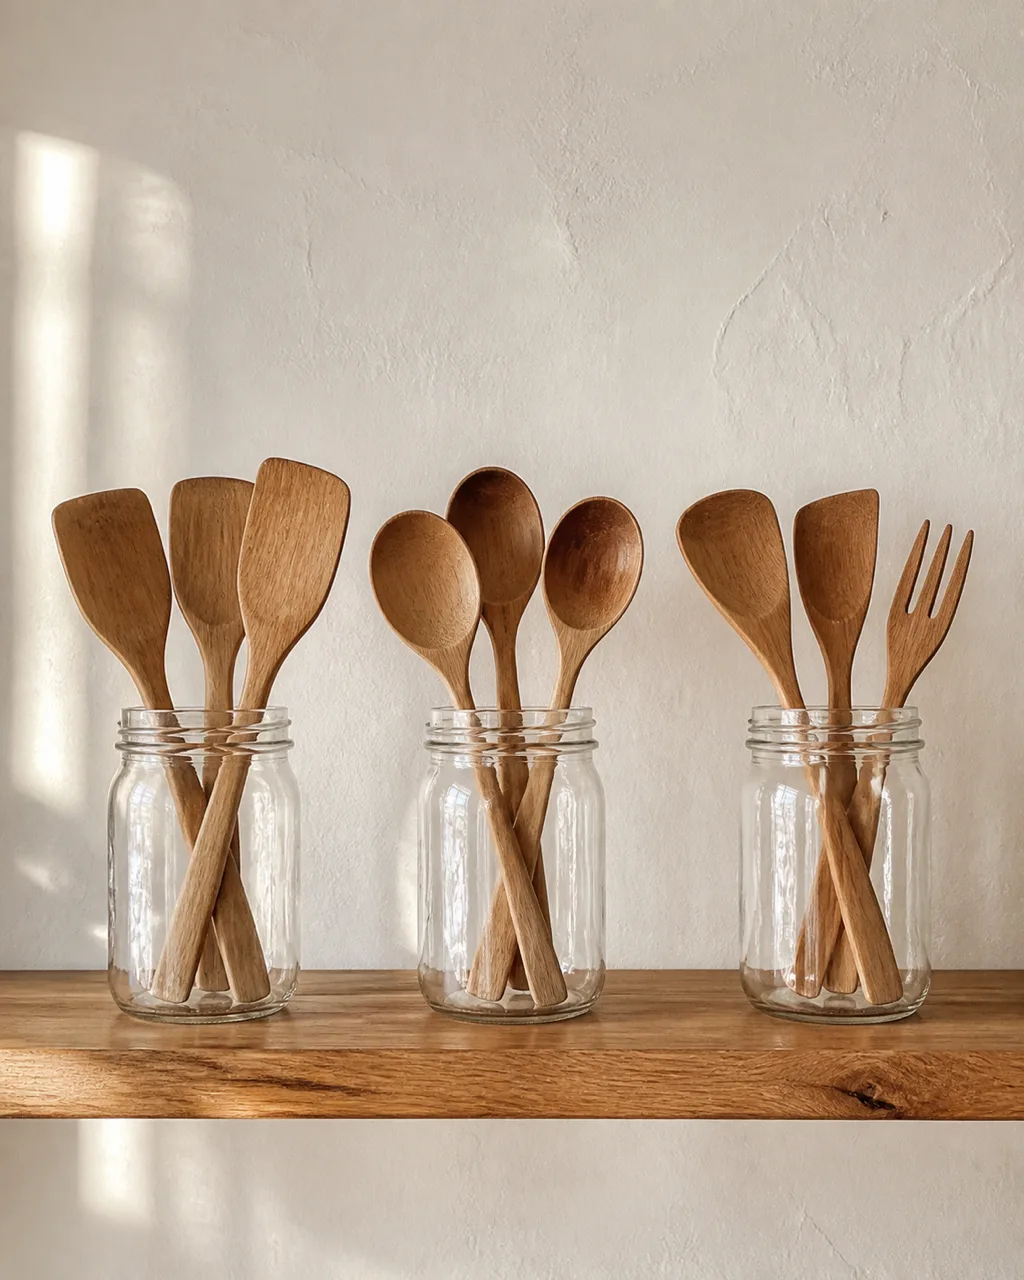
Separating flat wooden spoons from round spoons from angled ones prevents the jumble that makes you grab the wrong one every time. Three jars on an open shelf read as intentional display, not clutter, and each jar holds exactly the spoons you need for a specific stirring motion.
- Wide-mouth quart jars give enough clearance for spoon handles to fan without jamming
- Group by head shape: flat spoons for scraping, round spoons for stirring sauces, angled spoons for tasting
- Place the jars where you can reach them during cooking — on the shelf closest to the stove, not above the fridge
- Wash wooden spoons by hand and dry them before filing them back; standing wet wood in a jar invites mold at the base
- This approach doubles as kitchen decor on an open shelf without adding any decorative objects that serve no function
11. Rotate Seasonal Tools Into a Labeled Bin on the Top Shelf
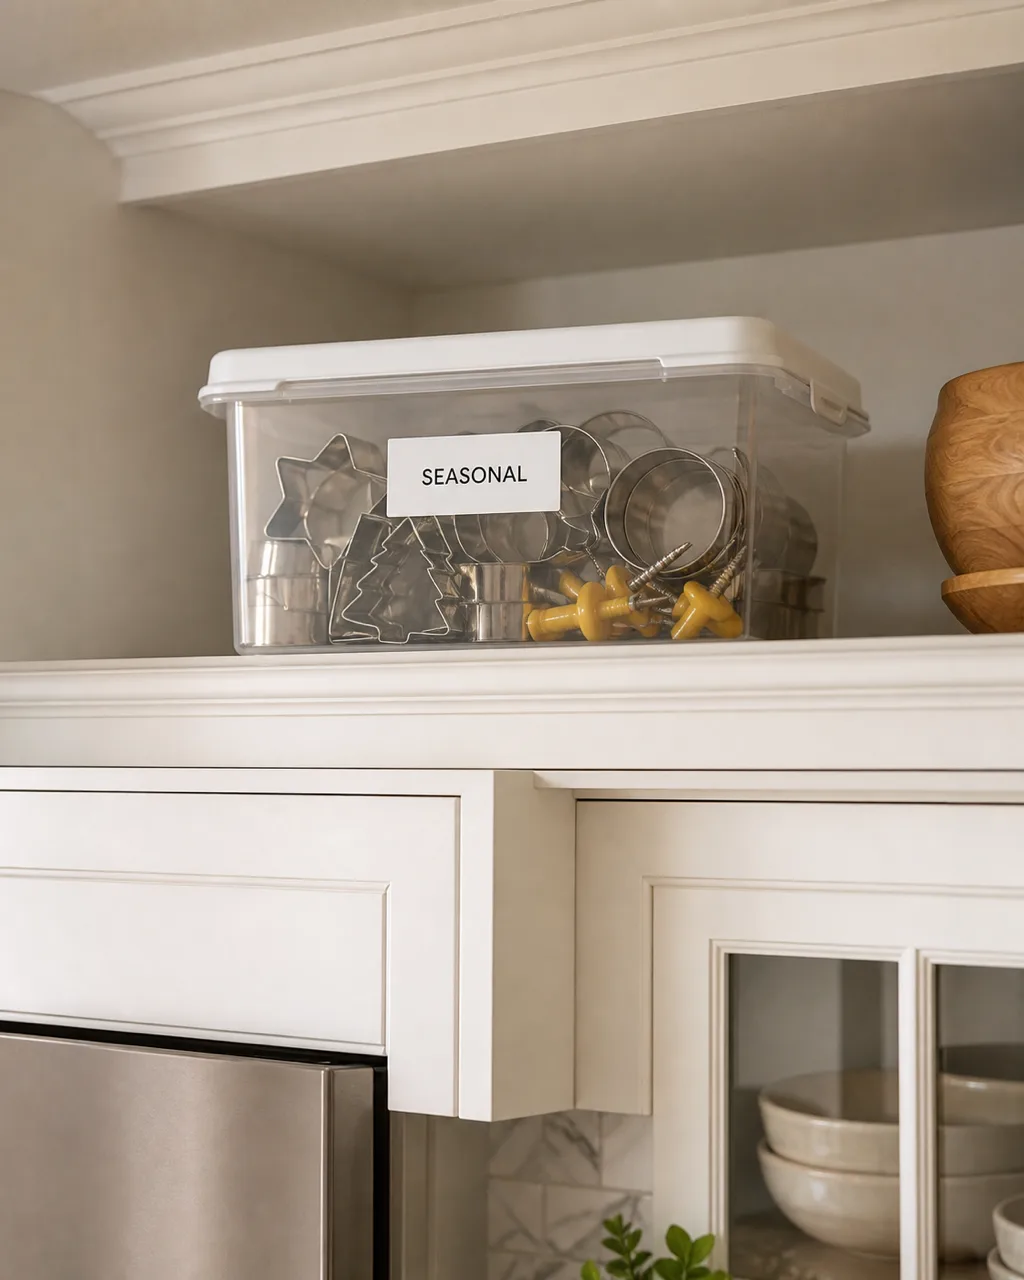
Holiday cookie cutters, corn holders, and lobster crackers take up prime drawer space year-round when they are only used a few weeks each year. A clear bin with a printed label on the top shelf keeps them findable without crowding the tools you reach for every day.
- Use a clear bin so you can confirm the contents without pulling it down
- Print a simple label (SEASONAL, HOLIDAY BAKING, or SUMMER GRILLING) in black text on white tape
- Store the bin on the highest shelf or on top of the cabinets where it is out of the way but still accessible with a step stool
- Rotate tools in and out by season: cookie cutters go up after the holidays, corn holders come down before the first barbecue
- This one move frees two to three drawer slots for daily utensils, which is often enough to eliminate the counter pile entirely
A kitchen where every spatula, whisk, and wooden spoon has a home based on how often you use it stays clear without thinking about it. The crock holds what you grab daily. The rail displays what you need at arm's reach. The drawer zones separate by task. And the top shelf takes everything seasonal out of the way.
If your kitchen countertops still feel crowded after organizing utensils, the next layer is clearing everything else — appliances, cutting boards, and the odds-and-ends pile near the sink.
For small kitchen layouts where every inch of counter and drawer space is contested, these utensil ideas scale down: a three-tool crock instead of six, a ten-inch rail instead of twenty, and a single mason jar on the shelf.