12 Small Kitchen Organization Ideas That Make Every Inch Count
Small kitchens lose square footage to traffic paths, door clearance, and appliance footprints. That leaves a narrow strip of usable storage, and most of it sits behind cabinet doors where items stack on top of each other until nothing is findable.
These 12 ideas target the zones most small kitchens ignore — the fridge side panel, the gap beside the stove, the back of a pantry door, the ceiling above the island. Each one converts a dead surface into working storage without a renovation.
Pick the idea that matches your worst daily friction. If you fight the spice cabinet every morning, start with idea 1. If the under-sink area defeats you, go to idea 2.
1. Magnetic Spice Jars on the Fridge Side
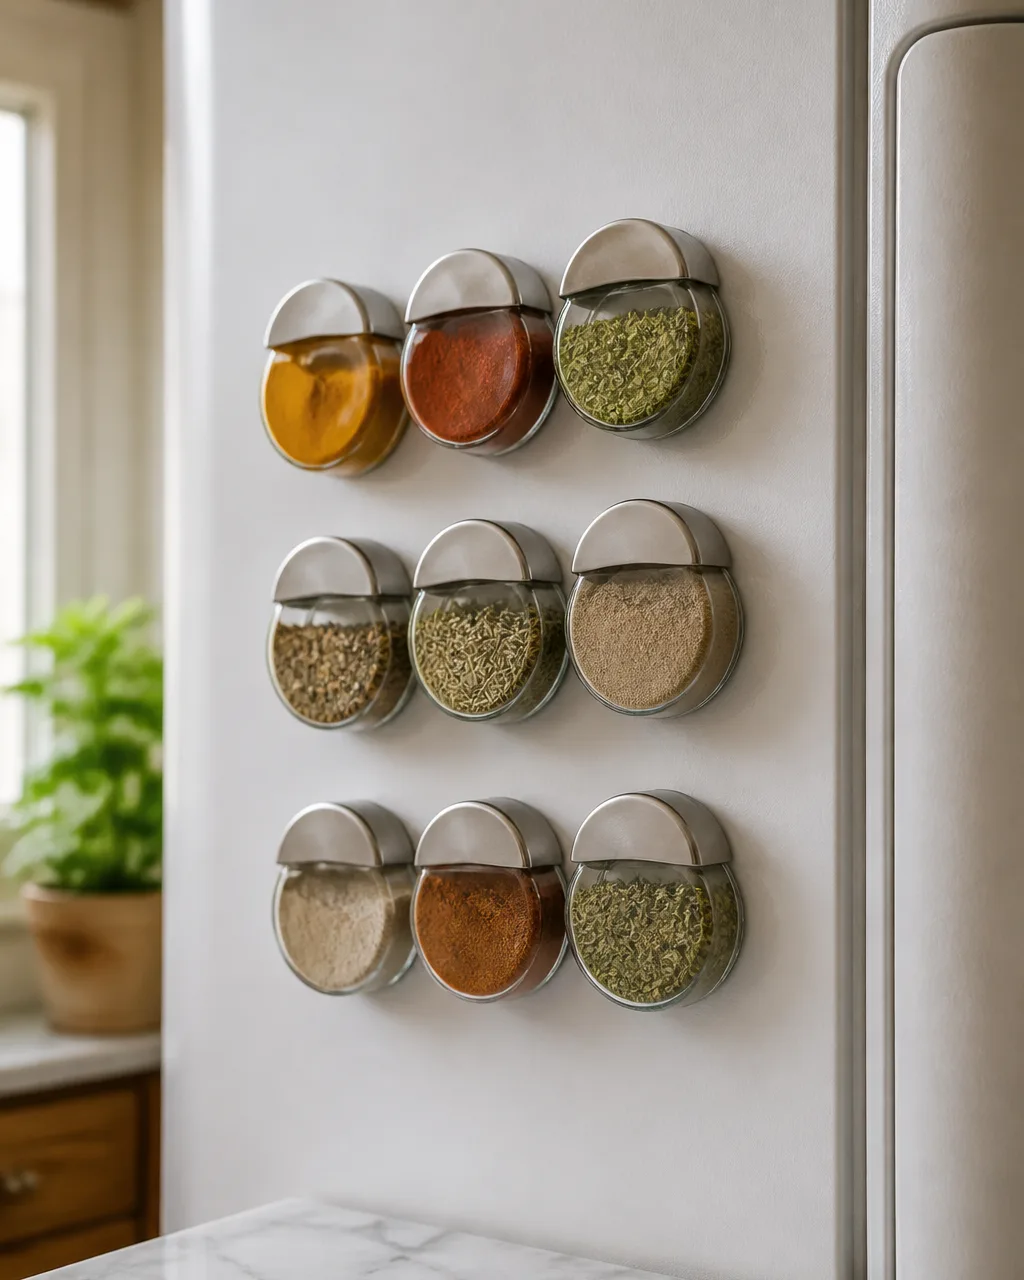
The side panel of a refrigerator is flat metal that does nothing all day. Magnetic spice jars stick directly to the surface and hold turmeric, paprika, dried herbs, and anything else you reach for at the stove. You free a full cabinet shelf and clear the counter at the same time.
This works because the fridge side sits right next to the cooking zone in most galley layouts. You turn, grab, and put back without walking.
- Choose flat-lid jars so they nest flush and do not bump when the fridge door opens
- Use a steel plate behind drywall if the fridge side is not magnetic
- Label tops with a white paint marker so you read them from above while cooking
- Group baking spices together and cooking spices together for one-grab access
- Wipe jars monthly to prevent grease film from weakening the magnet grip
2. Tension Rod Under the Sink
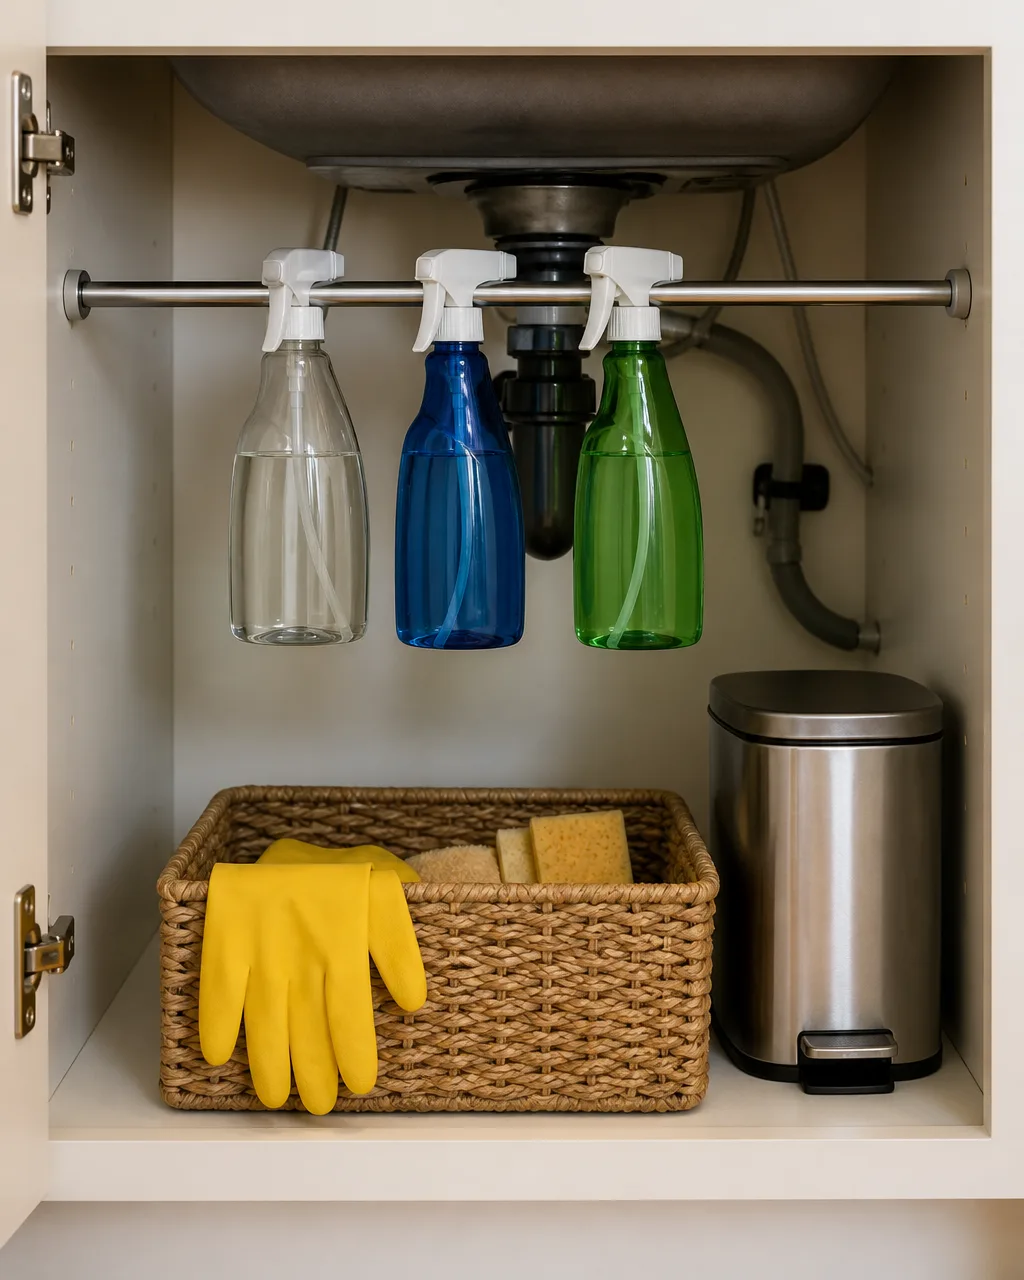
Under-sink cabinets collect cleaning supplies in a single pile where bottles fall over and nothing is visible. A tension rod spanning the cabinet width near the top adds a second tier. Hang spray bottles by their triggers, drape cleaning cloths over the bar, or clip trash bag rolls to the rod with binder clips.
The shelf below stays open for a bin or a bucket. You double the usable height of the cabinet for under two dollars.
- Mount the rod 15 cm below the sink basin so bottles clear the plumbing
- Hang bottles nozzle-down so you grab and spray in one motion
- Add a small basket on the shelf below for sponges and gloves
- Use a second rod at the back for rarely used bottles to keep them separate
- Check rod tension weekly since spray bottles are heavier than curtain fabric
3. Over-the-Door Pantry Rack
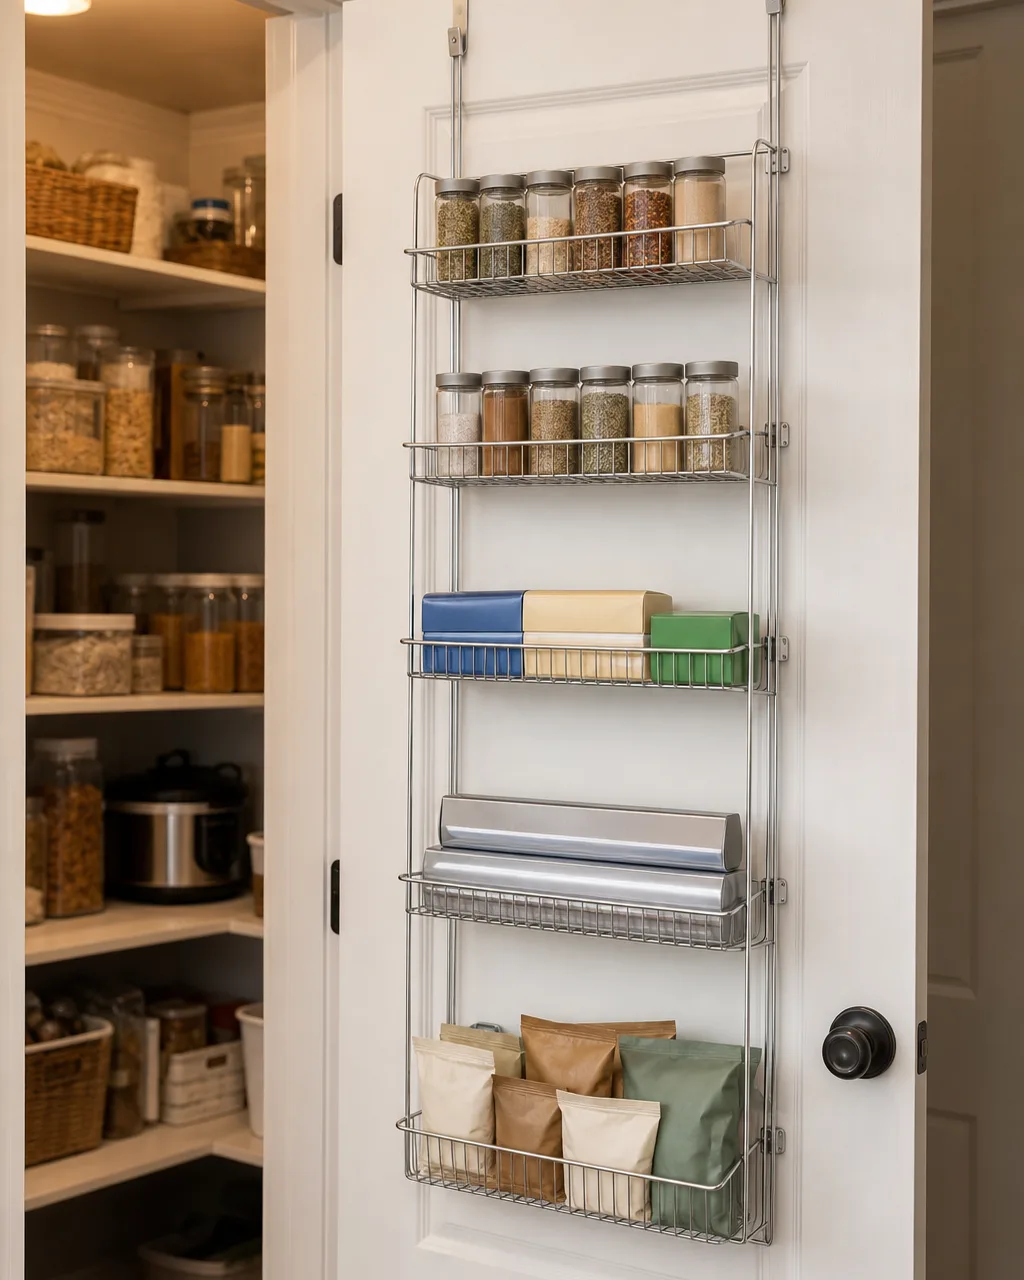
If your small kitchen has any door that opens to a closet, broom cupboard, or even the kitchen entry, the back of that door is unused vertical storage. An over-the-door rack with four to six wire shelves holds spice jars, aluminum foil, cling wrap, and snack packets without drilling a single hole.
You gain the equivalent of a narrow shelf unit without losing any floor or counter area.
- Pick a rack with adjustable shelf height to fit tall oil bottles on the bottom
- Keep heavy items like canned goods off the door to prevent hinge sag over time
- Group wraps and foils on the lowest shelf where gravity keeps them from sliding
- Add a small S-hook row at the top for measuring cups and spoons
- Line shelves with non-slip liner so jars do not slide when the door swings
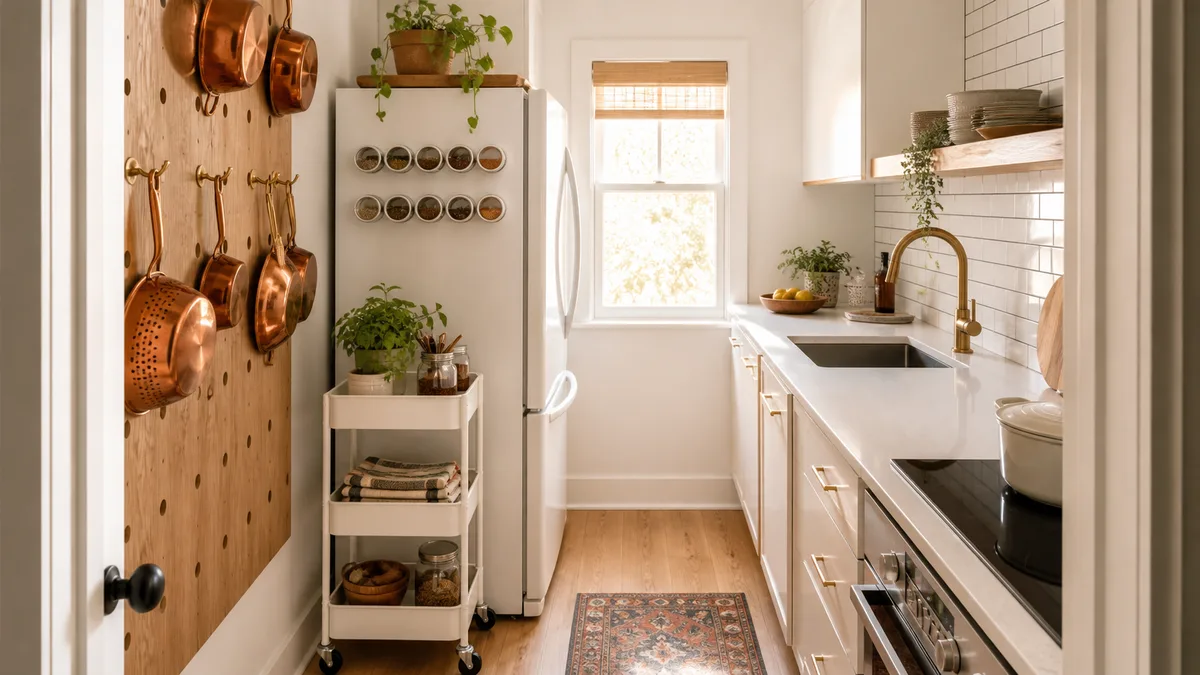
4. Pegboard Wall Panel
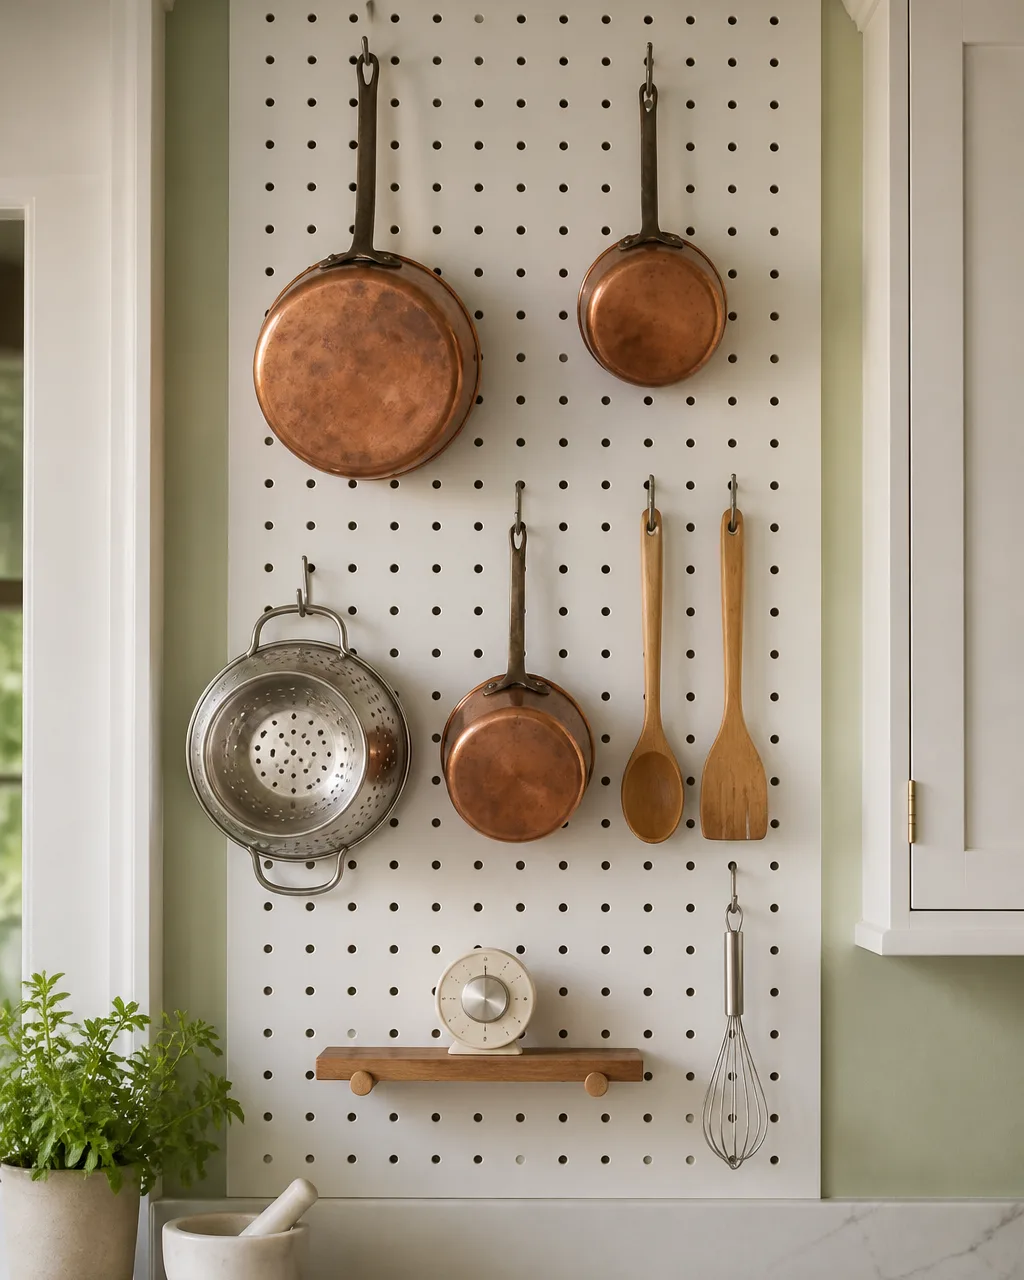
A pegboard mounted on any stretch of open wall converts dead vertical space into customizable storage. Hang pots, colanders, utensils, and mugs from repositionable hooks. When your cooking habits shift or you buy a new pan, move a hook in under a minute without touching a drill.
Painted the wall color, a pegboard looks built-in rather than DIY. It stores eight to ten items that would otherwise fill an entire cabinet shelf.
- Mount the board with 1 cm spacers so hooks insert cleanly from behind
- Paint the pegboard the same color as the wall for a seamless built-in look
- Dedicate the top row to heavy pots and the lower row to utensils for easy reach
- Add a narrow shelf peg for small jars, a timer, or a salt cellar
- Leave 30 percent of hooks empty so you can rearrange without unloading first
5. Rolling Slim Cart for Gaps
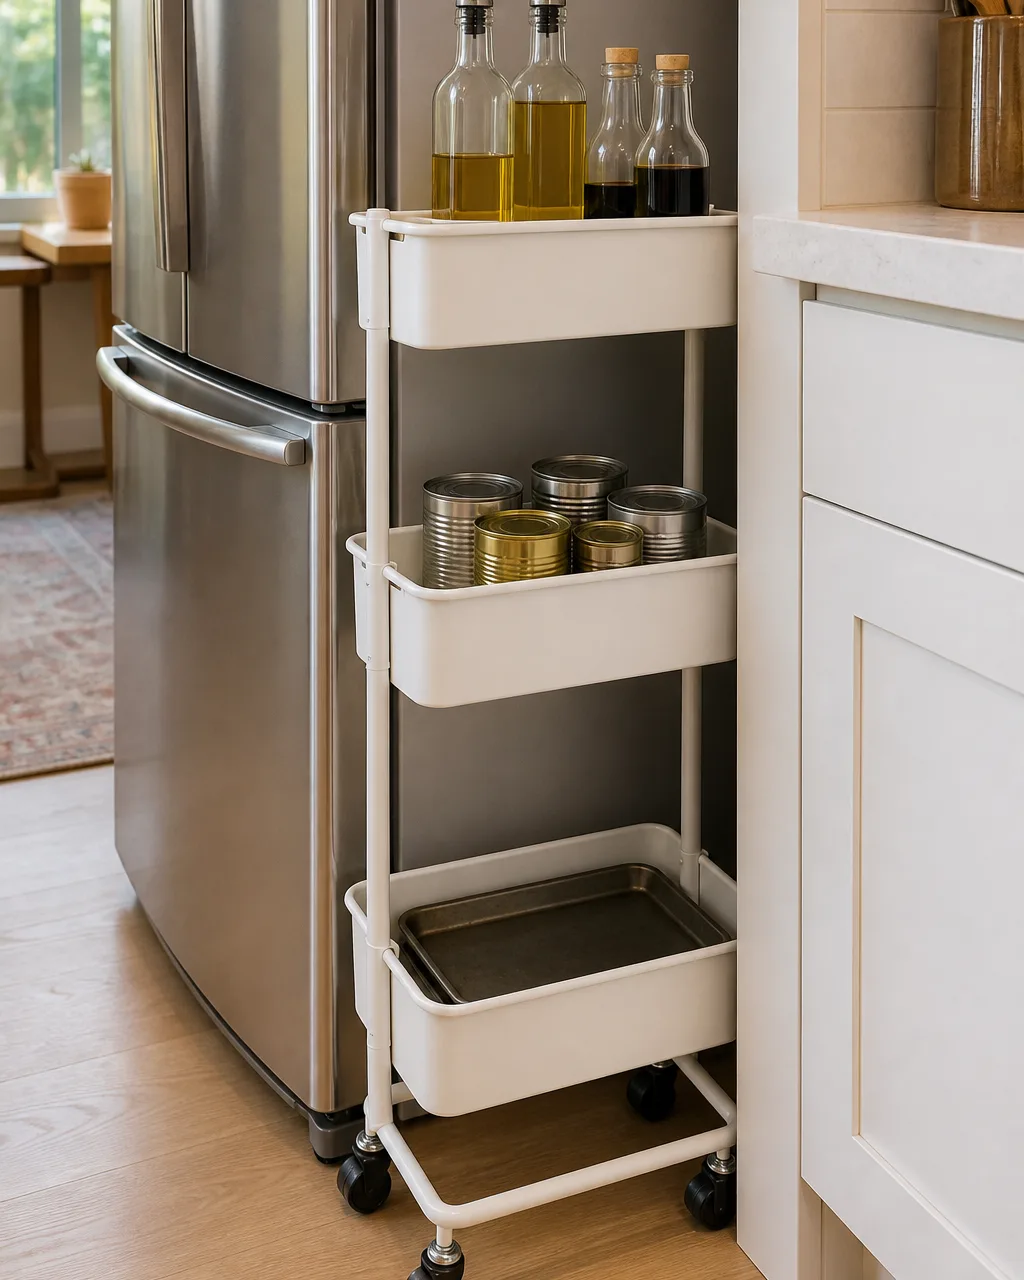
Most small kitchens have a narrow gap between the fridge and the wall, or between the counter and the stove. A slim rolling cart with three to four tiers slides into that 10 to 15 centimeter slot and pulls out when you need it. Use it for oils, vinegar, canned goods, or baking sheets that have no cabinet home.
This is found storage — the gap was doing nothing, and now it holds a cabinet's worth of items.
- Measure the gap at both the top and bottom since floors are rarely level
- Choose a cart with locking casters so it stays put when you bump it while cooking
- Put the heaviest items on the lowest tier for stability
- Attach a magnetic strip to one side for small metal tools like bottle openers
- Line each tier with removable shelf liner for easy monthly cleaning
6. Ceiling-Mounted Pot Rack
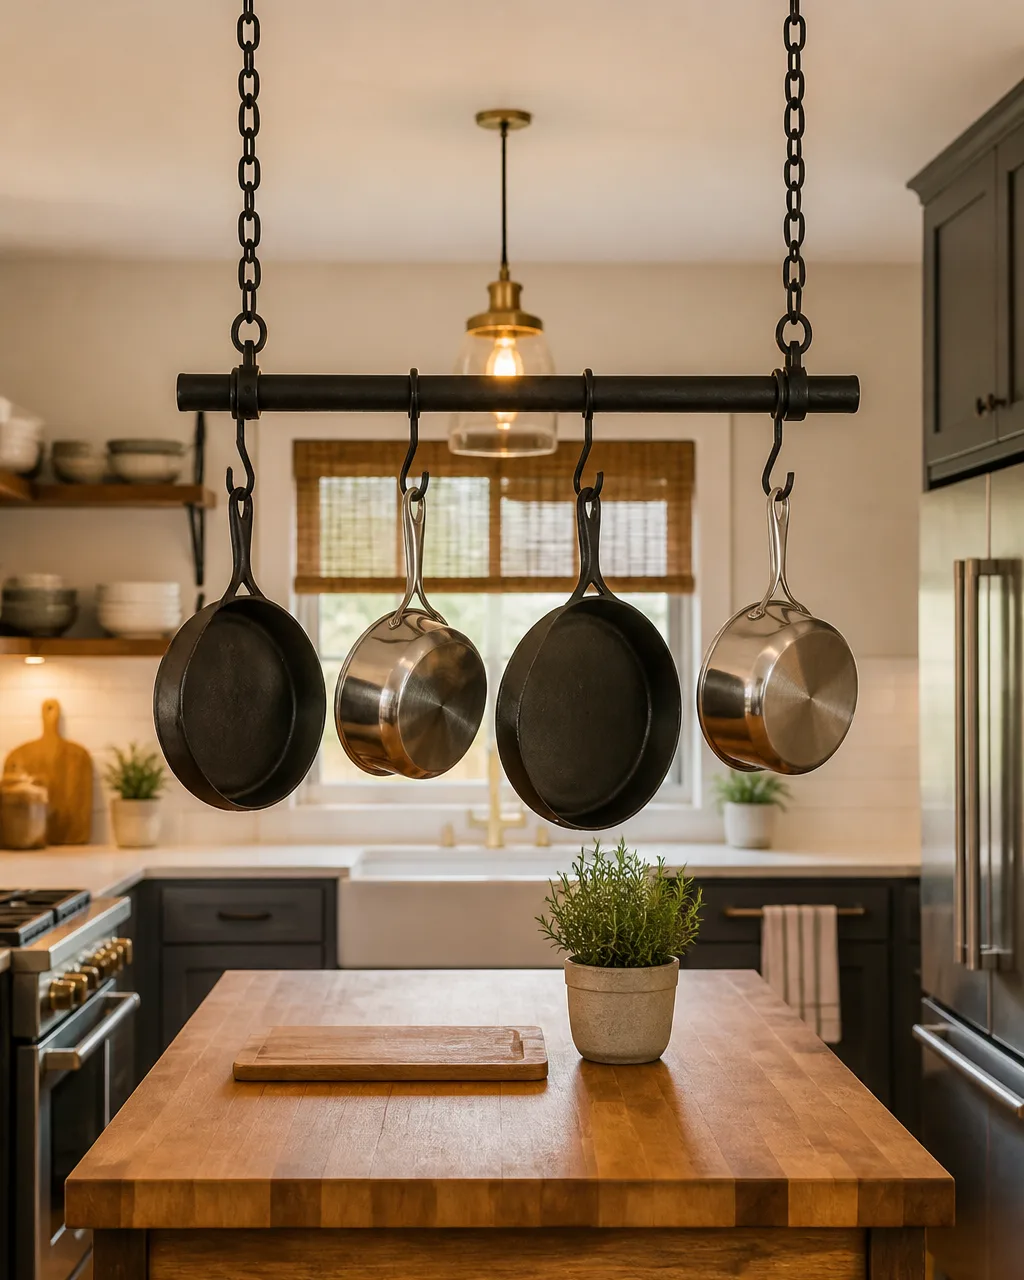
Four to six pots crammed into a lower cabinet take up space that could hold mixing bowls, baking dishes, or small appliances. A ceiling-mounted iron bar with S-hooks lifts them overhead, frees an entire cabinet, and turns the pots into a visual feature rather than a storage headache.
A simple bar and hook setup costs less than a cabinet organizer and works in any ceiling height above 2.4 meters.
- Install into ceiling joists, not drywall alone, since cast iron is heavy enough to pull anchors
- Hang the rack over a counter or island so pots stay within arm reach while cooking
- Space hooks wide enough that pots do not clang together when you grab one
- Store lids in a vertical file organizer inside a cabinet rather than hanging them
- Choose matte black or brushed nickel hardware that matches your faucet finish
7. Stackable Shelf Risers Inside Cabinets
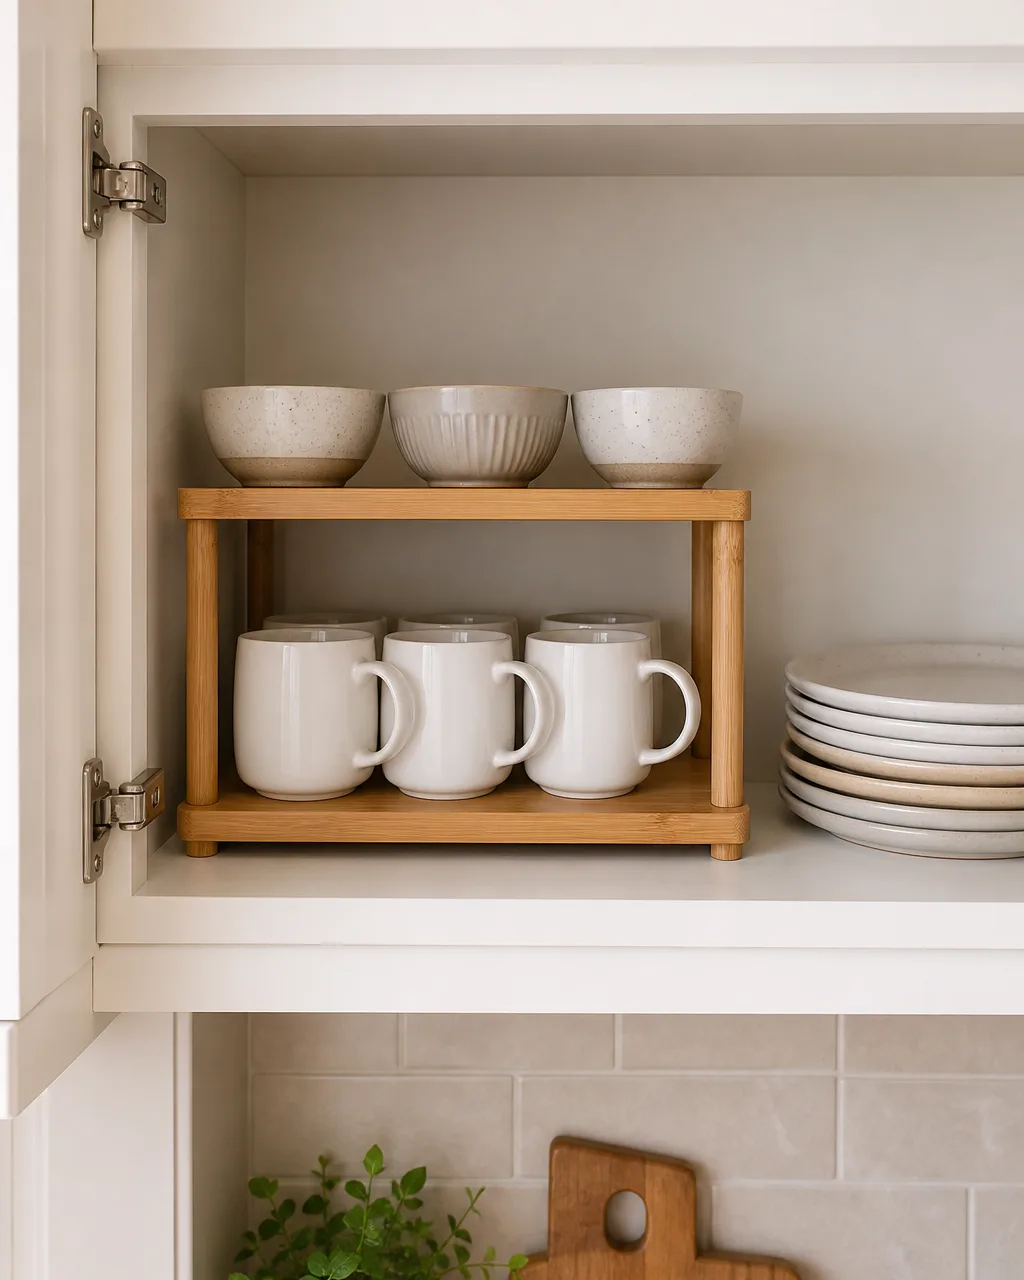
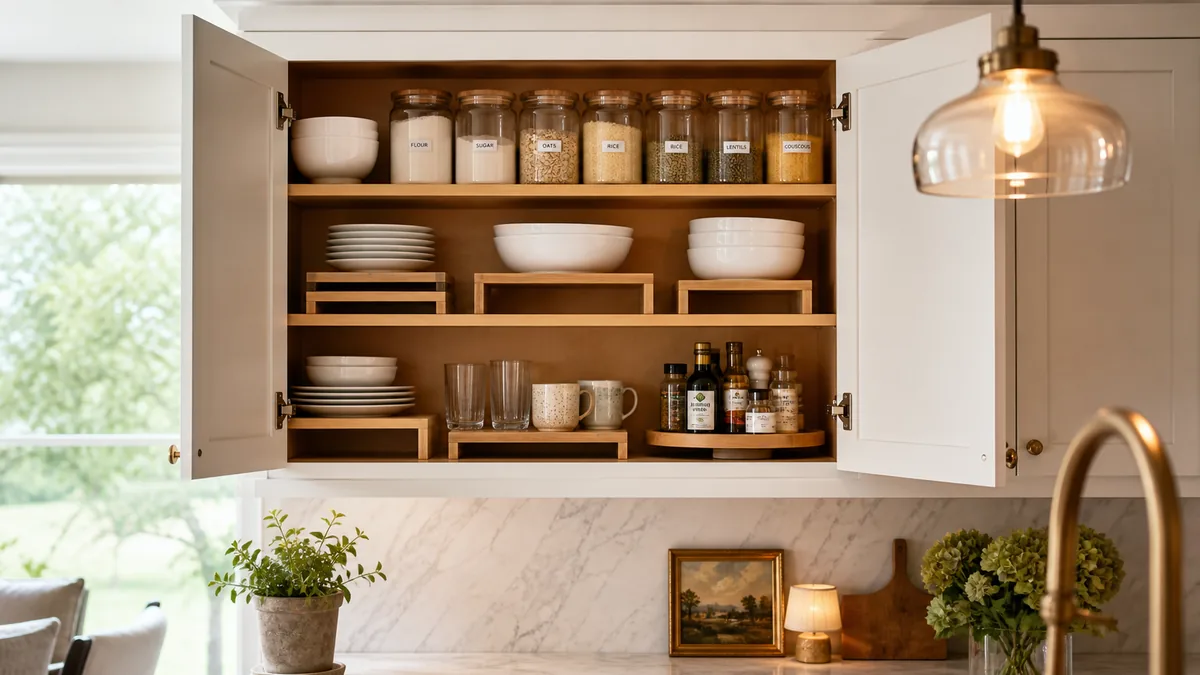
Cabinet shelves usually have twice the vertical clearance they need. Mugs sit on a shelf with 25 centimeters of empty air above them. A wire or bamboo riser adds a second tier inside the cabinet so short items each get their own level. You see everything at once instead of stacking and unstacking to reach the one in the back.
This is the fastest win on this list — it takes two minutes to place a riser and it doubles the usable shelf space immediately.
- Use risers in upper cabinets where depth is shallow and tall stacks waste vertical room
- Keep daily-use items on the lower tier at eye level for grab-and-go access
- Choose expandable risers that adjust to different cabinet widths
- Put one riser in the spice cabinet so you see the label on every jar at once
- Avoid cheap risers that bow under weight since ceramic plates are heavier than they look
8. Drawer Dividers with Angled Inserts
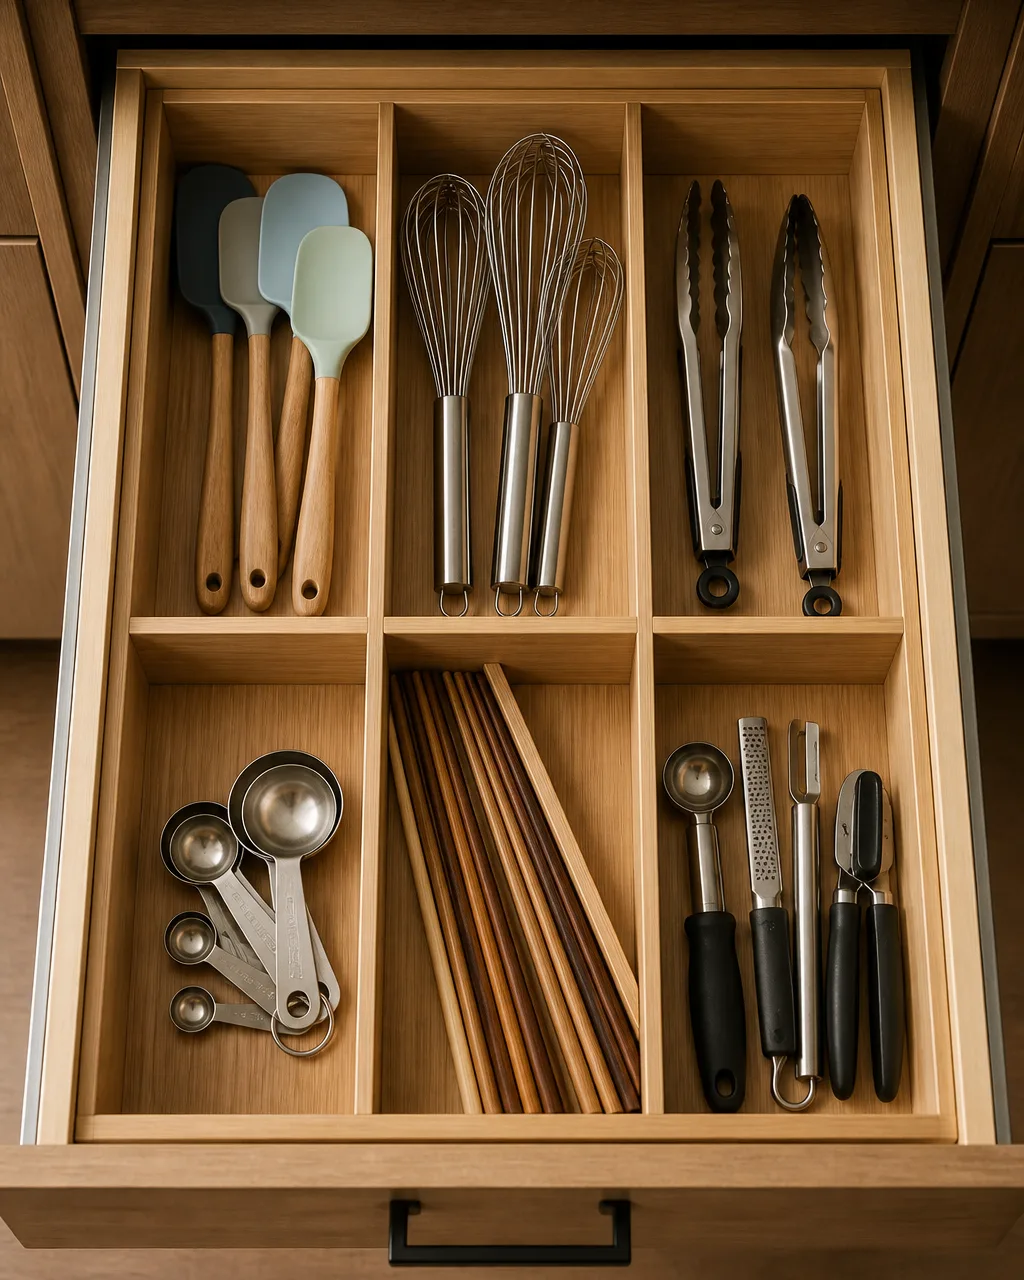
One deep kitchen drawer without dividers becomes a junk hole within a week. Every utensil tangles with every other utensil, and you dig for the one spatula you actually want. Bamboo or adjustable plastic dividers turn that single drawer into a sorted grid where spatulas, whisks, tongs, and measuring spoons each get a lane.
Angled inserts handle the long thin items — chopsticks, skewers, thermometers — that roll out of regular slots.
- Measure the inside drawer dimensions before buying since product listings show outside size
- Place the most-used utensil section closest to the stove for speed
- Use an angled insert for chopsticks, skewers, and thermometers that roll
- Leave one open section for items that do not fit any category
- Pull out and wipe dividers monthly to prevent crumb buildup in the grooves
9. Wall-Mounted Folding Table
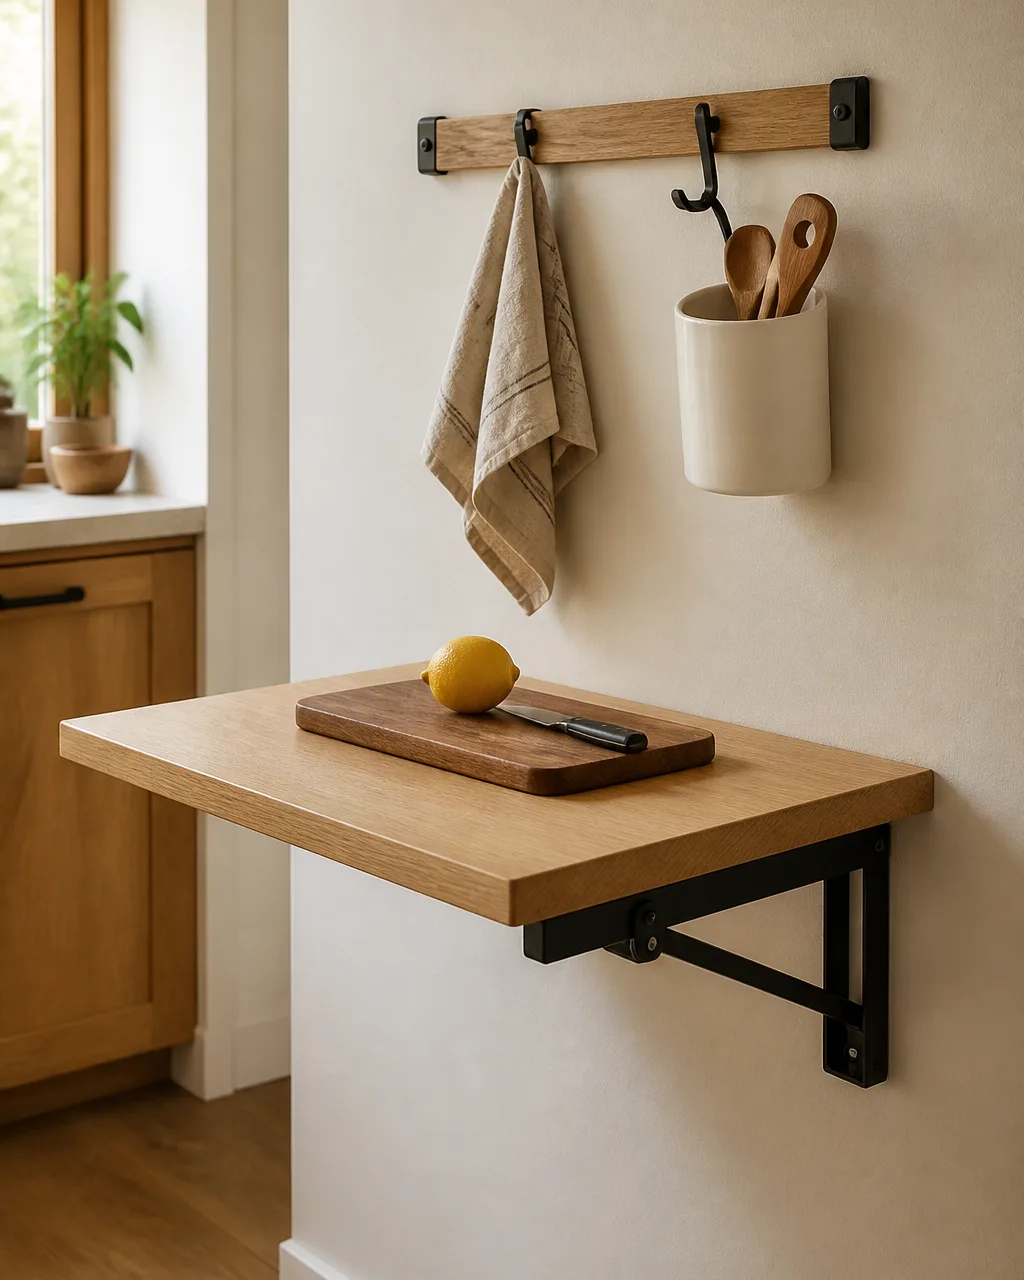
A fold-down table attached to the wall gives you prep surface that disappears the moment you finish cooking. It replaces the need for a portable island or a cutting board balanced over the sink. Fold it up, and the floor stays clear for walking through.
In kitchens too narrow for any permanent counter extension, this is the only way to gain prep space without shrinking the traffic path.
- Mount at counter height so you can stand and chop comfortably without hunching
- Choose a table depth of 30 to 40 cm so it does not block the walkway when open
- Add a wall-mounted rail above it for hooks holding a towel and a utensil cup
- Use the underside for a chalkboard or pinboard when the table is folded up
- Pair it with a folding stool that hangs from a wall hook when not in use
10. Lazy Susan in Corner Cabinets
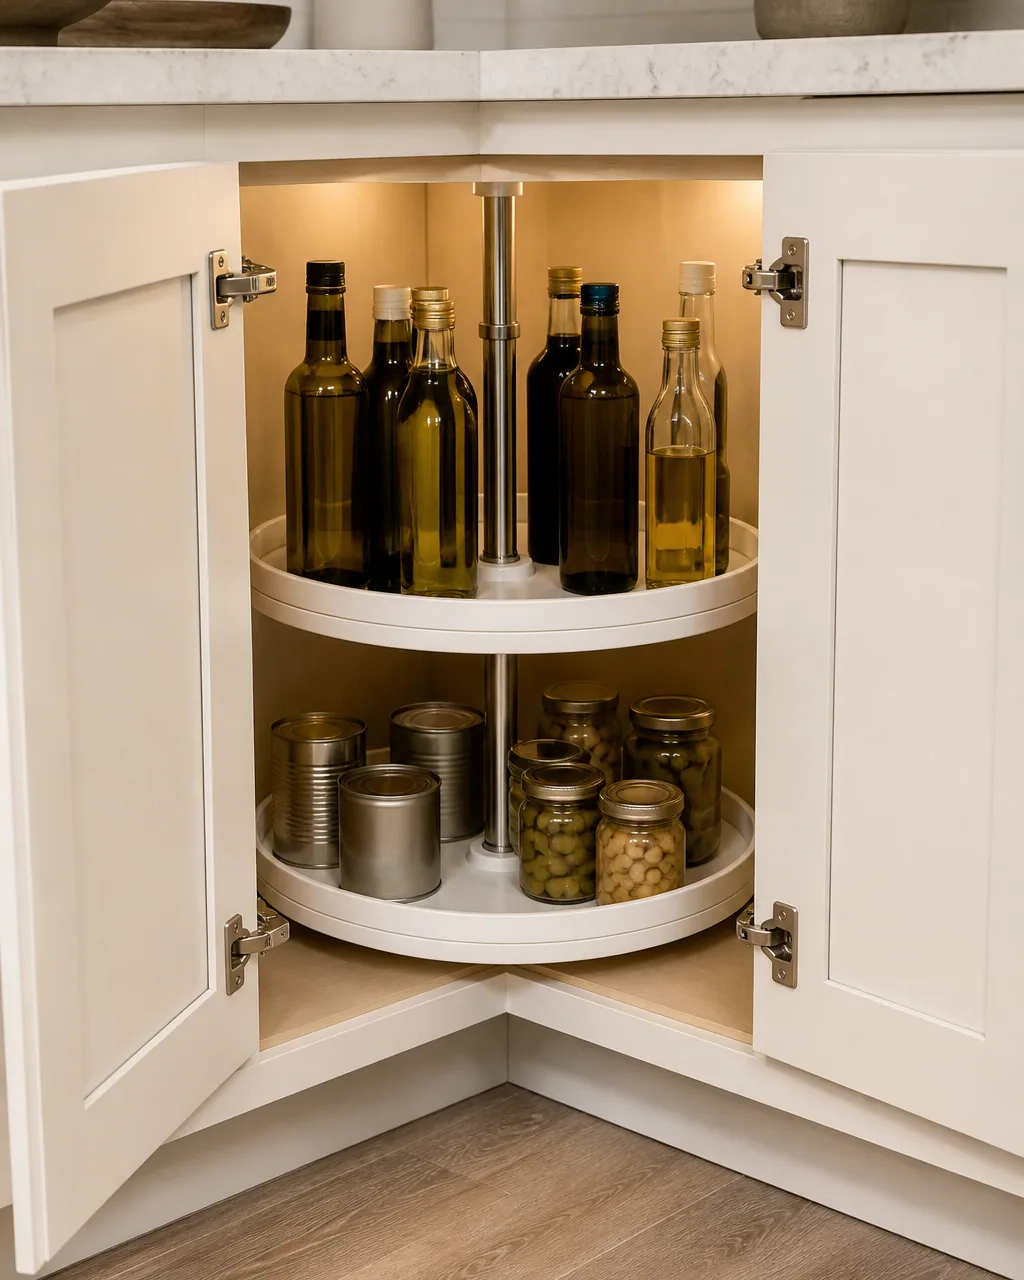
Corner cabinets in small kitchens swallow items into a dark zone where your arm cannot reach. A two-tier Lazy Susan turns the full depth of that cabinet into accessible rotating storage. Spin the turntable from the front opening and grab anything without crawling in.
This is one of the few solutions that makes an existing cabinet hold more useful volume rather than adding new storage.
- Choose a turntable diameter 5 cm smaller than the cabinet interior for smooth clearance
- Put tall bottles and oils on the upper tier and short cans on the lower
- Add a non-slip liner under the turntable so it does not walk across the shelf
- Group items by cooking type — stir-fry sauces together, baking extracts together
- Clean the turntable track quarterly since grease and crumbs slow the rotation
12 small kitchen organization ideas to save
- 1Magnetic Spice JarsStick to the fridge side panel — frees a full shelf and clears the counter.
- 2Tension Rod Under SinkHang spray bottles by their triggers to double under-sink height.
- 3Over-the-Door RackAdd 4-6 shelves to any door back for spices, foil, and wraps.
- 4Pegboard Wall PanelRepositionable hooks turn dead wall space into customizable storage.
- 5Rolling Slim CartSlides into the 10-15 cm gap beside the fridge or stove.
- 6Ceiling Pot RackLifts 4-6 pots overhead and frees an entire lower cabinet.
- 7Stackable Shelf RisersDoubles usable shelf height inside cabinets in two minutes.
- 8Drawer DividersTurns one junk drawer into a sorted utensil station.
- 9Folding Wall TablePrep surface that folds flat when cooking is done.
- 10Lazy Susan CornerSpins deep corner cabinet contents to the front opening.
- 11Magnetic Knife StripHolds knives flat on the backsplash — zero counter or drawer cost.
- 12Basket-and-Label ShelvesGroups dry goods by use so open shelving reads as tidy.
11. Magnetic Knife Strip on Backsplash
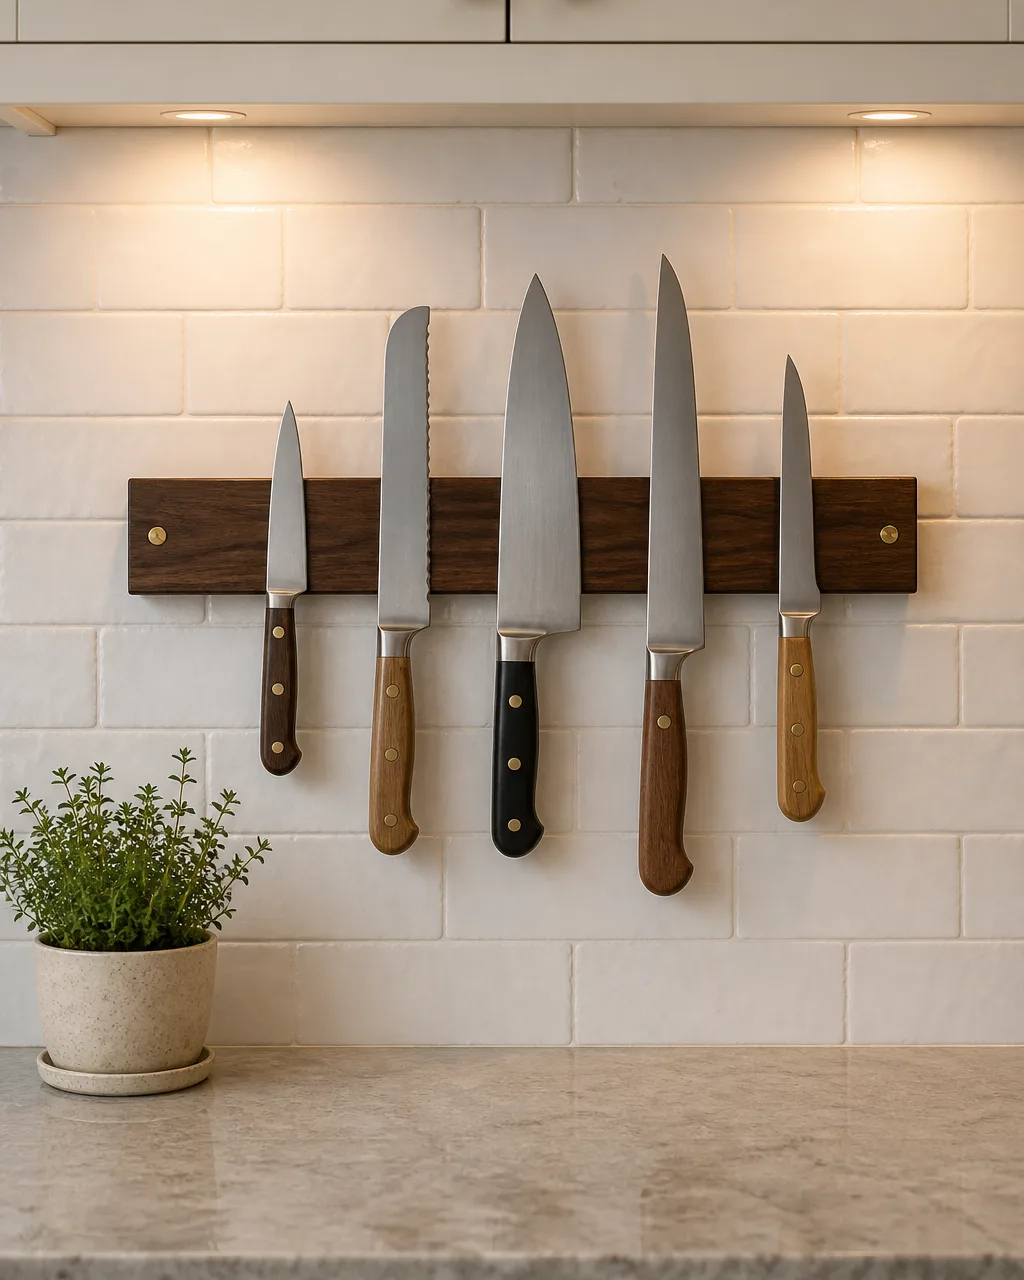
A knife block takes a 15 by 20 centimeter rectangle on the counter, and a drawer insert fills a full drawer. A magnetic strip on the backsplash holds knives flat against the wall where they stay visible, dry, and accessible with zero counter or drawer cost.
In a small kitchen where every surface serves double duty, removing the knife block gives you enough space for a cutting board to sit flat permanently.
- Mount the strip below eye level and above the reach of small children
- Place it between the stove and the sink where you use knives most often
- Stagger small and large blades so handles do not crowd each other
- Wipe the strip weekly since kitchen grease weakens the magnetic pull over time
- Avoid placing the strip directly above the stove where steam and oil splatter hit
12. Basket-and-Label System for Open Shelving
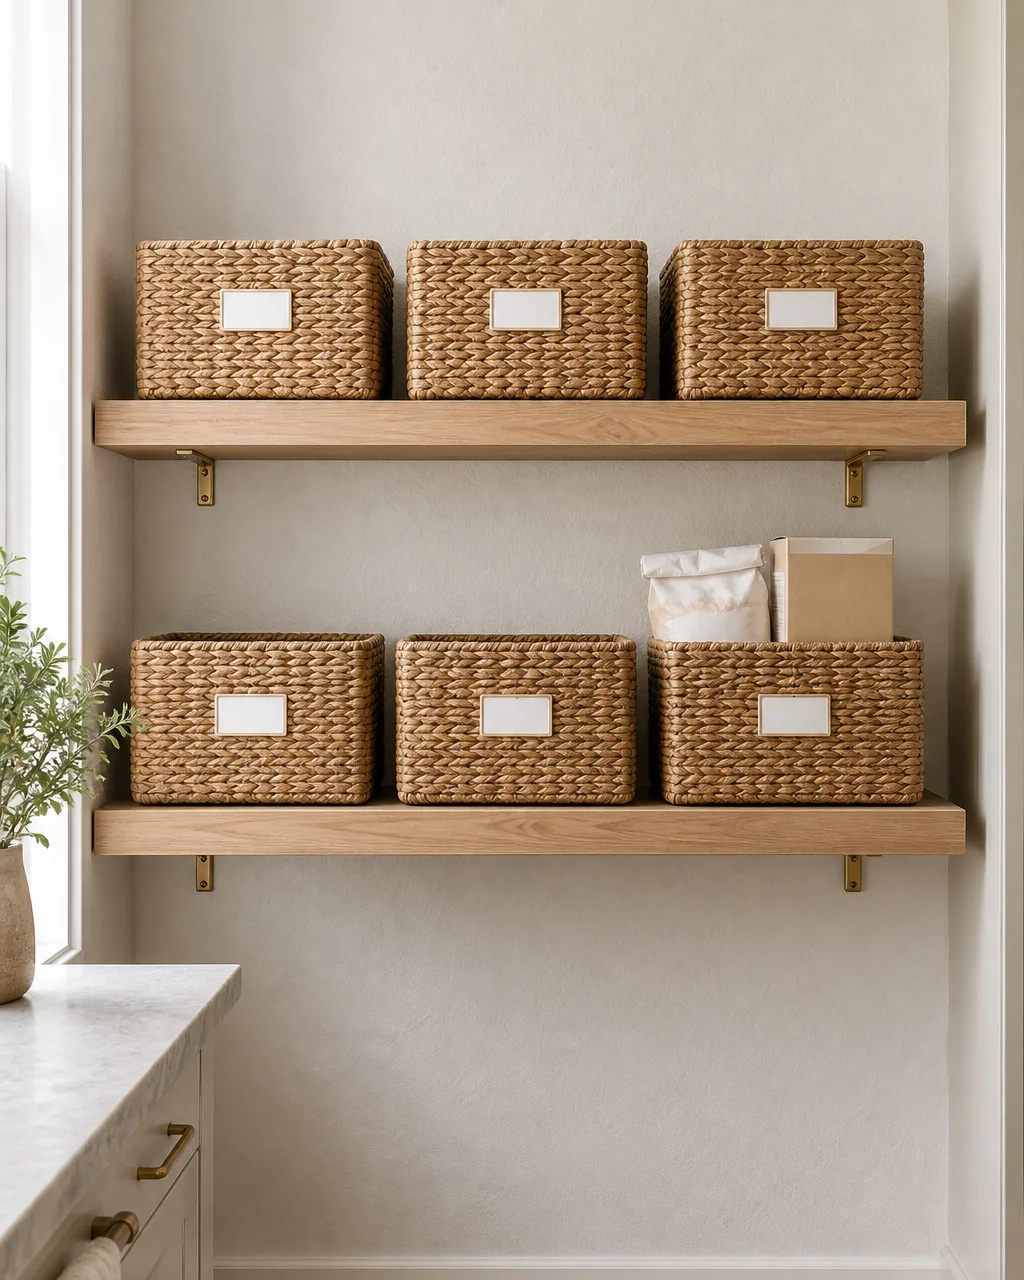
Open shelves in a small kitchen look cluttered within days unless every item is grouped. Woven or wire baskets with front-facing labels sort dry goods by use — baking, breakfast, snacks, pasta. You grab a basket, use what you need, and slide it back. From across the room the shelf reads as seven matching shapes, not forty mismatched boxes.
This turns the visual noise problem of open shelving into a design feature that also happens to keep food organized.
- Use uniform basket sizes for visual calm and so they stack if needed
- Label the basket, not the individual item, so contents can change freely
- Keep daily breakfast items on the middle shelf at arm height
- Reserve the top shelf for rarely used items like holiday baking supplies
- Rotate perishable dry goods forward monthly to prevent hidden expired bags
A small kitchen does not need more cabinets. It needs every surface doing a job. The fridge side holds spices. The ceiling holds pots. The gap beside the stove holds a cart. Once you see every wall, door, and dead zone as potential storage, the kitchen stops feeling small and starts feeling organized.
For more kitchen storage ideas, see our guide to kitchen organization ideas that make cooking easier. If your pantry needs attention too, these small pantry organization ideas cover tight spaces.
For layout help, explore our small kitchen ideas for making a compact kitchen feel bigger. You can also read our kitchen countertop organization ideas for targeted counter-clearing methods.