Kitchen Utensil Organization That Actually Stays Tidy
A utensil drawer that stays tidy is not about owning fewer tools. It is about giving each one a home that fits its shape, and then putting that home where the cooking actually happens.
Most utensil chaos starts the same way: one big drawer, no dividers, every spatula sharing space with every whisk. What works is small holds in the right places, a crock by the stove, a magnetic strip for the blades, a tiered tray for the tiny stuff.
These twelve moves work together as one small system, the same principle that runs through kitchen organization more broadly. None of them takes a weekend, and most cost under twenty dollars.
From sorting by how often you reach for a tool to a labeled bake-only bin, these twelve moves cut the drawer tangle and put every spoon, spatula, and whisk back in arm’s reach. Jump to the fix you need first.
- 1Sort by how often you actually cook with it
- 2Cut drawer dividers to match the tool shape
- 3Park the daily five in a counter crock by the stove
- 4Hang the blades on a magnetic strip
- 5Hide the awkward gear inside the cabinet door
- 6Lift small tools on a tiered drawer insert
- 7Station tools where you actually use them
- 8Hang the tall, long-handled tools on wall hooks
- 9Line the drawer so nothing slides into a tangle
- 10Pull the baking tools out as one labeled kit
- 11Use a vertical tension rod for flat awkward tools
- 12Stack clear acrylic trays so nothing gets buried
Sort Utensils by How Often You Actually Use Them
The first move is not buying anything; it is changing what sits where. Pull the drawer all the way out and split it front to back. Daily-use tools go in the front, the ones you grab without thinking, a wooden spoon, a spatula, a whisk, your tongs. The bake-once-a-week, carve-once-a-month gear moves to the back row or out of the drawer entirely.
This is what makes the same drawer feel calm by Tuesday. You stop fishing past a turkey baster to reach a spoon, and the cooking gets faster because the tools you reach for live in the easiest spot.
- Pull everything out and time how often you actually use each tool over a week, not your guess
- Put the daily five at the front, closest to the side of the drawer you open with
- Move weekly and bake-only tools to the back row, or to a separate drawer or bin
- If you have not touched a tool in a year, donate it before you reorganize around it
- Reorder once a season; how you cook in summer is not how you cook in November
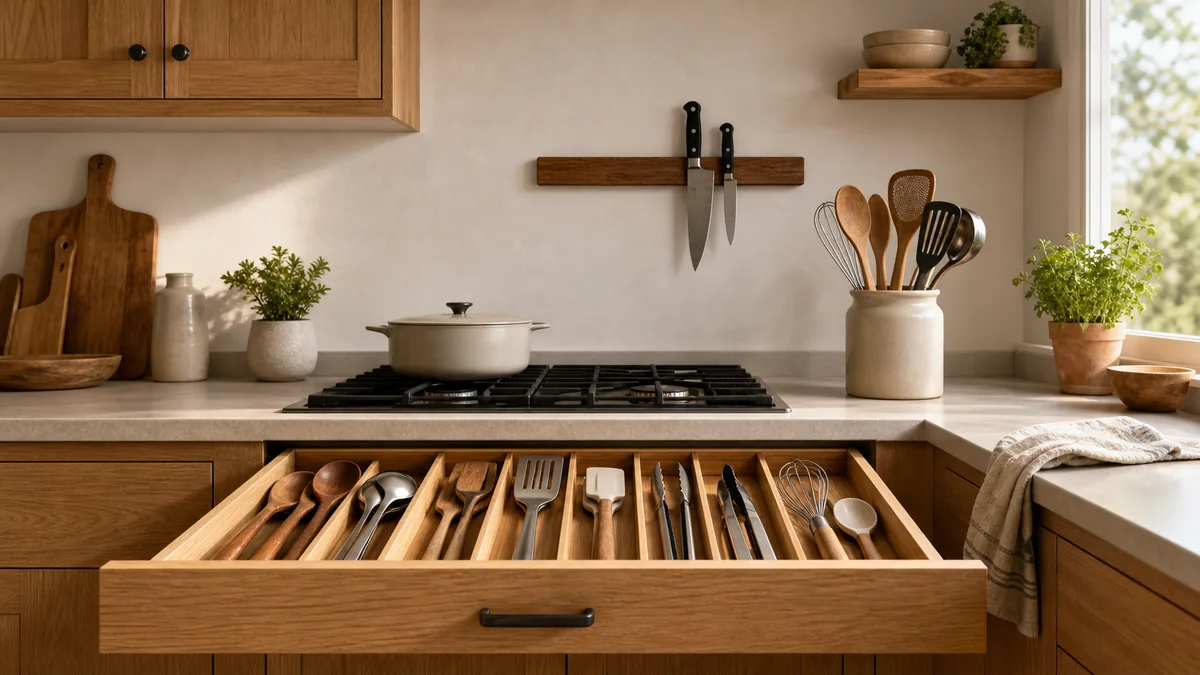
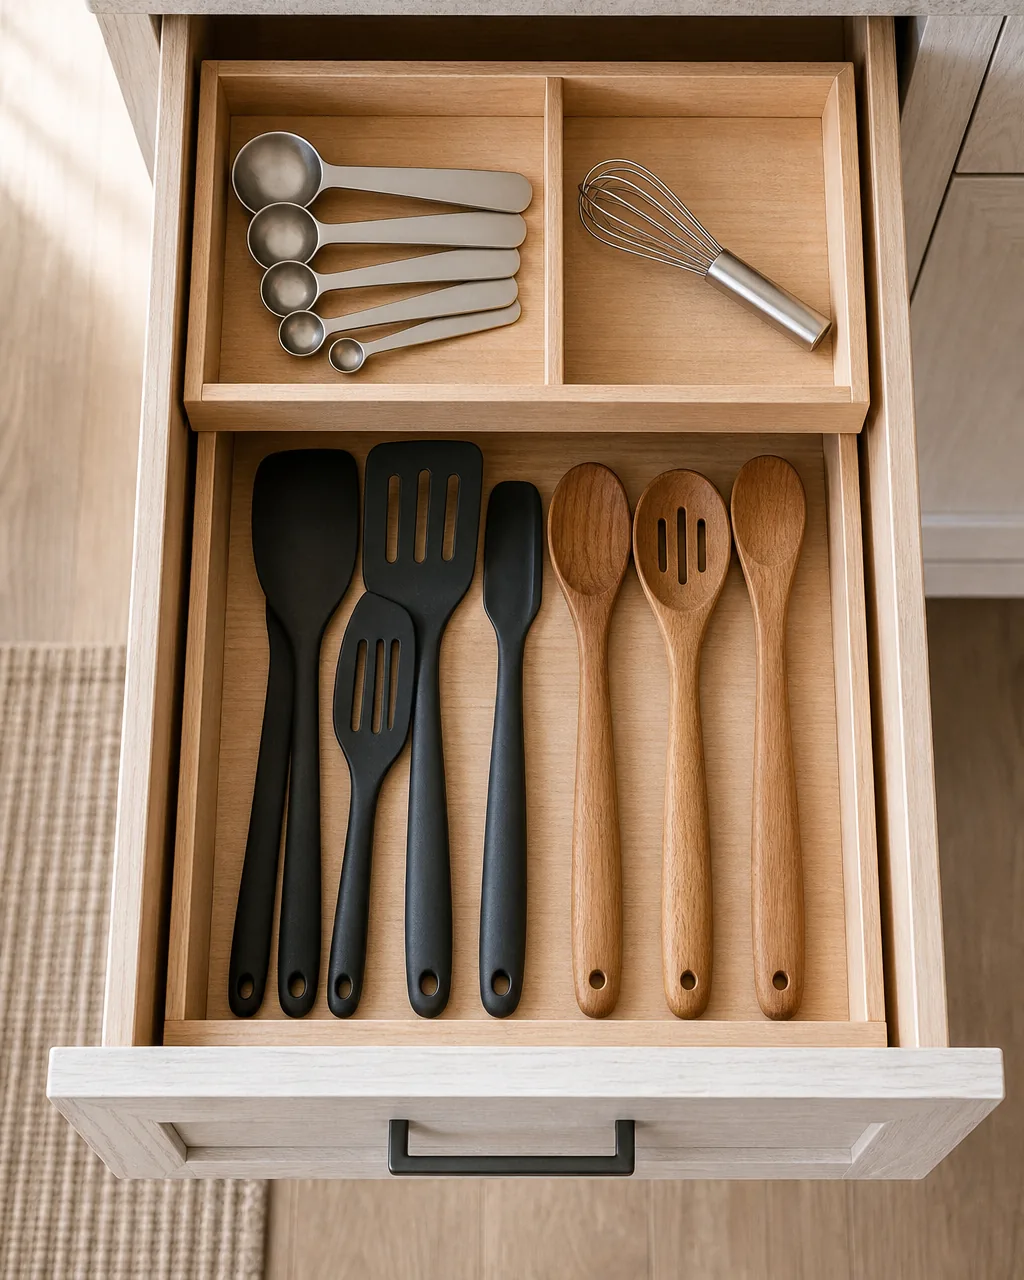
Cut Drawer Dividers to Fit Each Tool Shape
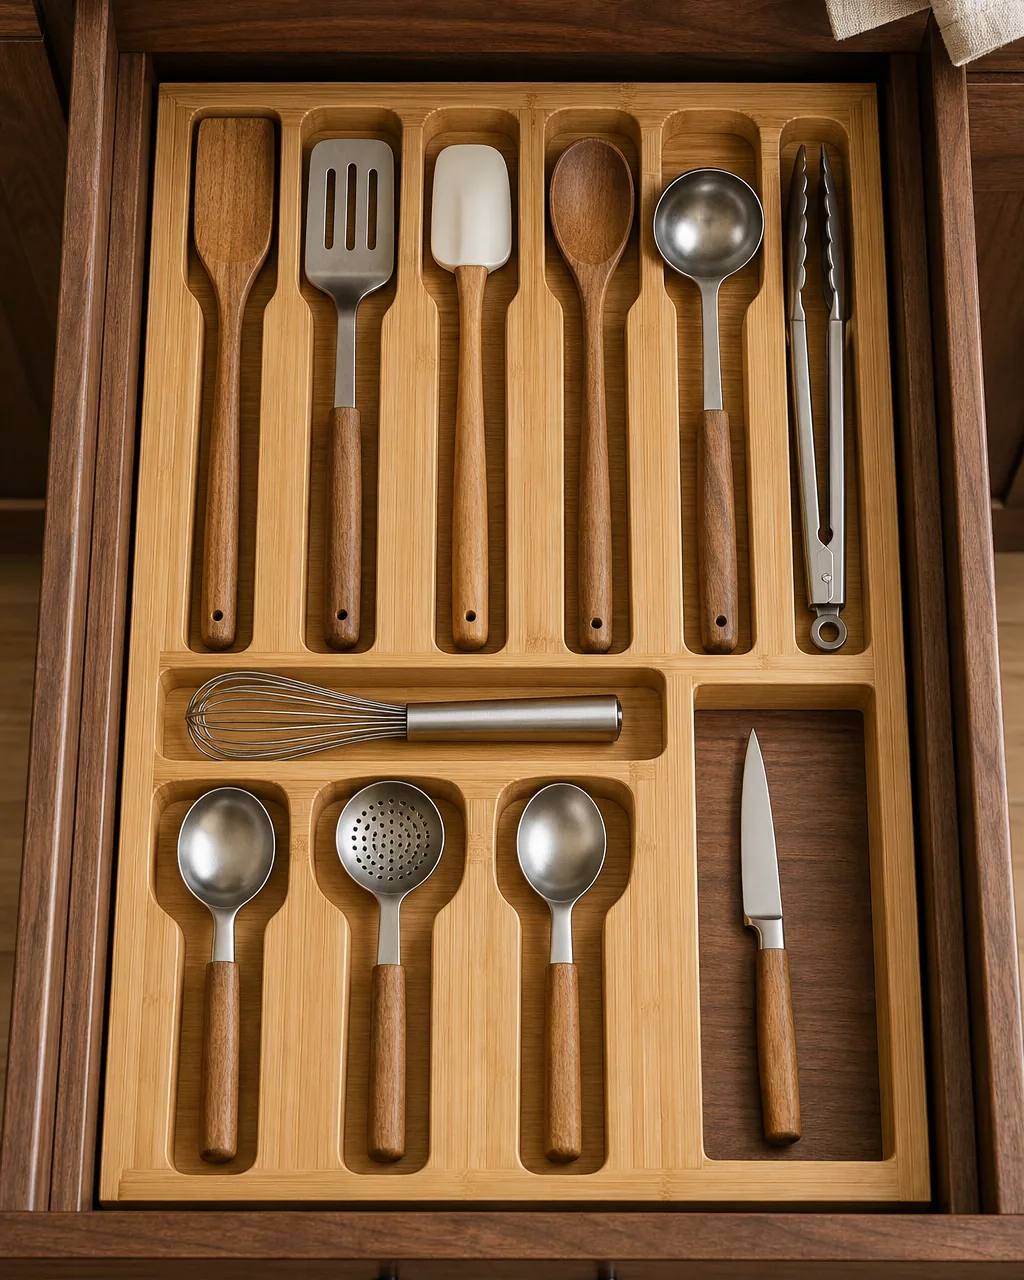
A drawer divider does almost nothing if it just chops the drawer into three identical squares. The version that actually keeps things tidy is shape-fit: a long narrow slot for spatulas, a wider channel for ladles, a shallow row for whisks, a small square bay for a paring knife. Every tool has a home that fits its outline.
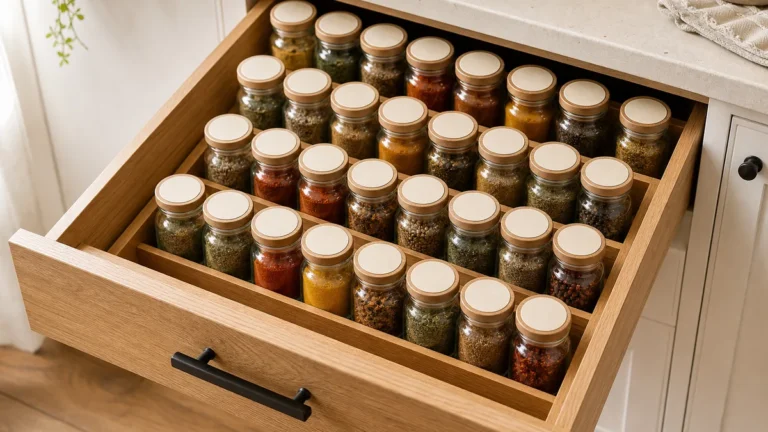
Bamboo expandable inserts are the easiest way in, but the principle works with simple cut-to-size pieces too. It is the same approach used in a spice drawer system, tuned to a different set of shapes. Once each tool has a bay, the drawer stops collecting drift, and you can close it without anything snagging.
- Map your drawer on paper first, group the tools by shape, then plan the dividers around them
- Use bamboo expandable inserts for the cheapest path; cut basswood strips if you want a custom fit
- Give long flat tools a long narrow channel, never a square slot they slide around in
- Leave a single empty bay near the front for new arrivals so you do not need to redo the whole layout
- Replace any divider that has bowed or cracked; a wobbly wall is what restarts the tangle
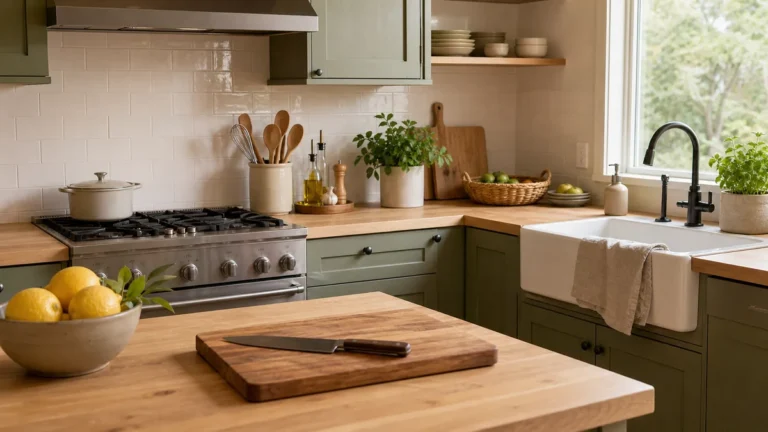
Keep the Daily Five in a Counter Crock by the Stove
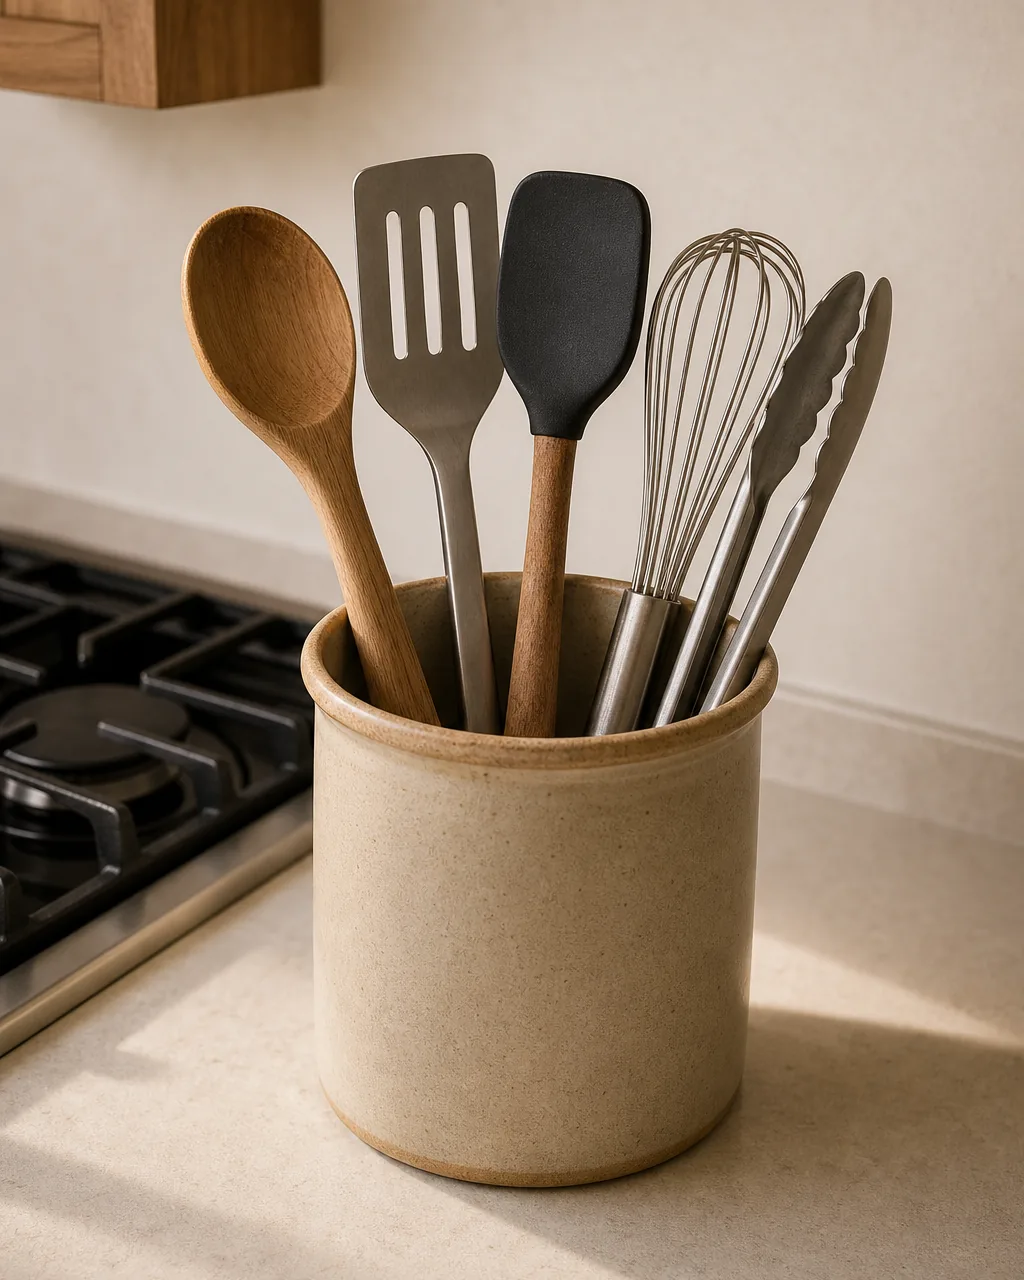
The drawer is not the right home for the tools you reach for every night. The crock is. Pick the five you actually use the most, a wooden spoon, a slotted spatula, a silicone spatula, a whisk, a pair of tongs, and park them in one stoneware crock right next to the cooktop. Handles up, business ends down.
The hard part is the discipline: five, not eleven. A crock with twelve handles fanning out is not organized, it is a holder for clutter. Five looks edited and stays calm even when the rest of the counter is busy.
- Choose a heavy stoneware or ceramic crock so it does not tip when you pull a tool out one-handed
- Cap it at five tools; anything you reach for less than weekly does not belong here
- Set the crock on the side of the stove your dominant hand reaches first, not the prettiest corner
- Keep the surrounding counter clear so the crock reads as a feature, not the start of a pile
- If a tool keeps falling out, it is the wrong size for the crock; move it to a drawer or hook
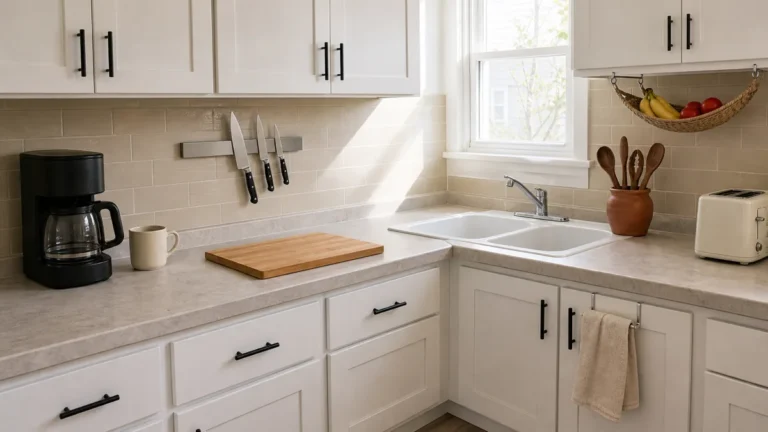
Hang the Knives on a Magnetic Strip
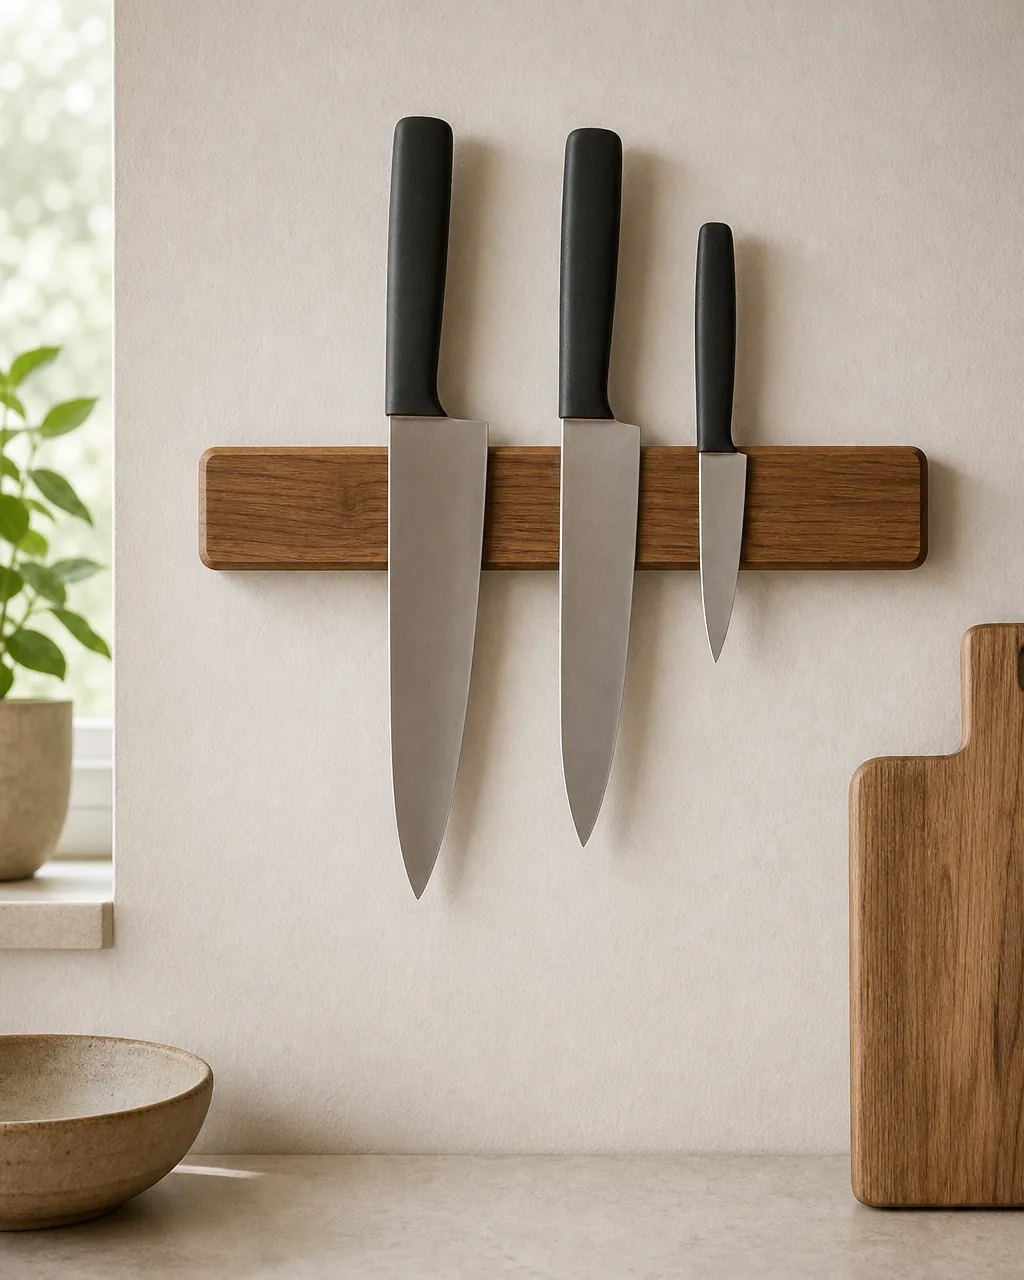
A block of knives eats counter space; a drawer of knives eats fingers. A slim magnetic strip on the backsplash does neither. The blades hang vertical above the prep zone, visible at a glance, blade dull-side down so nothing reaches a child’s height. The drawer below frees up for utensils, and the counter clears.
It also keeps blades sharper. They are not knocking against each other or grinding across drawer dividers every time you open it. One strip, three or four knives, is plenty for most home cooks.
- Mount the strip directly above the prep zone, not next to it, so the reach is one motion
- Set it above adult shoulder height if children are in the kitchen; out of reach beats out of sight
- Hold each knife dull-spine to the magnet first, then rotate the blade in so you never slide the edge across the strip
- Choose a strip with a warm wood or matte black face so it reads as architecture, not a tool wall
- Cap it at three to five knives; more than that turns the wall into clutter again
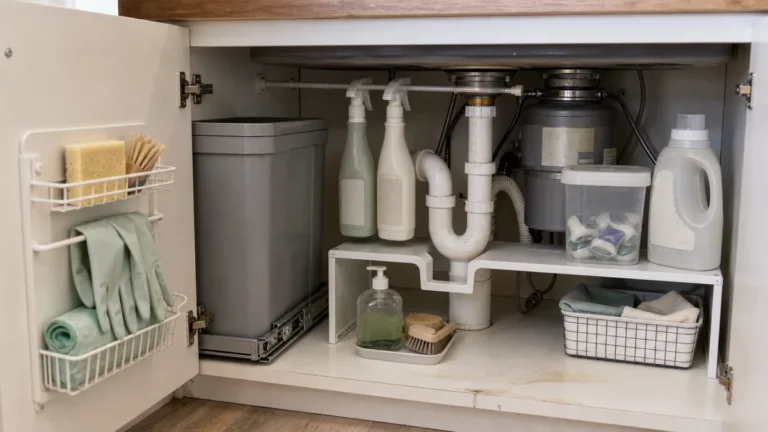
Move the Awkward Gear Inside the Cabinet Door
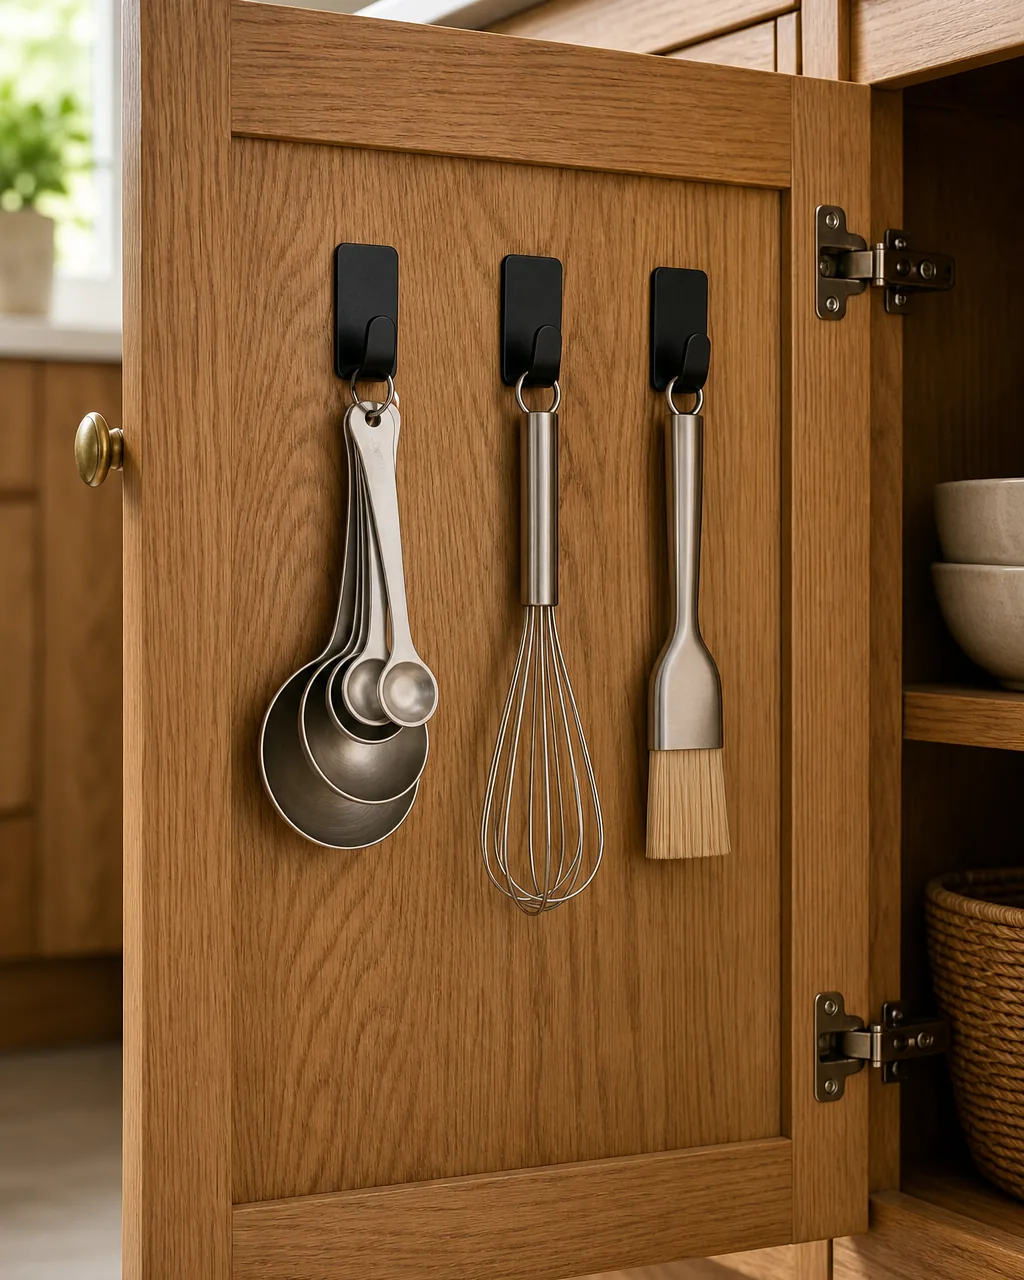
Measuring spoons, a basting brush, a small whisk, a microplane. The narrow gear nobody has a real home for, that always ends up at the bottom of a drawer in a tangle. The inside of a cabinet door is dead space, and three small adhesive hooks turn it into the right home for them.
It is the kind of move that looks like nothing in a photograph and changes the drawer entirely. The awkward five are gone from the main drawer, you can see them when the door swings open, and you stop fighting tangle every time you reach for a spatula.
- Pick the inside of a lower cabinet door near the prep zone, not a high upper cabinet
- Use slim adhesive hooks rated for the tool weight, and press for thirty seconds, not three
- Hang the tools by a hole or loop in the handle; if a tool has neither, add a small leather tie
- Space hooks so the door still closes flush, with two finger-widths between tools
- Skip hanging anything heavy or sharp here; this is for light, narrow, awkward gear only
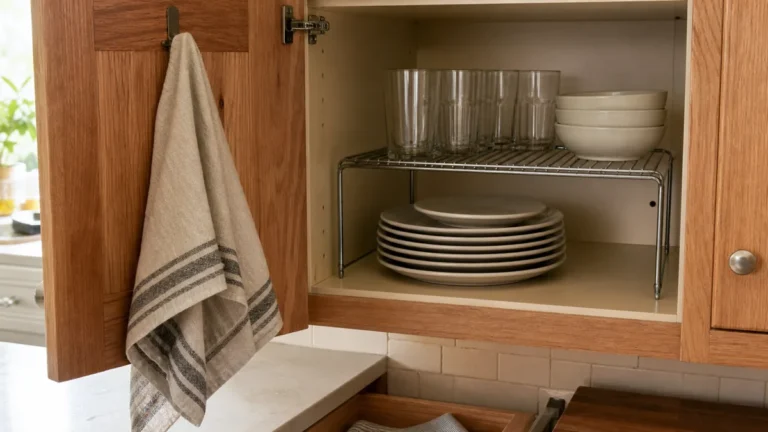
Lift Small Tools on a Two-Tier Drawer Insert
A shallow drawer is a blessing until you try to fit measuring spoons next to your spatulas and lose them under everything. A two-tier insert is the fix. The bottom tray holds the flat tools, spatulas and spoons laid out long. The top sliding tray lifts above them and holds the small gear, measuring spoons, a tiny whisk, a peeler.
Nothing stacks blind. You slide the top tray forward, see everything underneath, grab what you need, slide it back. The drawer holds twice as much and still reads orderly when you open it.
- Choose an insert that slides front to back, not one that lifts out; sliding is faster
- Put the small, easy-to-lose tools in the top tray and the longer flat tools below
- Match the insert dimensions to the drawer interior, not the drawer face, so the tray does not bind
- Leave one empty bay in each tier so a new tool does not force you to redo both
- Wipe the slide rails when you mop the floor; a little flour is enough to make the tray stick
Station Tools Where Each Task Actually Happens
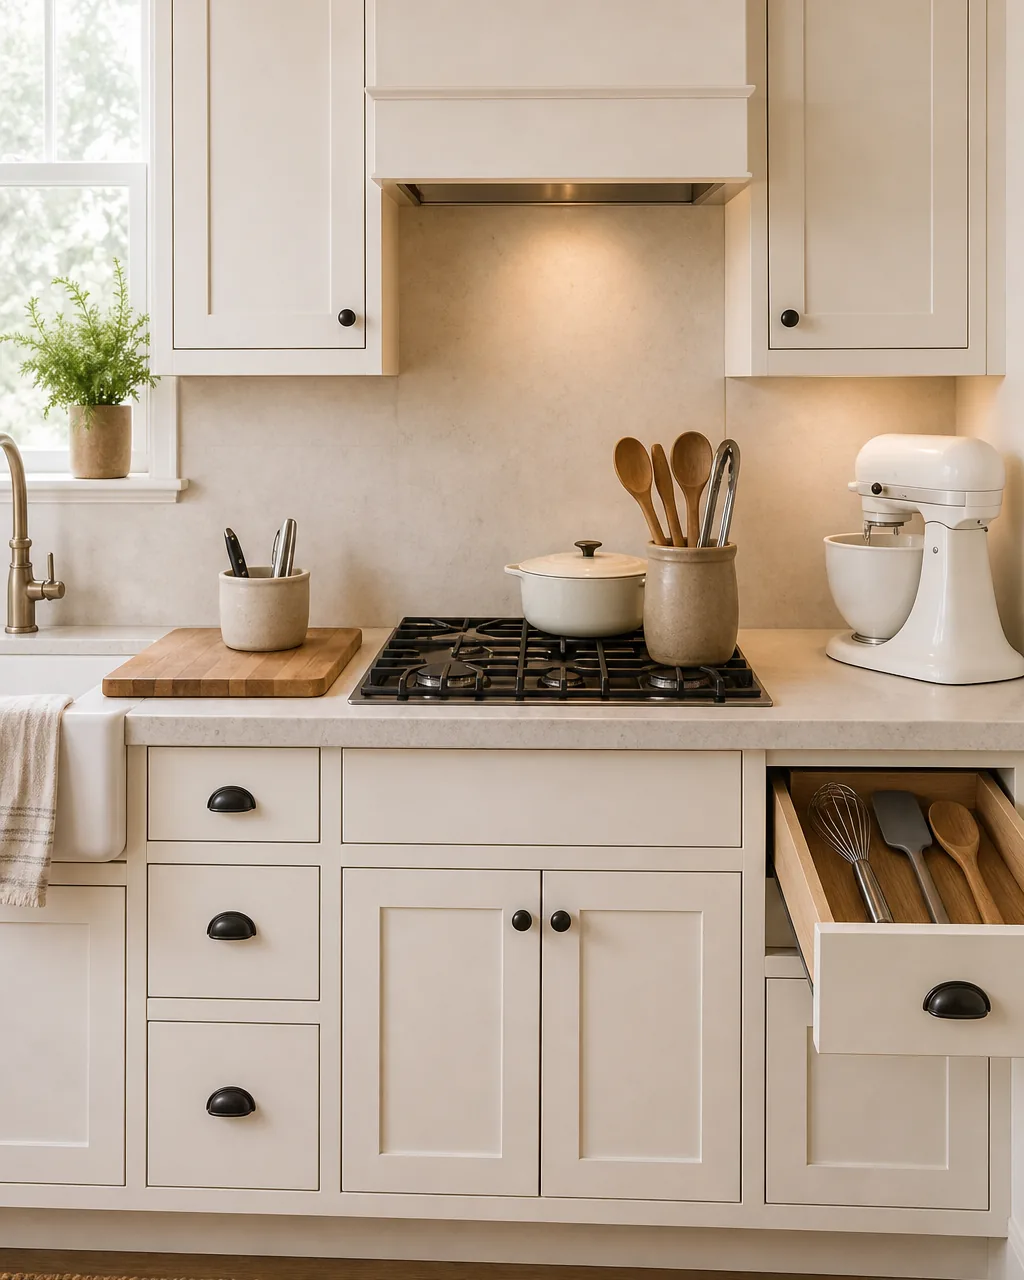
The reason a kitchen feels cluttered even after you organize the drawer is that everything still lives in one drawer. Walk through what you actually do, prep at the cutting board, cook at the stove, bake at the mixer, and the tools want to live where the task happens.
Three small holds beat one big one. A prep crock by the cutting board holds peelers and a paring knife. A cooking crock by the stove holds spoons and tongs. A bake drawer by the mixer holds whisks and spatulas. You stop walking back and forth, and each spot stays calm because it only holds the five things that belong there.
- Watch how you cook for a week and notice which tools you carry across the kitchen, then move them
- Put a prep crock or magnetic strip near the cutting board for peelers, paring knife, and microplane
- Park spoons, tongs, and slotted spatulas next to the stove, not in a far drawer
- Group whisks, sieves, and silicone spatulas near the mixer or the bake counter
- Resist duplicating tools across zones unless you bake and cook at the same time; one good whisk is enough
Hang the Long-Handled Tools on Wall Hooks
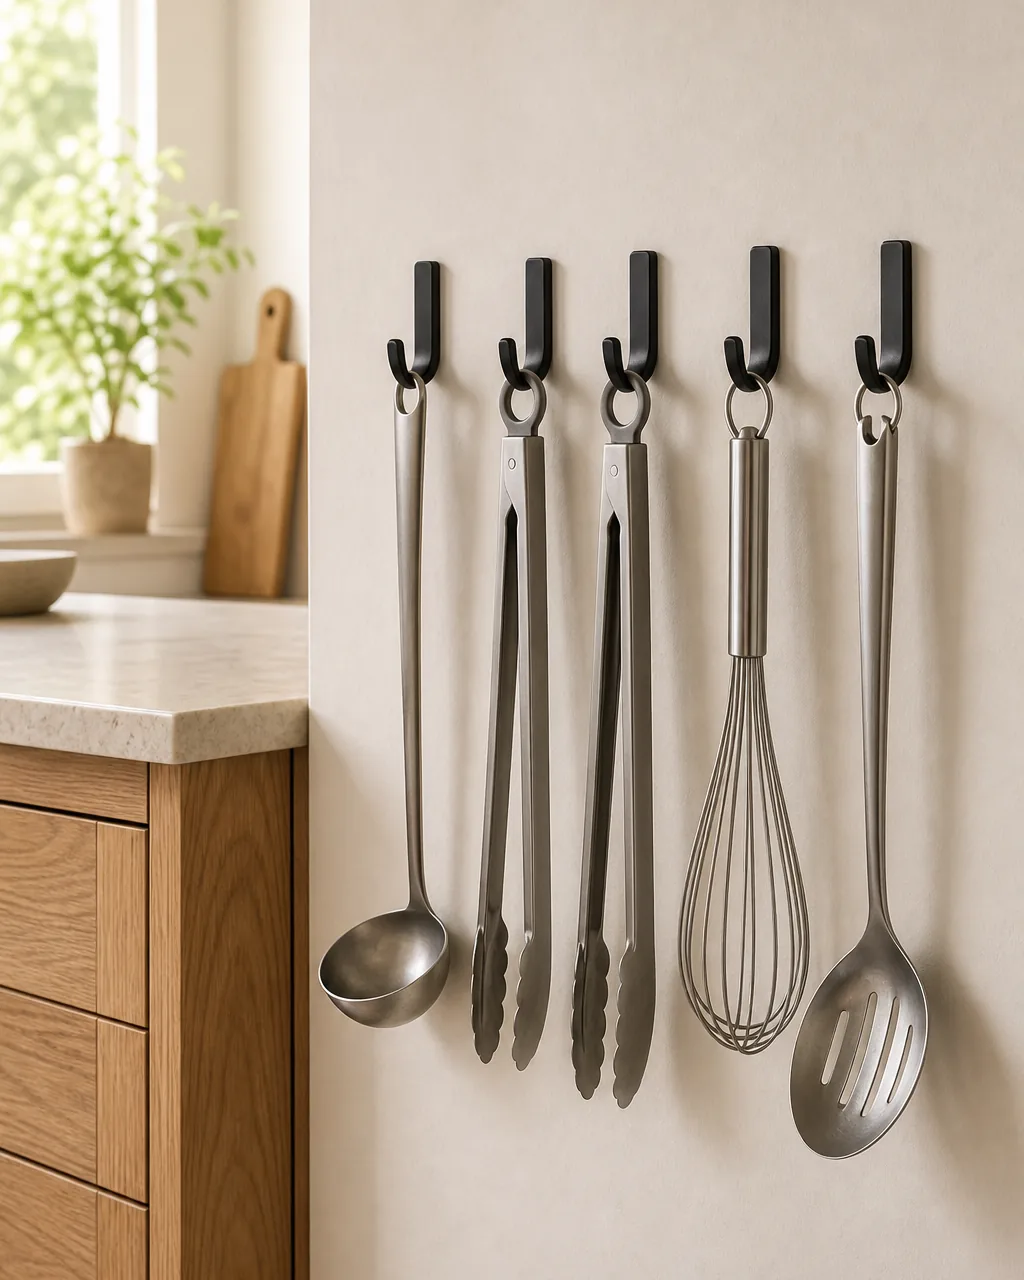
The long stuff, ladles, long tongs, a tall whisk, a slotted spoon, is what bullies a drawer. The stems do not lay flat, the handles knock into everything else, the drawer barely closes. Move them to a short row of wall hooks beside the island, hung by their handles, stems pointing down.
It is a working wall, not a display wall. Five hooks, five tools, all of them within arm’s reach of where you cook. The drawer below stops fighting the long-handled tools, and the wall gets a quiet, functional rhythm instead of empty space.
- Mount hooks at adult eye level, in a tight line, so the row reads as one composition not a scatter
- Use matte black or warm-brass hooks that read as fixtures, not the gold-plated coat-rack version
- Hang each tool by the loop or hole in the handle; nothing balanced or wedged
- Keep the row to five or six tools so the wall stays edited
- Pick a wall near the stove, not the only wall with empty space; usefulness beats symmetry
Line the Drawer So Nothing Slides Into a Tangle
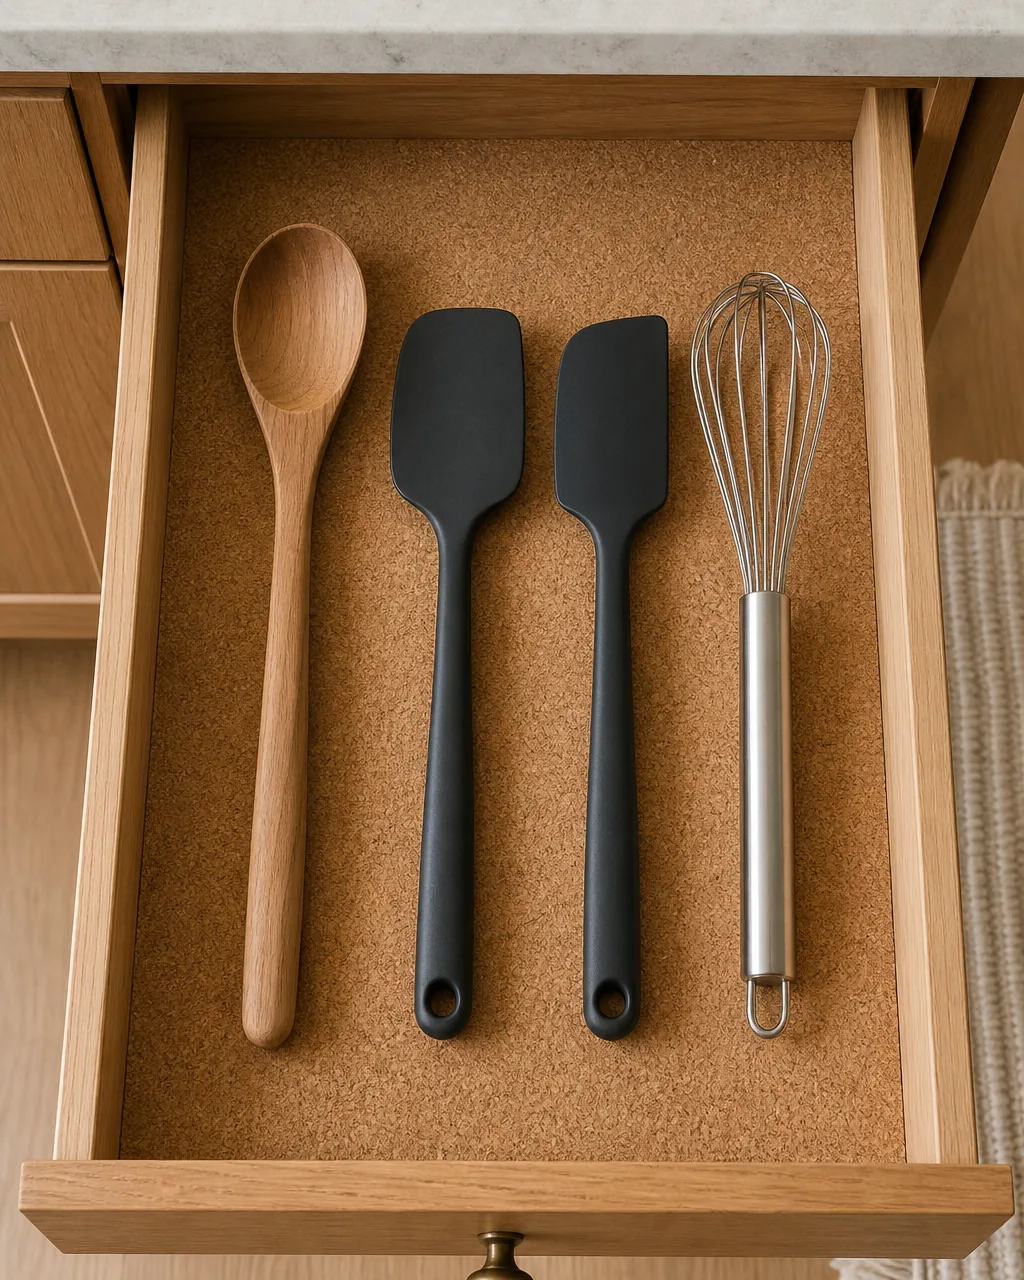
A clean drawer with good dividers still slides everything into a corner if the floor of the drawer is slick. A soft natural cork liner, or a thin rubber grip mat, fixes it. The utensils stay put when you open and close the drawer, which means the dividers actually keep working.
It also quiets the whole drawer. Wood and metal handles stop rattling against the bottom, the drawer opens softer, and the whole thing feels more deliberate even though the change is invisible from above.
- Choose natural cork or a thin rubber grip mat over a printed liner; texture is what stops the slide
- Measure the drawer base before cutting; one tight piece beats two overlapping pieces that lift
- Wash the liner once a season; cork wipes clean, rubber mats can go in the sink
- Replace a cork liner once it dents permanently around the heavier tools, usually after two years
- Skip adhesive liners; the grip should be passive so you can lift the liner out to clean underneath
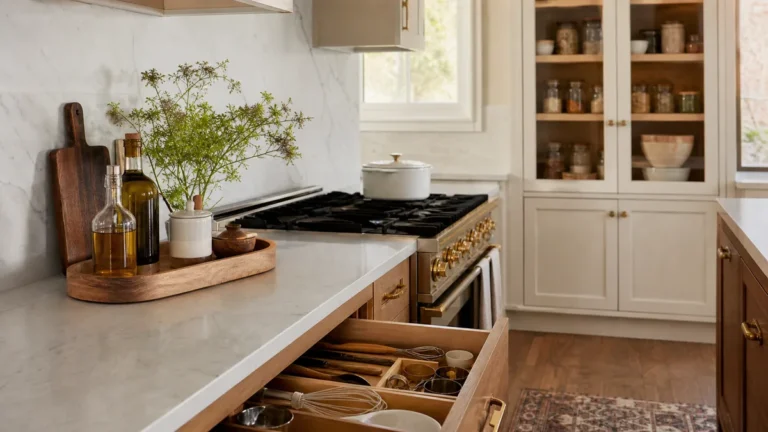
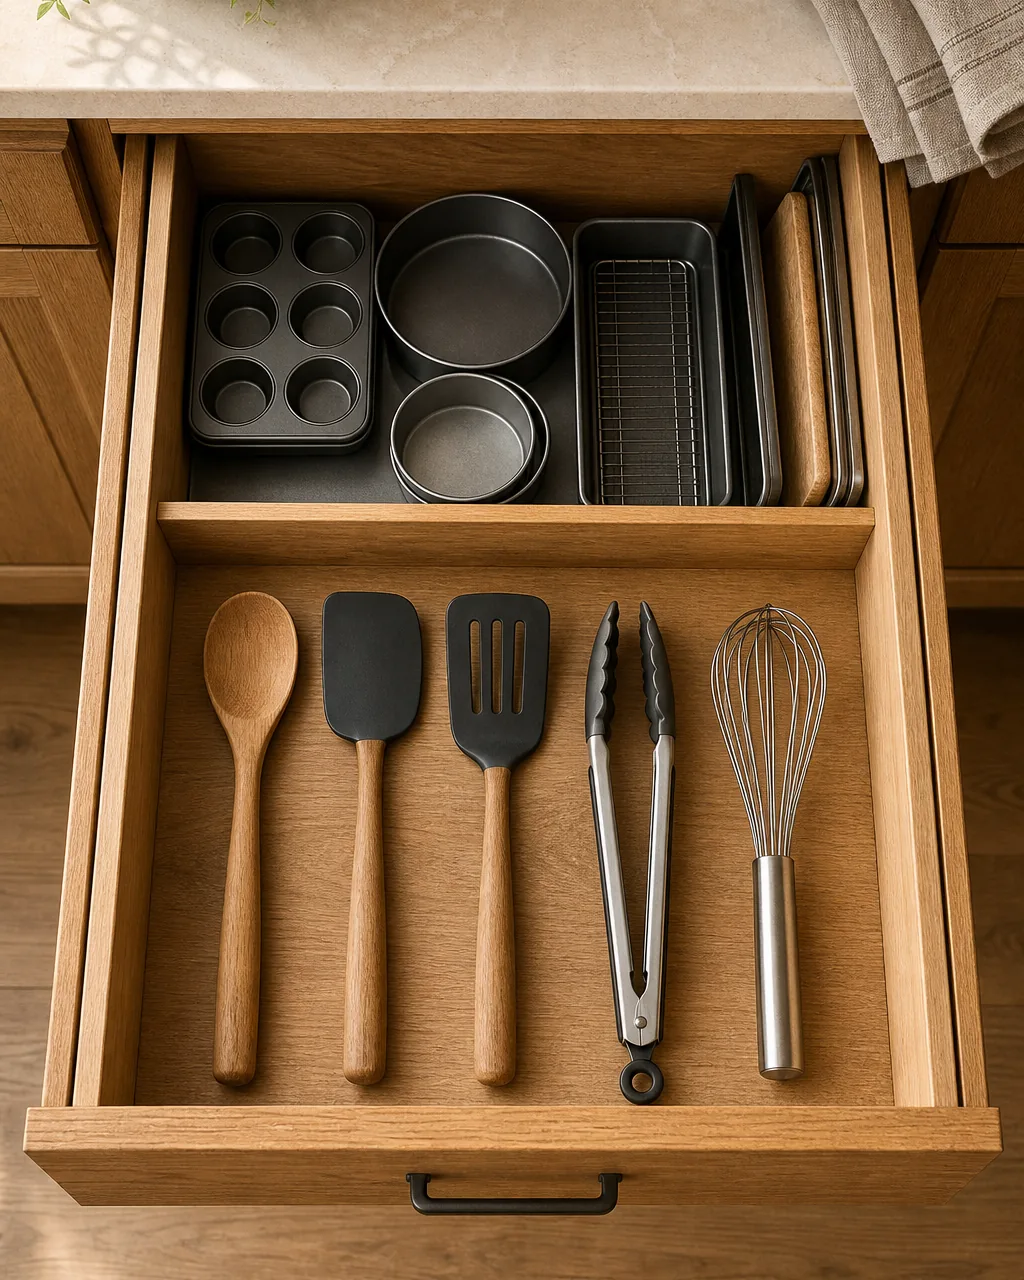
Pull the Baking Tools Out as One Labeled Kit
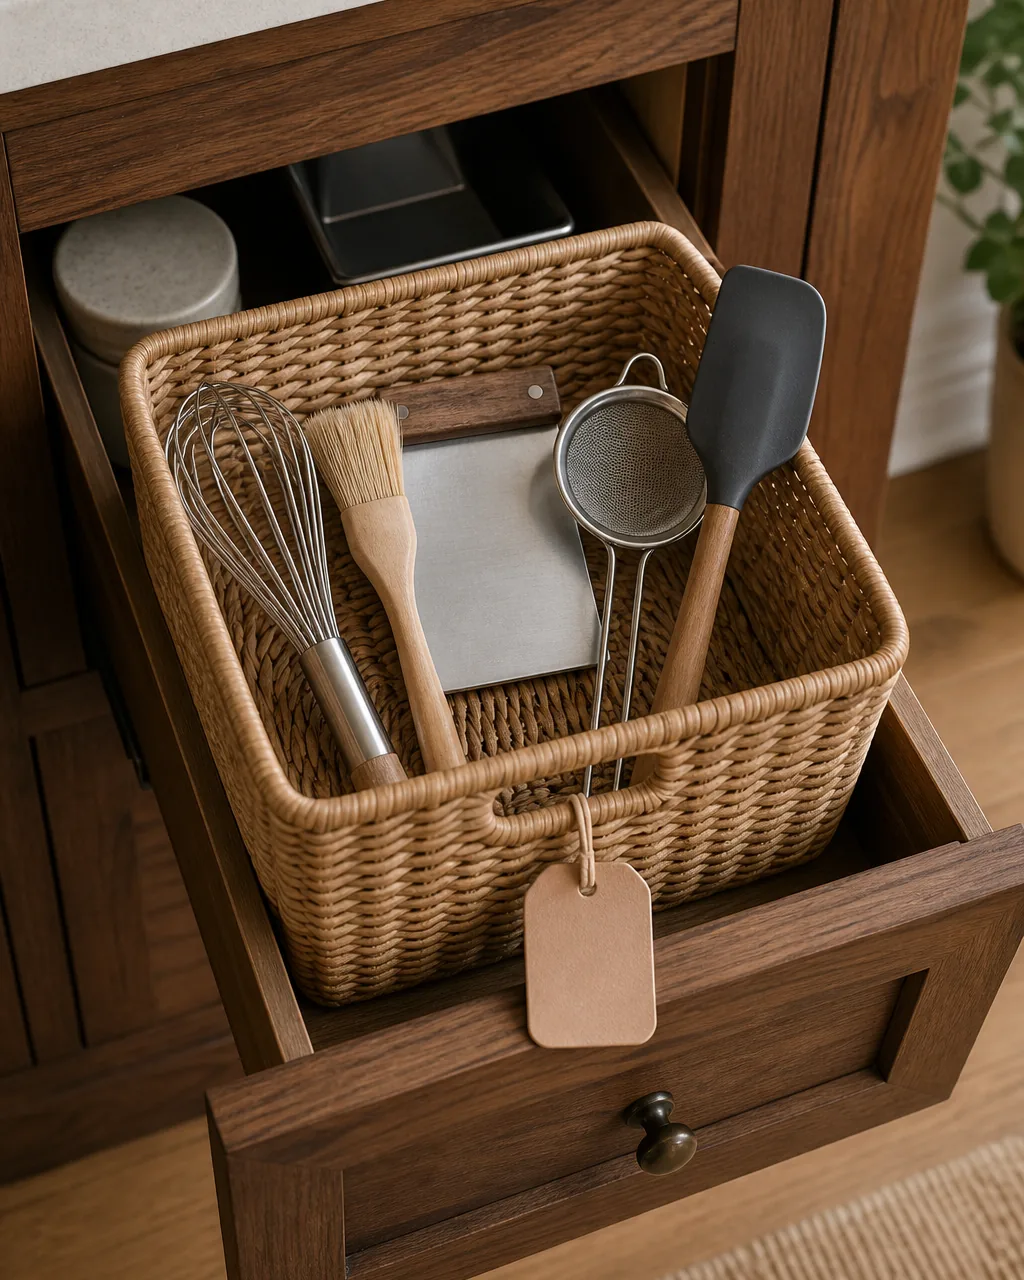
Baking is a once-or-twice-a-month job that needs its own collection of tools, and those tools have no business in the daily drawer. A small rattan or wood bin holds the kit: a whisk, a pastry brush, a bench scraper, a small sieve, a silicone spatula. Tag it so anyone in the house knows what is inside.
When you bake, the whole bin comes out to the counter as one piece. When you are done, it goes back to its cabinet shelf as one piece. The daily drawer never has to host them, and the kit never gets split up across three drawers again.
- Cap the kit at five to seven tools; this is for bake-only gear, not anything that doubles for cooking
- Choose a soft natural bin with a handle so you can lift it out one-handed with a sticky dough hand
- Store the bin on a low shelf you can grab without a step stool, not high up over the fridge
- Add a small leather or paper tag so the kit is recognizable when guests help in the kitchen
- Refill the kit after each bake; if the brush is missing, the kit is broken until it is back
Use a Vertical Tension Rod for Flat Awkward Tools
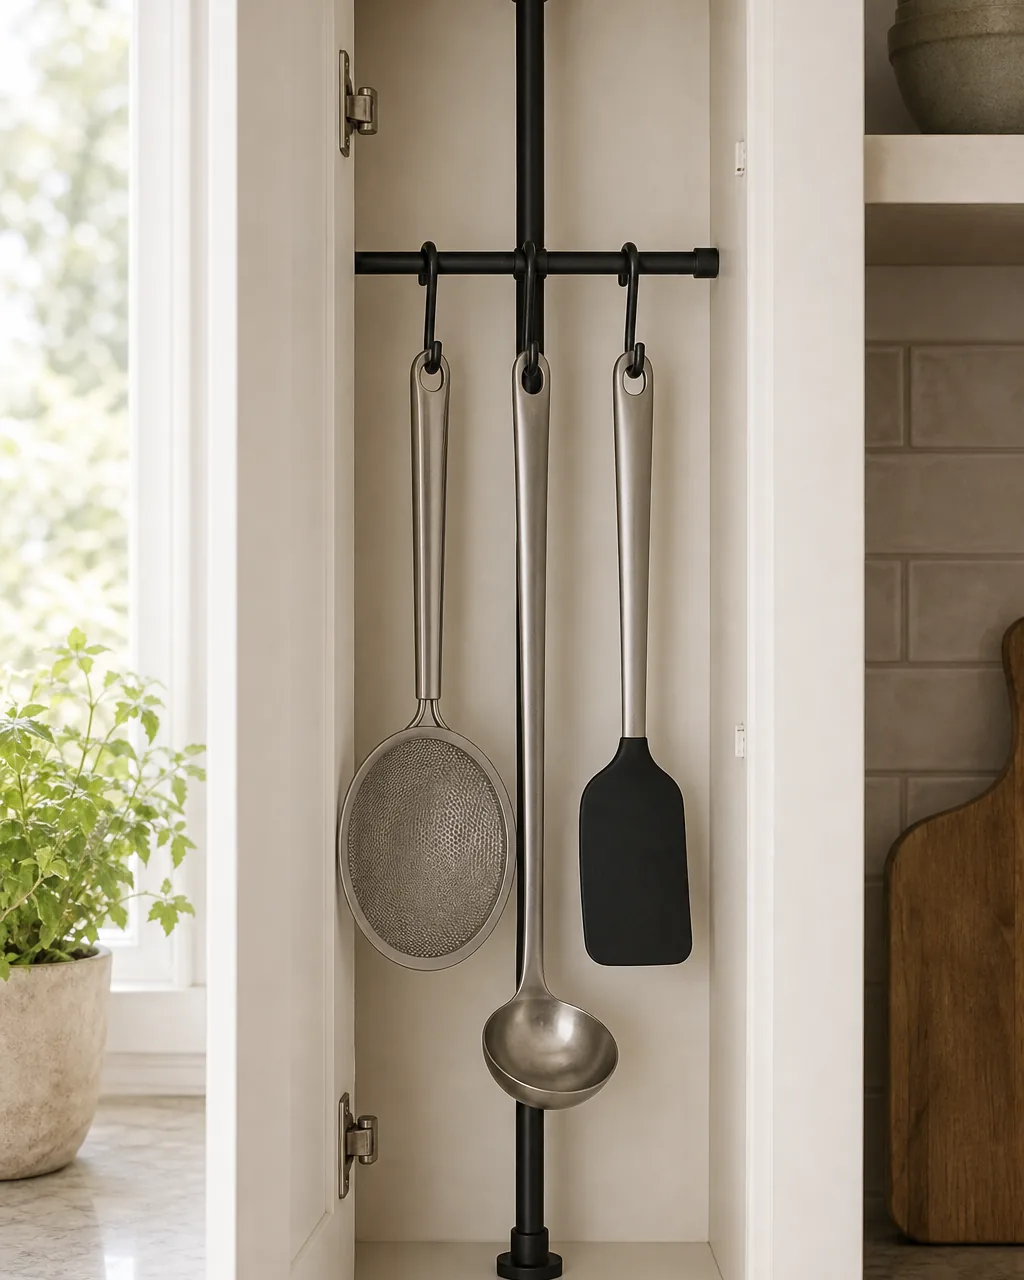
Every kitchen has one tall, narrow, awkward cabinet that nothing fits into well. A vertical tension rod mounted from the inside top to the inside bottom turns that dead space into a hanging rack. Three or four large tools hang upright by their handles, a flat strainer, a long ladle, a flat silicone spatula, all visible the moment you open the door.
Using the door instead of stacking lids and trays you cannot reach is the move. Tension rods cost almost nothing, install in two minutes, and free up an entire drawer because the bulky flat gear stopped trying to share it.
- Pick a tension rod rated for ten to fifteen pounds; the cheapest plastic ones bow under tools
- Mount it back from the door edge by an inch so tools hang clear when the door closes
- Hang each tool through the existing loop or hole in the handle; do not improvise with S-hooks that swing
- Cap at four tools per rod; more and the rod tilts forward over time
- Save the trays and lids the cabinet used to hold for a separate vertical file rack underneath
Stack Clear Acrylic Trays So Nothing Gets Buried
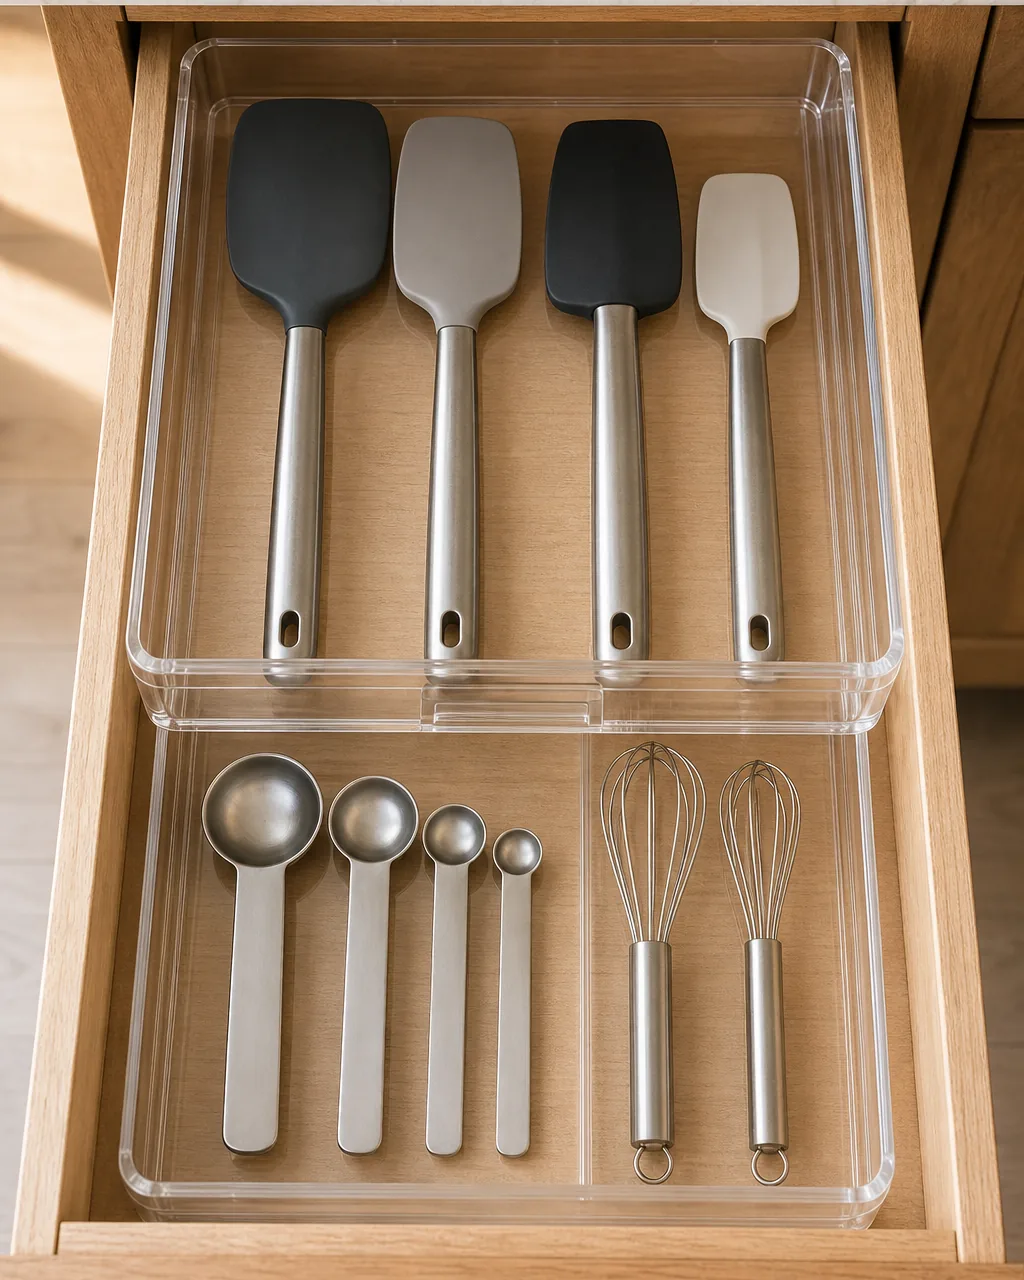
The other version of the two-tier drawer trick uses clear acrylic instead of wood, and the difference is visibility. The transparent walls let you see the tools in the lower tray even when the upper tray is sitting on top of them. Nothing gets buried, because you can always see what is buried.
It is a different aesthetic from cork-and-bamboo warm, but in a busy household drawer where two cooks share the space, the visibility wins. Anyone opening the drawer can see what is where in one glance, which is the whole point of organizing it in the first place.
- Choose acrylic trays with a smooth sliding base so the top tray glides without lifting the bottom
- Pick adjustable trays with movable dividers; tool collections change, the tray should too
- Match clear acrylic in one drawer and warm wood in the next so each room still reads warm overall
- Wash the trays once a season; crumbs settle in the corners and the transparency dulls
- Replace acrylic that has yellowed or cracked; cloudy plastic defeats the only reason you chose it
None of this needs a Container Store run or a weekend off. Start with the drawer beside your cooktop, sort by how you actually cook, give the tools you reach for nightly a home with their name on it, and move the awkward gear to a wall hook or inside a cabinet door. Once that one drawer stays calm for a week, the rest follows.
Start with tool-shape dividers and a cook-frequency sort. Bays first, edit second.
Move the daily five to a counter crock by the stove, then hang the blades on a magnetic strip.
Hide it with inside-cabinet door hooks and a tiered drawer insert for layered visibility.
Pull a self-contained labeled baking bin and station the rest by task zones.
- Every tool gets a bay, or it leaves. If a utensil has no slot, no hook, and no crock, it stops earning drawer space.
- Sort by use, not by category. Daily five up front; weekly bake and serve tools live behind them, not mingled.
- Park near where you use it. Cook tools by the stove, prep tools by the cutting board, bake tools by the mixer.
- Edit before you organize. Two spatulas, not five. Dividers and crocks only work after the duplicates are gone.
Pin this so the next time you reorganize, the tool sort, the dividers, the crock, and the bake kit are all in one place.
- 1. Sort by how often you actually cook with it
- 2. Cut drawer dividers to match the tool shape
- 3. Park the daily five in a counter crock by the stove
- 4. Hang the blades on a magnetic strip
- 5. Hide the awkward gear inside the cabinet door
- 6. Lift small tools on a tiered drawer insert
- 7. Station tools where you actually use them
- 8. Hang the tall, long-handled tools on wall hooks
- 9. Line the drawer so nothing slides into a tangle
- 10. Pull the baking tools out as one labeled kit
- 11. Use a vertical tension rod for flat awkward tools
- 12. Stack clear acrylic trays so nothing gets buried
Once the drawer is sorted, keep the whole kitchen on track with our kitchen organization guide and our spice drawer system.