15 Kitchen Cabinet Organization Ideas for Every Cabinet Type
Kitchen organization rarely fails at the kitchen level. It fails one cabinet at a time — the corner you avoid opening, the upper shelf you can’t quite reach, the deep base cabinet that swallowed your stockpot back in March. Generic “organize your kitchen” advice doesn’t help when the failure is cabinet-specific.
So this article is structured the way the problem actually shows up: cabinet by cabinet. Upper, lower, corner, drawer, and the inside of every door. Fifteen moves you can do one weekend at a time, with the cabinet still standing where it is. If you also need counter and broader-kitchen ideas alongside this, the full kitchen organization rundown sits next to this one.
Skim the list, jump to the cabinet you want to fix first. Five cabinet types, fifteen specific moves. None require replacing the cabinet itself.
- 1Shelf risers
- 2Clear bins, grab-and-go
- 3Light items, top shelf
- 4Pull-out drawer kit
- 5Vertical pan file
- 6Door-mounted lid peg
- 7Heavy roll-out drawer
- 8Lazy susan, corner
- 9Half-moon, blind corner
- 10Divide by use, not size
- 11Plates on vertical pegs
- 12Angled spice tier
- 13Shallow drawer spice tray
- 14Door-mounted spice + lid rack
- 15Above-fridge pull-out bins
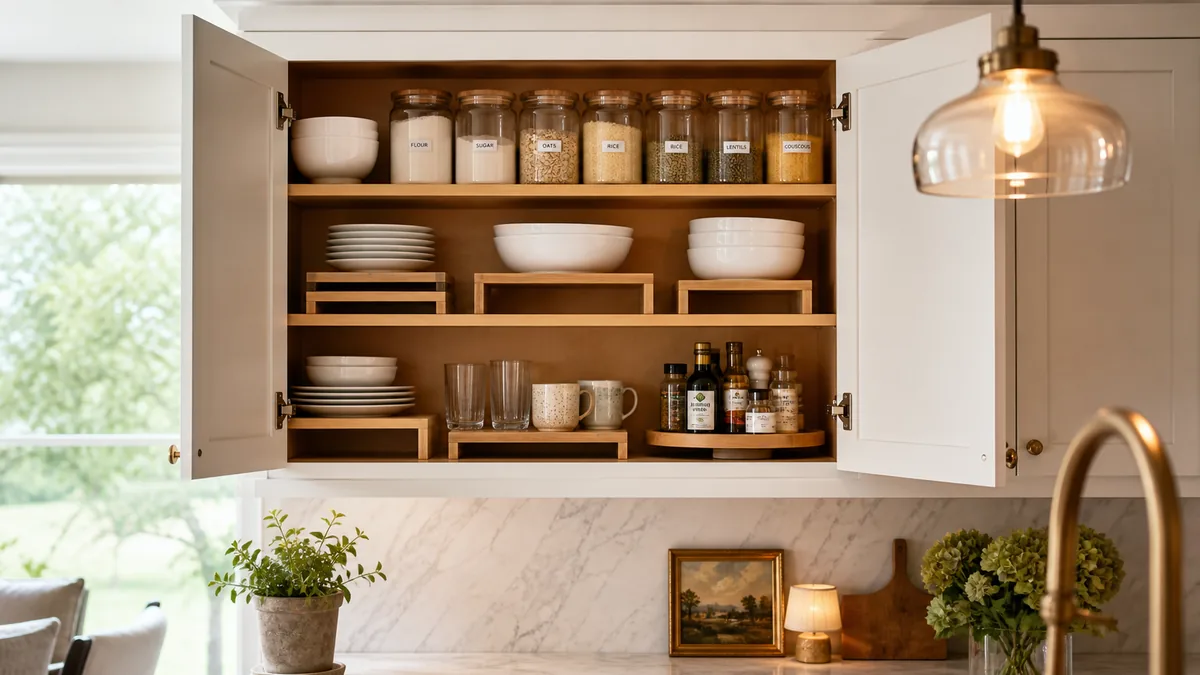
Double Upper Cabinet Capacity with Shelf Risers

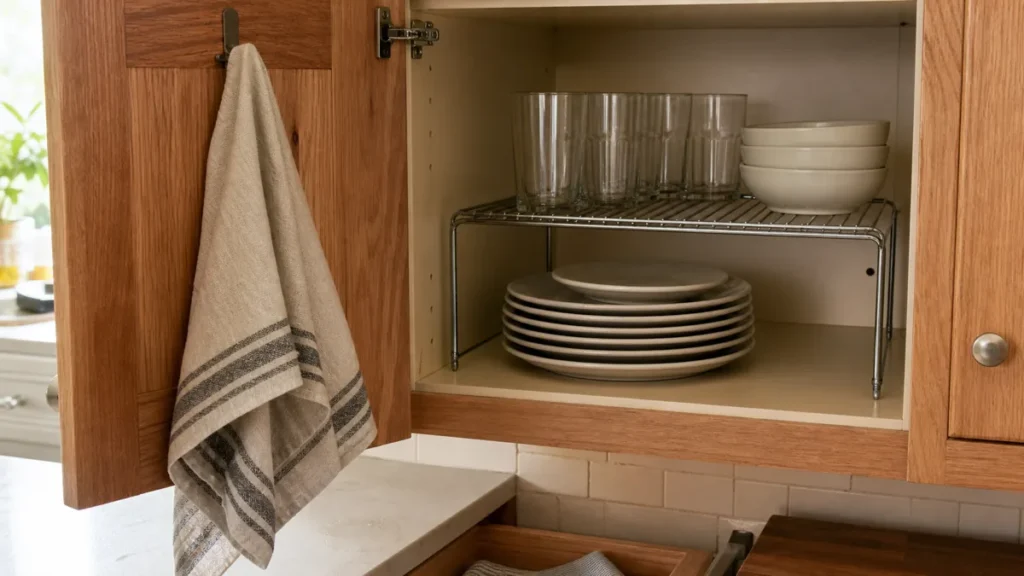
An upper cabinet shelf usually holds one stack of plates with eight to ten inches of air above it. That air is shelf you already paid for and aren’t using.
One metal shelf riser, dropped onto the lower shelf, splits that air into two usable layers. Dinner plates underneath. Salad plates and ramekins on top of the riser. The riser doesn’t bolt to anything, doesn’t ask permission from your landlord, and lifts out in two seconds when you need to clean.
The version in the picture is the standard adjustable kind — wire mesh, four short legs, eight to twelve dollars at most kitchen stores. One per cabinet shelf is usually enough. If you have an unusually tall cabinet (a few apartments do), a second riser stacked above the first can give you three layers.
Use Stackable Clear Bins for Grab-and-Go Upper-Shelf Items

The other failure mode in upper cabinets isn’t stacking — it’s the loose-snack pile-up. Granola bar pouches, coffee filters, tea bag boxes, one half-empty bag of nuts. Each item is fine on its own. Together they slide into chaos by Wednesday.
Three stackable clear bins fix this for the cost of a coffee out. One bin per category — snacks, coffee, tea — so the contents of each bin are predictable without a single label. The bins have small front handles, which means you pull the whole bin forward, grab what you need, and slide it back. The cabinet shelf stays clean because you stopped reaching past things.
If your upper cabinet is closer to a pantry shelf (taller items, more variety), the same logic carries over to the pantry-organization approach with bigger bins. Same idea, different scale.
Reserve the Top Shelf for Light, Seasonal Items Only

A top shelf you can’t reach without a step stool is a top shelf you’ll only open four times a year. Treat it that way on purpose.
The image above is the rule made visible: foil roasting pans you pull out for one big meal, a parchment roll and a foil roll because they stand on end and never fall, one large serving platter that lives behind glass the rest of the year. Nothing in this picture you’d want every day. Nothing heavy. Nothing breakable that would hurt coming down.
The mistake most apartments make is filling that top shelf with the things they couldn’t fit elsewhere — a stand mixer, a stockpot, the food processor. Those belong at counter height or in a base cabinet. The top shelf belongs to objects that are light, flat, and rarely visited.
You don’t need all fifteen at once. Pick the row that matches the cabinet you avoid opening, and jump to the two or three moves that fix it.
Install Pull-Out Drawer Kits in Deep Base Cabinets

A deep base cabinet is a black hole. The back half is unreachable, so the back half stops getting used, so the cabinet’s true storage volume is half of what you’re paying for. Bending over with a flashlight is not a system.
A pull-out drawer kit converts that black hole into a drawer that comes to you. The version in the picture is a wood-bottomed kit on standard side-mount slides — a cabinet’s existing shelves are removed, the kit drops in, and the slides screw to the cabinet’s inside walls. About one hour of installation for someone comfortable with a drill. Most kits are sized to fit standard 12-inch, 15-inch, or 18-inch base cabinets.
For renters: the slides come out the same way they went in, and the screw holes are inside the cabinet — not visible from the kitchen. Of all the cabinet upgrades you can make in a rental without changing the cabinet itself, this is the one that pays back hardest.
File Pans Vertically or Mount Lids on a Pegboard

Sheet pans, cutting boards, and cookie sheets are the worst offenders for horizontal storage. Stacked flat, they’re a slow-motion avalanche every time you pull one out.
The image shows two fixes that work in the same cabinet. On the cabinet floor: a vertical pan file rack — the wire kind with adjustable dividers — holds sheet pans and cutting boards on edge. You grab the one you want without disturbing the others. On the cabinet door, on the inside: a small pine pegboard holds pot lids on pegs that thread through each lid’s center, knob facing out — three lids in a triangular layout, each one visible at a glance.
- The cabinet-door pegboard idea is worth calling out on its own — almost every cabinet has unused door interior real estate, and pot lids are the awkwardly-shaped item every kitchen has too many of. Mounting screws go through the door interior only, hidden from the outside.
Together these two moves usually free up half a base cabinet’s footprint that was previously eaten by horizontal stacking.
Build a Roll-Out Cookware Drawer for Heavy Pots

A pull-out drawer for pantry goods (idea 4) handles light items. A roll-out drawer for heavy cookware is a different specification — the slides need to be rated for the load.
The picture above is sized for the everyday heavy work: a cast iron skillet, a small enameled dutch oven, a couple of mixing bowls. The drawer extends fully so you can lift the dutch oven straight up rather than wrestle it past a cabinet door. The slides under this kind of drawer are heavy-duty undermount or side-mount rated to 100+ pounds — worth confirming on the spec sheet before you buy, because a cast iron skillet alone is six to ten pounds and a dutch oven full of soup is heavier than most slides are built for.
This is also the cabinet where it’s worth keeping a wooden spoon or a silicone spatula laid across — the tools you actually use with these pans. A pan that needs a tool you can’t find is a pan you avoid.
Most kitchen organization advice is written for kitchens that already work. These rules are for the kitchen you have right now, in the cabinets you didn’t choose, without changing a single cabinet face.
Add a Lazy Susan to the Corner Cabinet

The corner cabinet has the most square footage in most kitchens and the least usable storage. The geometry is the problem — you can reach the front, but the back corner is two feet away on a diagonal, and your shoulder doesn’t bend that way.
A two-tier lazy susan turns that geometry inside out. Everything rotates to the front. The bottles in the picture — oils on the bottom tier, dry-goods canisters on the top tier — are all reachable by spinning the susan, not by climbing into the cabinet.
A few details to get right when you shop. Tier diameter should be one to two inches less than the cabinet’s interior width at its narrowest point (often the cabinet face, not the back). Tier height matters too — make sure your tallest bottle clears the upper tier when it spins. And don’t fill the susan past the rim — anything overhanging will catch on the cabinet wall.
Use a Half-Moon Pull-Out for the Blind Corner

Some corner cabinets are not lazy-susan-shaped. They’re “blind corner” cabinets — meaning the cabinet wraps around behind an adjacent cabinet’s face, so half the storage is hidden behind a wall you can’t see past. Lazy susans don’t fit because the rotation arc is blocked.
The half-moon pull-out solves the geometry differently. The shelf is shaped like a half-moon and attaches to the cabinet on a swing-arm. You open the cabinet, swing the shelf out into the open kitchen, and the back of the cabinet is suddenly accessible. The picture shows a typical blind-corner load — items you use once a week but not enough to deserve counter space. A small slow cooker, a compact food processor, a backup jar of dry goods. Rarely-used by design — that’s the whole point of putting them where you have to swing them out.
This is one of the more expensive cabinet retrofits — the hardware costs more than a basic susan, and installation is harder. Worth it for blind corners that would otherwise stay empty.
Divide the Utensil Drawer by Use, Not by Size

The standard utensil drawer has spoons in one slot, forks in another, knives in a third. This sounds organized. It isn’t, because nobody cooks by reaching for “a spoon.” You cook by reaching for “the thing I need to flip the chicken right now.”
Group by use, not by shape. The picture shows three compartments that map to three moments in cooking. Prep: peeler, knife, microplane, shears. Serve: slotted spoon, ladle, tongs, fork. Bake: spatula, whisk, wooden spoon, offset. When you start a recipe, you open the drawer once and your hand goes to one zone.
The dividers in the picture are the adjustable kind — wood spines, slots you can reposition. Custom-fit to your drawer, removable when the drawer gets reassigned. Twenty dollars for a kit that covers most kitchen drawer sizes.
The 5-Cabinet-Type Kitchen Organization System
- 1Upper cabinetsShelf risers, stackable clear bins, and a deliberately sparse top shelf. Double the vertical use of every cabinet you already paid for.
- 2Lower & base cabinetsPull-out drawer kits, vertical pan files, door-mounted lid pegboards, and heavy roll-outs. The back of the cabinet comes to you.
- 3Corner & blind-corner cabinetsTwo-tier lazy susans when the cabinet rotates clean. Half-moon swing-outs when it’s blind. Dead square footage becomes reachable storage.
- 4Drawer cabinetsGroup utensils by use, stand plates and pans on vertical pegs, slot spices in an angled tier or shallow tray. Drawers stop being a guessing game.
- 5Door interiors & above-fridgeDoor-mounted spice and lid racks. Slim pull-out bins for the cabinet over the refrigerator. The two zones every kitchen forgets.
styledhomenotes.com
Stand Plates and Pans Up in a Deep Drawer with Vertical Pegs

A deep drawer beneath a counter is one of the most flexible storage volumes in a kitchen — but most people stack plates flat in it, and a flat stack of plates is heavy, slow to access, and prone to chipping on the way up.
Vertical wooden pegs in a peg-board base turn the same drawer into a plate file. Plates stand on edge between pegs. You see all of them at once. You grab one without lifting eight. The cast iron skillet on the right slots in the same way — vertical between two pegs — and the small stack of bowls fills the corner that pegs alone wouldn’t hold well.
The peg system is adjustable. Pegs slot into pre-drilled holes (the picture shows the holes visible), so you can reposition them when your plate count changes. This is the rare drawer retrofit that costs under thirty dollars and replaces a more expensive purpose-built drawer insert.
Slot Spices in an Angled Tier or a Shallow Drawer Tray

Spices fail two ways. Either they’re in a deep cabinet where you can only see the front row, or they’re in a flat drawer where you have to lift each jar to read the label. Two opposite cabinet types, two opposite fixes.
For the deep upper cabinet: an angled tier. The picture’s tier holds jars at three levels so each lid faces the front. You spot the cumin from across the kitchen because nothing is hiding behind anything.
- For the shallow drawer: a flat tray that holds jars on their sides, lids up. You glance down into the drawer and read the lids. Same total spice count, different cabinet, different fix. The shallow-tray version is especially good when you have drawers under the counter but limited upper cabinet space.
One detail that matters for both versions: mismatched jars work fine if the lids are clean and the labels are clean. You do not need ten identical glass jars to get an organized spice cabinet. The matching jars in every Pinterest picture are an aesthetic choice, not an organization requirement.
Mount a Spice Rack or Lid Organizer Inside Cabinet Doors

The inside of every cabinet door is real estate most kitchens leave blank. The hardware to use it is inexpensive and reversible — usually four screws into the door interior, none of which show from outside the cabinet.
The picture shows two of the most common candidates. A narrow shelf rack mounted to one door holds small spice jars in four horizontal rows. A stainless lid rack on the opposite door holds three pot lids by their handles. Each rack is mounted with visible screws (the honest version — not adhesive, which fails under weight).
A few notes from experience. Spice racks on the door are best for the spices you cook with weekly — not the full collection. Anything mounted to the door adds weight to the hinge, so check that the cabinet’s hinge can handle a few extra pounds, especially if you have older cabinets. And don’t mount anything that sticks out so far it interferes with closing the door — measure first, mount second.
Make the Above-Fridge Cabinet Useful with Slim Pull-Out Bins

The cabinet above the fridge is the dead zone of every kitchen. Standing on a stool to reach it is annoying, and the shelf depth is so deep that the back half is invisible.
Slim pull-out bins with front handles solve both problems at once. You stand on the stool, grab the bin handle, pull the bin forward, and the contents come to you. The bin in the picture’s left half is mid-pull — the folded paper bags and paper towel roll inside become accessible without reaching past anything. The right bin sits fully back, holding the rarely-used small appliances (an immersion blender, a backup electric kettle) that don’t deserve counter space but you don’t want to give away.
Two slim bins fit most standard above-fridge cabinets. The bins are the deep slim plastic kind sold as pantry or above-fridge organizers — not full pull-out drawers. They sit on the cabinet’s existing shelf and slide on the shelf itself. No installation, no slides, no drilling.