20 Under Sink Organization Ideas That Use Every Inch Around the Pipe
Under-sink cabinets collect chaos faster than any other zone in the bathroom because three constraints stack on top of each other — the curved P-trap drain pipe blocks the usable middle of the cabinet, the vertical height between cabinet floor and ceiling sits mostly empty, and the whole cavity is dark enough that bottles disappear into the back corners.
Most under-sink advice ignores the pipe entirely and recommends “buy more clear bins,” which only works if the bins happen to fit beside a constraint they were never designed around. What actually works is mechanism design — risers with U-shaped cutouts that straddle the pipe, tension rods above it, lazy susans beside it, adhesive baskets on the doors that never touch it, and a battery LED that solves the dark-cavity problem in five minutes.
Twenty mechanism-first ideas below, organized from the foundation moves you do first to the maintenance trigger that keeps the system from drifting back to chaos.
Skim the list, jump to the mechanism that fits your cabinet. Twenty mechanism-first ideas grouped from foundation moves to maintenance triggers — pick one this weekend, build the system one piece at a time.
- 1Empty + measure P-trap clearance
- 22-tier riser with U-cutout
- 3Tier-shelf bottle split around pipe
- 4Pull-out drawer slide on cabinet floor
- 5Stackable clear bins by category
- 6Icon-labeled category bins
- 7Tension rod for spray bottles head-down
- 8Adhesive wire baskets on door
- 9Stacked door baskets per category
- 10Magnetic strip for small metal tools
- 11Lazy susan in the back corner
- 12Acrylic file holders for hair tools
- 13Decant bulk into uniform amber pumps
- 14Front-line decanted bottle row
- 15Frequency zones: daily / weekly / refill
- 16Battery LED motion-sensor light
- 17Washable contact paper liner
- 18Spot-drip protection liner
- 19Rolling cart in wider cabinets
- 20Quarterly reset on TP refill trigger
Start by Emptying Everything and Measuring P-Trap Clearance

The first move is the boring one almost everyone skips. Pull every product, jug, and stray Q-tip out of the cabinet. Wipe the floor down. Then take a tape measure and check two numbers — the vertical distance from cabinet floor up to the bottom of the curved P-trap pipe (the clearance any riser has to fit under), and the distance from the pipe top up to the cabinet ceiling (the clearance any organizer above the pipe has to clear). Most “organized cabinet” Instagram fails happen because someone bought a 12-inch-tall riser when the pipe-to-floor clearance was only 9 inches. Five minutes with a tape saves a return trip to the store. For the broader bathroom-org playbook covering every zone (counter, drawer, shower, linen closet, vanity), the 20 bathroom organization ideas pillar is the foundation this under-sink deep-dive sits inside.
Install a 2-Tier Metal Riser With a U-Cutout That Fits Around the Pipe

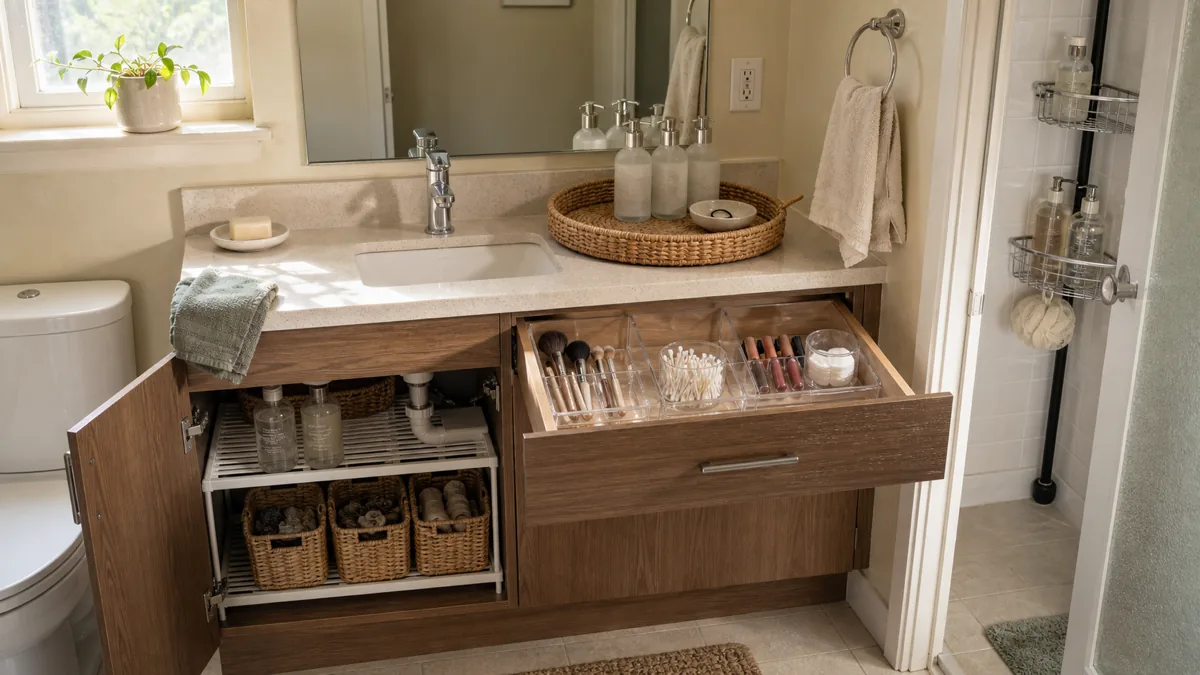
- The 2-tier matte-black wire riser with a U-shaped cutout in the lower shelf is the single highest-leverage move in the cabinet. The cutout cradles the curved P-trap pipe so the lower shelf splits cleanly around it — two bottles on the left of the pipe, two on the right, no wasted space. The upper shelf sits above the pipe with no interference, so it gets a full row of six cleaner bottles. One $20 piece of wire shelving converts the dead vertical zone around the pipe into two working storage levels. This is the same vertical-thinking lever that runs through every small-space storage trick — see the broader storage ideas for small spaces playbook for how it shows up in living rooms, closets, and entryways too.
Add a Pull-Out Drawer Slide on the Cabinet Floor for Back-Reach Access

When the P-trap pipe is offset to one side of the cabinet (most apartment vanities), the floor on the other side becomes a clear lane for a pull-out drawer. A shallow wire-mesh drawer mounted on matte-black slide rails turns the back two-thirds of the cabinet from “unreachable junk drawer” into “pull-it-forward, grab, push-back.” Tall bottles, refill jugs, anything you currently lose at the back of the cabinet lives in the drawer instead. The slide rails screw to the cabinet floor in under fifteen minutes and the drawer lifts off the rails when you need to clean.
Under-sink organization works one constraint at a time, not as a full cabinet overhaul. Pick the failure mode that frustrates you most and match it to the mechanism that fixes it — pipe blockage, tipping bottles, wasted door, or dark cavity. The other failure modes will be easier once the worst one is resolved.
Use Stackable Clear Bins on the Lower Shelf Grouped by Category

- Two clear plastic stackable bins side-by-side on the lower cabinet shelf — the kind with handle cutouts at the front, half-pulled out for easy reach — group products by category in a way “everything in one pile” never can. One bin holds cleaning products (the green, blue, and yellow tints of spray cleaners read at a glance through the clear walls). The other holds hair products (the cream-white shampoos and conditioners read distinctly different from the cleaners). Each bin gets a small icon label on the front — a spray-bottle silhouette for cleaners, a hair-droplet silhouette for products — so anyone in the household can identify the bin without opening it. Icons over text means the system survives a partner who never reads labels.
Hang a Tension Rod Across the Upper Cabinet for Spray Bottles Head-Down

This is the single highest-leverage tension-rod use in the home. A thin black tension rod wedges horizontally across the upper third of the cabinet interior, both ends pressing against the inner side walls. Spray bottles hang from the rod by their trigger handles in head-down orientation — the trigger loops over the rod, the spray nozzle points down, and the bottle body hangs upward. Four to five spray bottles fit on a 24-inch rod. The head-down orientation keeps product flowing toward the nozzle (no more half-empty spray that won’t spray), and the rod converts the dead upper-cabinet airspace into vertical bottle storage. Total cost: $5. Total install: 30 seconds.
Mount Adhesive Wire Baskets on the Inside of the Cabinet Door

- The inside of the cabinet door is the second-largest under-sink surface after the floor, and almost everyone wastes it. Three small matte-black adhesive wire baskets stacked vertically on the door interior turn it into a third storage zone with no drilling and no commitment. The top basket holds a clear glass jar of cotton pads and a hairbrush handle. The middle basket holds a Q-tip jar plus two small bottles. The bottom basket holds three amber pump bottles. Each basket holds a distinct category, so the door becomes its own micro-organizer for things you reach for daily but don’t want bouncing around inside the cabinet. Adhesive backing (not screws, not magnets) means it peels off cleanly when you move out.
Use a Magnetic Strip on the Door for Tweezers, Scissors, and Small Metal Tools

Tweezers, grooming scissors, hair clips, nail files — the small metal grooming tools that always get lost in drawers because they’re too thin to organize and too easy to bury. A short matte-black magnetic strip mounted horizontally on the cabinet door interior holds all of them visibly. Tweezers stick along the strip on their long edge, scissors stick by their closed blades, hair clips stick by their metal tips. Everything is visible at a glance, reachable in one second, and the cabinet door swings shut to hide the whole strip when you’re done.
Most under-sink advice is a parts list of organizers. These four rules are what turns the parts list into a cabinet that stays organized past the first week of motivation.
Put a Lazy Susan in the Back Corner for Daily-Reach Bottles

A small 10-inch lazy susan tucked into the back corner of the cabinet rotates daily-reach bottles to the front in one motion. Six amber pump bottles arranged around the susan’s perimeter — daily face cream, sunscreen, mouthwash, contact solution, the things you actually reach for every morning — spin from the back of the cabinet to the front edge in two seconds. The bottle that was hidden against the back wall is now in your hand. The susan sits beside the P-trap pipe (not under it, not in front of it) so it doesn’t fight the cabinet’s existing constraint geometry — it just adds a rotating storage layer where the back corner was wasted before.
Corral Hair Tools With Acrylic File Holders on the Cabinet Floor

Two clear acrylic file holders side-by-side on the cabinet floor solve the hair-tool tangle. A hair dryer stands handle-down in the left holder, its cord coiled and tucked at the top. A flat iron stands handle-down in the right holder, same cord treatment. The vertical orientation keeps cords from tangling into each other, the clear acrylic walls keep heat-tool residue from staining the cabinet wood, and you can see at a glance which tool is where. File holders cost $4 each at any office-supply store and outperform every $40 “hair-tool organizer” sold for the same job.
Decant Bulk Refills Into Uniform Amber Pump Bottles Front-Lined

- Decanting bulk refills into uniform amber glass pump bottles does two things at once. Visually, four matching bottles in a row read as intentional rather than chaotic — the eye stops fighting visual noise and the cabinet looks calm even before any other organizing happens. Functionally, you keep the giant bulk refill jug at the back of the cabinet (or under it) and only the active 8-ounce decanted bottle lives at the front. When a bottle runs empty, you decant from the bulk jug with a small funnel — the same bottle, refilled, no constant new-bottle clutter. The decant rule is the catch: decant only what you USE monthly, not what you OWN. Most decanting fails because someone decants every single product, including the once-a-quarter exfoliator, the rarely-used hair mask, and the deep conditioner. Keep those in their original packaging at the back — decant only the four to six bottles you actually reach for in any given month.
Group by Frequency — Daily Front, Weekly Middle, Refill Back

The simplest layout system in the whole cabinet: three frequency zones from front edge to back wall. Daily essentials live at the front edge (toothpaste backup, face cream, sunscreen, contact solution, lip balm) — anything you reach for every morning sits one hand-length inside the cabinet so you grab without looking. Weekly products live in the middle band (deep conditioner, hair mask, refill cleaner sprays, body lotion) — things you reach for less often but still regularly. Backup refills live at the back band (bulk shampoo jug, multi-pack toilet paper, large refill cleaner gallon) — things you touch maybe once a month when you refill or restock. The P-trap pipe naturally lives in the back zone, which is the same zone where the largest items live, so the geometry stops fighting itself.
The 5-Step Under-Sink System
- 1Empty + measure pipe clearancePull everything out, wipe the floor, measure pipe-to-floor and pipe-to-ceiling heights. Skip this step and every organizer you buy will be the wrong size. Five minutes that saves a return trip to the store.
- 2Riser with U-cutout + tension rodA 2-tier wire riser straddling the P-trap pipe (lower shelf split by the U-cutout, upper shelf above the pipe) plus a tension rod across the upper cabinet for spray bottles head-down. Two pieces, twenty minutes of install, triples the usable volume.
- 3Door baskets + magnetic stripAdhesive wire baskets stacked vertically on the cabinet door interior + a short magnetic strip for tweezers and small metal tools. The door is the second-largest surface in the cabinet and most people waste it.
- 4Lazy susan + uniform amber pumpsA 10-inch lazy susan in the back corner with daily-reach bottles. Decant the four to six products you use monthly into uniform amber pumps, front-lined for visual calm. Keep the rest in original packaging at the back.
- 5Motion LED + quarterly TP resetA battery LED motion-sensor light stick mounted to the cabinet ceiling solves the dark-cavity problem. Reset the entire system every time you refill toilet paper (~once a quarter) — the TP refill is the natural cue your brain already responds to.
styledhomenotes.com
Add a Battery LED Motion-Sensor Light Stick to the Cabinet Underside

The dark-cavity problem is the single most under-discussed under-sink failure mode. You can’t organize what you can’t see, and most apartment vanities have no light inside the cabinet at all. A slim matte-white LED light stick mounted to the underside of the cabinet top — peel-and-stick, no wiring, no screws — solves it in five minutes. Motion sensor means it turns on the second you open the door. Warm-white at 2700K is calmer than cool-white blue for bathroom contexts (the cool-white feels clinical). Battery powered, so it’s renter-safe. The LED’s warm pool of light illuminates the riser, the bottles, the P-trap, the back corners — all the places you couldn’t previously see — and proves immediately how much usable storage was hiding in the dark.
Line the Cabinet Floor With Washable Contact Paper to Spot Drips Fast

- Washable contact paper on the cabinet floor catches drips fast — leaks from cleaner bottle caps, condensation off the P-trap pipe, the slow weep from a shampoo refill that didn’t seal properly. The white or light marble pattern makes drips visible immediately as darker spots, before they soak into the cabinet wood and stain. Wipe down with a damp cloth instead of scrubbing wood grain. Replace the liner once a year or whenever it stains beyond cleaning. A roll costs $8 and covers a typical 30-inch cabinet floor twice. The curled-corner-when-you-cut detail is the proof it’s a separate layer protecting the wood underneath, not the cabinet finish itself.
Roll a Cart on Casters Into Wider Under-Sink Cabinets

Wider under-sink cabinets — the 40-inch double-door master-bath style, or the wider apartment bathroom vanities — have enough lane on the non-pipe side to fit a small narrow rolling cart on casters. A matte-black 3-tier cart, about 12 inches wide and 24 inches tall, rolls into the right side of the cabinet (when the P-trap is on the left) and stays there until you need to pull it out for full access. Three tiers means three categories: top tier for small daily items, middle tier for medium cleaners, bottom tier for backup refills and bulk jugs. The casters mean rolling, not lifting — when you need the back-corner item, you roll the cart forward, grab, roll back.
Reset the Under-Sink Area Every Quarter When You Refill Toilet Paper

The maintenance trigger that actually works is the boring one most organizing advice misses. Tie the under-sink reset to refilling toilet paper. Every time you open a fresh bulk multi-pack of TP (typically once every eight to twelve weeks for an apartment household), spend ten minutes resetting the cabinet — pull everything forward, throw out anything expired, refill the amber bottles from the bulk jugs, rotate the lazy susan to put the back items at the front, replace the contact paper if it’s stained, wipe the floor. The TP refill is the natural cue your brain already responds to. Tie any new habit to an existing cue and it sticks. Tie it to nothing and it disappears in three weeks.
Reset to this state and the next quarter of bathroom mornings runs smoother by default.