12 Kitchen Counter Organization Ideas for a Clutter-Free Cooking Space
Kitchen counters re-clutter by Wednesday no matter how often you wipe them down on Sunday. The cause is not laziness. It is that the counter is the only flat surface within reach for mail, keys, and groceries, so every item drifts there as default storage. Twelve specific moves, each with the mechanism, the rental-safe execution, and one honest trade-off.
If your whole kitchen needs an organization system, not just the counter, the 20-idea kitchen organization playbook is the upstream foundation — sort the cabinets and pantry first, then come back to the counter surface.
The reader’s counter always ends up cluttered no matter how often she cleans. Each idea is a specific lever — counter-zone map, drawer divider, magnetic strip, daily 60-second reset. Pick the four that match your kitchen and stack from there.
- 1Four zones — counter map
- 2Tray — pretty zone boundary
- 3Two appliances max
- 4Drawer divider — vs crock
- 5Vertical riser — cookbooks + boards
- 6Magnetic strip — backsplash
- 7Wall rail — paper towel + utensils
- 8Single crock — warm-tone anchor
- 9Pinch bowls — pre-portioned
- 10Wall basket — fruit hammock
- 11Over-sink board — sink cover
- 1260-second reset — daily rule
Designate Four Counter Zones (Coffee, Prep, Cleanup, Pretty)

A counter re-clutters when items have no assigned zone, so they land in whichever inch is closest. Four named zones give every item a home and the counter stops drifting between coffee and cleanup. The image shows what this looks like at rest — the coffee maker stays on the left, the cutting board stays in the center, the sink area handles cleanup, and one styled crock holds the pretty corner.
The mechanism is simple but unintuitive: zones beat freeform because the eye reads bounded space as calm. Freeform reads as chaos even when the same items are present. A counter with four visible zones reads functional and styled. A counter with the same five items scattered reads cluttered.
- Map your four zones in 60 seconds. Coffee corner near the outlet, prep zone by the stove, cleanup at the sink, pretty corner under the cabinets. Sketch it on a sticky note.
- Assign one job per zone. Coffee items live in the coffee corner only. Prep tools stay in or near the prep zone. The pretty corner is not allowed to overflow into prep.
- Block freeform drift on day one. When a mug ends up in the prep zone, it goes back to coffee. The first week is the hardest. By week two the system runs on muscle memory.
- Skip the “wherever there’s room” pattern. It guarantees the counter re-clutters because items have no rule about where to return.
- Works on counters as short as four feet. A small galley still has four zones, just shorter ones — coffee corner can be 14 inches wide if the rest is assigned.
- Trade-off. A counter under 30 inches total cannot hold four zones. Combine coffee + pretty into one warm corner and you have three working zones instead of four.
Use One Tray to Corral the Pretty Zone

The pretty zone fails when items spread across the counter loose. The same four items inside a tray edge read as a styled vignette. The boundary is doing the work — the eye reads “bounded” as calm and “spread” as cluttered, even with identical contents.
A walnut tray with four contained items, like the one shown, sets the rule. The dark wood gives the warm color anchor (covered in idea 8 from a different angle) and the tray edge is what tells the eye where the styled corner stops. Without the boundary, the same olive oil bottle and small vase read as items waiting to be put away.
- Pick a tray 12 by 8 inches up to 16 by 10. Fits most pretty corners with room to breathe and matches the visual scale of a normal counter depth.
- Cap the count at four items maximum. Five becomes seven within a month. Four is the magic number where the eye still reads each item as intentional.
- Material warm tones beat cold ones. Walnut, oak, cane, terracotta ceramic, matte oat-color stone. Avoid stainless and glass — both read cold in a small kitchen.
- Items that earn the spot. A bottle of olive oil you use daily, a salt pinch bowl, a small vase with one sprig, a small lidded crock. Things you reach for, not just look at.
- Skip the “every pretty item I own” pile. Three or four items each read as intentional. Seven or eight items each fight for attention and the zone reads cluttered.
- Trade-off to be honest about. A small kitchen counter under 30 inches deep can only fit a 12-inch tray. Go shallower (10 by 6) and cap at three items.
Limit Visible Appliances to Two on the Counter

Every visible appliance on the counter is visual mass that the eye reads before the styled items register. Two appliances reads as a working kitchen. Four or more reads as cluttered before the reader even processes what each one does. The image shows the two-appliance baseline — coffee maker on the left, toaster on the right, the center clear.
The math is unintuitive because each appliance individually looks fine. The problem is cumulative — the eye sees mass first and details second, so a counter with four appliances reads more cluttered than a counter with twice the small items but only one appliance.
- Pick the two you use daily. For most US households this is coffee maker plus toaster, or kettle plus air fryer. The rest live in a cabinet or pantry.
- Store the rest in a low cabinet near the prep zone. Stand mixer, blender, food processor, waffle iron — anything you use weekly or less belongs off the counter.
- Cheap version with no installation. Move the blender to the pantry shelf. Move the stand mixer to the bottom of the lower cabinet. No money spent, instant counter recovery.
- Skip the “all out in case I need them” pattern. Biggest source of counter clutter in apartments. The convenience of one extra appliance costs a third of your counter.
- Measure before buying any new appliance. If you cannot name which existing appliance it replaces, do not buy. New ones layer onto the counter, they do not swap.
- Trade-off to be honest about. If you genuinely use three appliances daily, two is the wrong number — keep three out and store the rest. Honest beats aspirational.
Not every kitchen needs all twelve ideas. The article is built so each idea is a stand-alone lever — pick the four that target your counter’s specific weakness and skip the rest. The four quadrants below are the most common starting points.
Move Daily Utensils to a Drawer Divider System (Not a Crock)

A utensil crock on the counter takes about a 12 by 10 inch footprint and adds visual mass to the prep zone every minute the kitchen is awake. A drawer divider system holds the same utensils, hides them when the drawer is closed, and reclaims the full footprint for cutting space or prep room.
The trade-off is real but small: opening a drawer adds one second to grabbing a spatula. Most home cooks find the second is invisible after the first day. The constant 12 by 10 visual footprint of the crock is not invisible — it registers every time you look at the counter.
If the drawer divider system is the lever you want to lean into, the 15-idea kitchen cabinet organization playbook sorted by cabinet type is the dedicated sibling deep-dive — measure the drawer width first, then install.
- Choose a drawer at least 18 inches wide. Near the prep zone or stove, not at the far end of the counter. Tight to where you reach for utensils mid-cooking.
- Bamboo or wood divider with four to six sections. Adjustable dividers fit most drawers without cutting. Skip plastic dividers — they crack within a year.
- Group by use, not by type. Chopping tools together. Spoons and spatulas together. Measuring tools in a small front section. Tongs and tools with handles in their own slot.
- Skip the deep drawer with no divider. A 4-inch drawer full of unsorted utensils is the worst version — items pile, the drawer drags, and nothing is quick to find.
- Counter crock or drawer system, not both. The crock is one styled item to look at (idea 8). The drawer is a hidden working system. Pick the one that fits your kitchen.
- Trade-off. This idea needs a drawer of the right size in the right spot. If your only drawer is across the kitchen from the prep zone, idea 8’s crock probably wins.
Mount a Vertical Riser for Cookbooks and Cutting Boards

A stack of cookbooks on the counter eats 8 to 12 inches of depth that you would otherwise use as prep space. Mounted vertical storage moves the same books and boards off the surface and onto the wall, recovering the depth without losing access. The image shows a walnut wood riser with matte black brackets holding two cookbooks and two cutting boards in a vertical line.
Vertical storage works because counter depth is the most valuable inch in any small kitchen — the front 8 inches of counter is where you actually chop, plate, and stage. A stack of books or boards on the back wall is invisible from the side; mounted on the wall, the back wall is reclaimed as decorative storage that still functions.
- Wall-mounted vertical riser in wood or matte black metal. Mount 6 to 12 inches above the counter so the books are at eye level when you stand at the counter.
- Holds two or three cookbooks and two cutting boards. More than that crowds the riser and the visual benefit reverses. Less than two and the wall reads underused.
- Pick books and boards in cohesive warm tones. Sage, cream, wood, walnut, oat. The spine colors visible from across the room are the signal that matters most.
- The riser sits 4 to 6 inches off the wall. That is the standard depth for a riser that holds books and small boards. Anything deeper crowds the counter.
- Skip the cookbook stack on the counter. It looks intentional only on day one. By week two it is layered with mail and sticky notes and the styled moment is gone.
- Rental-safe with picture-hanging strips rated for 12 pounds. Two cookbooks plus two boards weigh about 9 to 10 pounds total. Stay under the rating and the strips hold.
- Trade-off. A wall already filled by upper cabinets leaves no riser space. If your counter has no wall, skip this and rely on idea 4’s drawer for boards instead.
Add a Magnetic Strip on the Backsplash for Knives and Small Metal Tools

The backsplash is dead vertical real estate in most US kitchens — the wall between the counter and the upper cabinets is doing nothing except absorbing splash. An 18 to 24 inch magnetic strip turns that wall into knife storage and small-tool storage simultaneously. The image shows four knives plus six small metal spice tins mounted to a single strip above the cutting board.
Magnetic strips work harder than knife blocks because the block on the counter takes a 4 by 12 inch footprint while the strip on the backsplash takes zero. The same knives are accessible by reaching forward instead of grabbing. Spice tins on the right half use the dead space the knives do not need.
- Stainless steel magnetic strip 18 to 24 inches wide. Longer than 24 inches crowds most backsplash sections. Shorter than 18 holds only two or three knives without spice tins.
- Mount 16 to 18 inches above the counter. Out of the splash zone but reachable. Anything lower catches grease. Anything higher is hard to reach without standing on your toes.
- Mounted with #8 screws if you own. Strong adhesive strips work for renters — check the weight rating, since four knives plus six spice tins totals 6 to 7 pounds.
- Skip the knife block on the counter. It is the worst counter footprint thief — 4 by 12 inches occupied by storage that the magnetic strip handles for free above.
- Skip placing the strip directly over the stove. Grease vapor coats the blades and the strip. Off to the side, or above the prep zone, is the right spot.
- Spice tins on the unused half. Six small magnetic tins fit the right half of an 18-inch strip. Label the lid, not the side — the lid is what you read reaching down.
- Trade-off. A tile backsplash with sharp grout lines may not lay flush against an adhesive strip. Test with two pounds of weight for 48 hours before loading knives.
Most kitchen counter organization advice fails because it gives you containers without a system — you buy the crock and the tray and the appliance garage, then the counter re-clutters within four days. These four rules cover what consistently closes the loop — named zones, appliance cap, one warm-tone anchor, and a daily reset — so the system holds past the first week.
Install a Wall-Mounted Paper Towel + Utensil Rail

The dead space between the underside of the upper cabinet and the counter surface — usually 16 to 20 inches of unused wall — holds a rail that takes paper towels off the counter, utensils out of the drawer, and measuring cups off the inside of the cabinet door. The image shows a matte black rail with paper towel mount, five S-hooked utensils, and two measuring cups all in a single line.
A rail solves three counter problems at once. The standalone paper towel holder on the counter is one of the worst footprint thieves — a 6 by 12 inch base for a roll that gets used three times a day. Move it up to the wall and the footprint is zero.
- Rail length 18 to 30 inches. Fits most upper-cabinet runs. Choose matte black or warm brass to match cabinet hardware. Skip chrome unless your kitchen is already chrome.
- Mount 4 to 6 inches below the cabinet underside. Low enough that paper towels tear easily, high enough that measuring cups clear the counter.
- S-hooks hold 4 to 6 utensils. Wooden utensils with hanging holes work best. Skip stainless utensils — they clang against the rail and look industrial.
- Paper towel attachment at one end. Most rails come with a snap-on paper towel holder included. Place the holder on the end nearest the sink so wet hands reach the roll first.
- Measuring cups stack at the other end. Nesting metal cups hang from a single S-hook and free up cabinet door storage.
- Rental-safe with picture-hanging strips rated for 8 pounds. A rail plus paper towels plus utensils plus measuring cups totals about 4 to 5 pounds. Stay well under the rating.
- Skip the standalone paper towel holder on the counter. One of four footprint thieves in any apartment kitchen — knife block, paper towel holder, utensil crock, toaster oven.
- Trade-off. Upper cabinets that run to the counter leave no rail space. If you have 4 inches or less between cabinet underside and counter, this idea does not apply.
Use a Single Warm-Tone Crock for Color Anchor

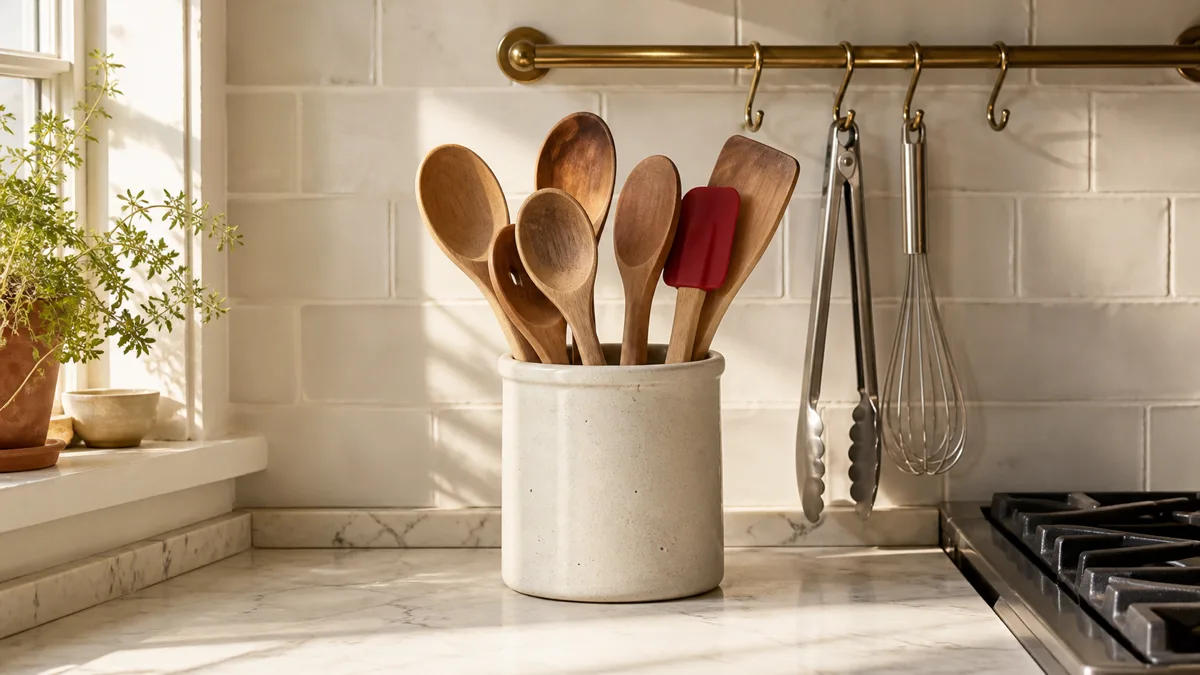
If you cannot or do not want to do the drawer divider (idea 4), the single warm-tone crock is the alternative — and a valid one. The mechanism is different: one styled crock in a warm anchor color becomes the ONE styled item on the counter, and every other item stays hidden. The image shows a terracotta crock with five wooden utensils, no competing color, no second styled item near it.
A single warm-tone anchor reads as intentional. Two anchors fight each other and read as cluttered. The terracotta color of the crock pulls the eye to one specific spot — the pretty corner — and everything else can be plain.
- Pick ONE crock in a warm neutral. Terracotta, oat, walnut, matte cream-with-a-warm-undertone. Skip true white — it blends into the counter and loses the anchor function.
- Four to six wooden utensils inside, handles up. No metal utensils mixed in (cold contrast), no plastic (visual noise). Wood reads warm and consistent.
- Place in the pretty corner under the cabinets. Tuck the crock about 4 inches from the wall corner so the cabinet shadow frames it.
- Skip a second crock anywhere on the counter. Two crocks double the visual mass and the anchor effect cancels. For more utensil storage, idea 4’s drawer is the right answer.
- Skip the all-white crock. It reads as an empty container, not as a styled element. The warm tone is what does the work.
- Trade-off. This idea is the opposite of idea 4 — pick one, not both. The crock takes a 12 by 10 footprint the drawer reclaims. Choose styled visual or cleared surface.
Pre-Portion Pantry Staples in Small Ceramic Pinch Bowls

Cooking-class kitchens keep small bowls of staples pre-portioned at the prep zone so the cook does not break stride mid-recipe to open the pantry, find the salt jar, and unscrew the cap. Three small ceramic pinch bowls — salt, pepper, red pepper flakes — within reach of the cutting board pay back the small footprint immediately.
The image shows three matched bowls on the counter near the cutting board. The bowls themselves read as styled (small, white, identical) rather than cluttered, and the contents are functional staples used at every meal. This is the “small effort styled-and-functional” answer to the pantry-fetching break.
- Three to five small white ceramic pinch bowls. Each 1 to 2 inches in diameter. Skip ramekin-size bowls — they read as serving dishes, not prep staging.
- Fill with weekly staples. Salt and pepper required. Add red pepper flakes, garlic powder, or dried herbs based on what you cook. Skip anything used monthly — it goes stale.
- Place on or near the prep zone. Within 12 inches of the cutting board. The whole point is that the cook does not have to turn around.
- Refill weekly from the pantry. Sunday refill keeps the bowls reading fresh. A bowl with three peppercorns in the bottom reads as forgotten, not styled.
- Skip the loose herb jar collection. A row of mismatched jars on the counter is the cluttered version. Matching small ceramic bowls is the styled version of the same idea.
- Skip filling all three with the same color. Visual variety matters — white salt, dark pepper, red flakes. The contrast is what makes the row read as intentional.
- Trade-off to be honest about. Open ceramic bowls are not airtight. Anything you fill expecting to last a month will go stale. Refill weekly or skip this idea entirely.
12 Kitchen Counter Organization Ideas for a Clutter-Free Cooking Space
- 1Four counter zones — coffee, prep, cleanup, prettyMentally map the counter into 4 named zones so every item has a default home. Coffee zone holds the maker + mugs + beans. Prep zone holds cutting board + knife. Cleanup zone holds dish soap + sponge. Pretty zone holds the styled crock.
- 2Tray — defines the pretty zone boundaryOne wood or stoneware tray 12 by 18 inches in the pretty zone bounds the styled vignette. Everything inside the tray reads intentional. Everything outside it reads as drift to be cleared in the daily reset.
- 3Two appliances visible maximumCoffee maker + toaster (or coffee maker + Instant Pot) stay out. Blender, KitchenAid, rice cooker, food processor go inside a cabinet. Three or more visible appliances kills the visual breathing room no matter how clean the counter is.
- 4Drawer divider — replaces the counter utensil crockA bamboo or wood drawer divider holds wooden spoons, spatulas, whisks, ladles inside the drawer instead of on the counter. The crock disappears from the counter entirely. Pair with the kitchen cabinet organization system for the full closed loop.
- 5Vertical riser — cookbooks plus cutting boards on edgeA wood or metal vertical riser at the back corner holds 2-3 cookbooks and 2 cutting boards on edge instead of flat. Vertical orientation recovers counter footprint and adds a vertical eye line that flat horizontal stacks can’t.
- 6Magnetic strip — backsplash knife and tool holderA magnetic strip mounted on the backsplash holds 4-6 knives + metal kitchen scissors + a peeler off the counter and out of a counter knife block. Renter alternative: command-strip adhesive magnetic strip rated for 5 pounds.
- 7Wall rail — paper towel plus utensils suspendedA wall-mounted rail at backsplash level holds the paper towel roll + 4-5 most-used utensils on S-hooks. The rail clears counter footprint for the paper towel stand and the secondary utensil holder you were going to buy.
- 8Single warm-tone crock — the styled anchorOne terracotta or oat or walnut crock in the pretty zone holds 4-5 wooden spoons + spatula + whisk. This is THE styled element. Do not add a second crock or a wood riser as decor — one anchor is the rule.
- 9Pinch bowls — pre-portioned mise en place3-5 small ceramic pinch bowls stacked in a drawer or on a shelf for pre-portioning salt, pepper, garlic, herbs during cooking. The bowls keep loose ingredients off the counter mid-prep and speed cleanup.
- 10Wall basket — fruit hammock off the counterA wall-mounted woven basket or wire fruit hammock holds the fruit bowl off the counter entirely. The counter regains 18 inches of footprint and the fruit becomes a wall feature instead of clutter.
- 11Over-sink board — the sink becomes prep surfaceA wood cutting board sized to span the sink converts the dead sink area into temporary prep surface during cooking and styled surface when not. The board lifts off when you need to wash dishes.
- 1260-second daily reset — the rule that closes the loopOne 60-second pass at the end of every day — return drifted items to their named zone, wipe the counter, close every container. The reset is the rule that turns the system from one-time cleanup into sustained order.
styledhomenotes.com
Hang a Wall Basket or Fruit Hammock Above the Counter

A fruit basket on the counter takes up about 12 by 16 inches of footprint for items that do not need to be on the counter at all. A wall-mounted basket or fruit hammock holds the same bananas, onions, garlic, and tomatoes off the counter entirely.
The image shows a woven hammock with two bananas, three tomatoes, an onion, and a garlic head — the counter directly below is clear.
The mechanism is simple: items that need air circulation (bananas, onions, garlic, tomatoes) cannot go in the fridge or sealed pantry, so they default to the counter unless given another spot. The hammock is the other spot. The counter footprint is recovered and the produce stays visible enough that you remember to use it before it browns.
- Fruit hammock or shallow wall basket under the upper cabinet edge. The under-cabinet mount keeps the basket out of the way of counter work and uses dead vertical space.
- Realistic load: 2-3 bananas, 3-4 tomatoes, 1-2 onions, 1 garlic head. Heavier loads sag the hammock and stress the mount over time.
- Skip storing potatoes in the hammock. They are heavier per item and need a darker spot. Potatoes plus bananas greens the potatoes and ripens the bananas too fast.
- Rental-safe with adhesive hooks rated for 5 pounds. Test with weight before loading. A full hammock with the load above weighs about 3 to 4 pounds.
- Skip the basket on the counter. It is the third major counter footprint thief after the knife block and the paper towel holder. The wall move recovers all of it.
- Skip overloading with citrus. Lemons and limes are fine in small numbers. Oranges and grapefruits stress the mount — a 1-pound orange weighs double a tomato.
- Trade-off. A hammock sits 16 to 20 inches above the counter. If the bananas are at eye level standing, the visual works. At chest level, it gets awkward — measure first.
Add a Stowable Over-Sink Cutting Board That Doubles as Sink Cover

A cutting board placed over the sink turns 18 inches of unused sink space into usable counter when you are not actively washing dishes. The same board stows vertically under the sink between uses, so it has no permanent counter footprint. The image shows a wood board over a double-basin sink with active prep — onion, tomatoes, and herbs being chopped above where the sink used to be.
This is the lever that most reliably wins back counter space in a small galley kitchen. A galley with 30 inches of counter between the stove and the sink suddenly has 48 inches when the board is in place. The trade-off is that you cannot run the sink while you are prepping, but most cooks can stage prep before the cleanup phase.
- Cutting board sized to span your sink, typically 18 to 24 inches wide. Measure rim-to-rim and add 1 inch overlap on each side. A board that floats inside the sink edge slips.
- Grippy underside or rubber feet. Critical. A flat-bottom bamboo board slides off the sink edge during chopping. Pay $5 more for the rubber-footed version.
- Use during prep, remove during cleanup. The board is not a permanent installation — it is a movable extension. Treat it like one.
- Stow vertically under the sink. Lean against the back wall of the under-sink cabinet between the cleaning supplies. Drying side up.
- Skip the integrated colander accessory. Useful in theory, hassle in practice. The board’s job is to be a flat surface, not a multi-tool.
- Works best in galley and L-shape kitchens. A U-shape kitchen probably has enough counter already. The sink-cover board is most valuable when counter inches are scarce.
- Trade-off. You cannot run the sink while the board is in place. If you wash vegetables continuously while chopping, this adds friction. If you batch-prep, it saves counter.
Daily 60-Second Counter Reset Rule (Items Off Surfaces Each Night)

A rule is what closes the loop on the other eleven systems. Without a daily reset, items drift back to the counter by Wednesday no matter how good the zones and rails and drawers are.
With a 60-second reset every evening, the counter starts blank every morning and the systems keep working. The image shows the goal state — a fully cleared counter in warm evening light, one styled crock as the only counter object.
The 60-second window is short on purpose. A 5-minute reset feels like a chore and gets skipped within a week. A 60-second reset is so fast that it feels free. After a month it runs on muscle memory and the counter is never the day-2 disaster it used to be.
- 60-second window after dinner. Set a timer if the rule keeps slipping. Most reset routines take 45 to 60 seconds once the systems are in place.
- Four sequential actions. Clear the prep zone. Clear the cleanup zone. Reset the coffee corner. Wipe the counter with the linen towel. Each one takes about 15 seconds.
- The counter starts blank every morning. Walk into the kitchen tomorrow and the only object on the counter is the one styled crock in the pretty corner.
- Skip the “I’ll do it tomorrow” pattern. It is what causes the other eleven systems to silently fail. Tomorrow becomes the day after, and by Wednesday the drift is back.
- Works in tandem with all 11 prior ideas. The rule keeps zones honest, appliances stored, the crock alone, the rail clear. Without it, the systems are theory.
- Trade-off. One missed evening becomes a 5-minute reset the next night. Two missed evenings and the systems start drifting. The cheapest discipline in the article, but real.
Twelve ideas. You will not do all twelve on one weekend, and you probably should not try. Pick four or five that target your counter’s specific weakness and let the rest wait.
A small galley with no wall space and one drawer benefits most from ideas 4 (drawer divider), 6 (magnetic strip), 11 (over-sink board), and 12 (60-second reset). Those four reclaim the most counter inches with the least installation.
An L-shape kitchen with a real pretty corner can lean on ideas 1 (zones), 2 (tray), 8 (crock), and 11 (over-sink board). That set builds the styled-and-functional look without giving up working space.
A rental where nothing can be drilled into the wall doubles down on ideas 1 (zones), 2 (tray), 3 (appliance limit), 4 (drawer), and 12 (reset rule). Every one of those works with zero hardware.
A counter with four or more appliances always out runs ideas 3 (limit to two), 4 (drawer divider), and 7 (wall rail) first, in that order. Then fold in idea 12 to keep it from drifting back. The systems compound — once four of them stick, the counter stops re-cluttering by Wednesday.